


Yes i didn’t know it was such a simple device this stickshaker. Sometimes i get the oportunity to buy oem parts for a reasonable price, but nowadays people ask crazy prices, so i end up creating my own parts; i refuse yo pay those prices. but this one ok Yes i didn’t know it was such a simple device this stickshaker. Sometimes i get the oportunity to buy oem parts for a reasonable price, but nowadays people ask crazy prices, so i end up creating my own parts; i refuse yo pay those prices. but this one ok I finally made the windscreen shields. from the inside.. I finally made the windscreen shields. from the inside.. Beautiful work Roel! Your sim is looking fantastic! Yes, the windscreen frames are time consuming but fairly easy to build if you have the windscreen templates. At first glance, you might think that modeling the windscreens would be difficult but because the windscreens simply wrap around the shell like a piece of paper does a cone or a funnel, the same principle applies to a large piece of Lexan or Acrylic. Beautiful work Roel! Your sim is looking fantastic! Yes, the windscreen frames are time consuming but fairly easy to build if you have the windscreen templates. At first glance, you might think that modeling the windscreens would be difficult but because the windscreens simply wrap around the shell like a piece of paper does a cone or a funnel, the same principle applies to a large piece of Lexan or Acrylic. Yes it seemed pretty easy, still have the templates, but still i needed to made little adjustments due to the fact i used a jigsaw to cut them. Captainside screen was my first and is a bit lesser then the FO side screen But...still i am happy with the result 😉 Yes it seemed pretty easy, still have the templates, but still i needed to made little adjustments due to the fact i used a jigsaw to cut them. Captainside screen was my first and is a bit lesser then the FO side screen But...still i am happy with the result 😉 A while ago I purchased , in fact two, OEM compass's. The logic is coded that first a complete 360 rotation is done , then when the zero point is detected the stepper motor will turn to the current heading. Little demo: https://youtu.be/NDXoJgX4ZG8 I still have to figure out how to build it in my sim 😉 p.s. I created the back plate with my new Omtech laser cutter...WOW..so easy and fast!! A while ago I purchased , in fact two, OEM compass's. The logic is coded that first a complete 360 rotation is done , then when the zero point is detected the stepper motor will turn to the current heading. Little demo: I still have to figure out how to build it in my sim 😉 p.s. I created the back plate with my new Omtech laser cutter...WOW..so easy and fast!! I have been working a while on my FMS. First attempt to create a main PCB (i decided to create 3 separate ) failed. So all parts ready to assemble and paint! I have been working a while on my FMS. First attempt to create a main PCB (i decided to create 3 separate ) failed. So all parts ready to assemble and paint! I also decided to buy a 3D printer. I did have to learn 3D CAD and use Blender for creating parts. The top engraving is an insert created with the laser. I also decided to buy a 3D printer. I did have to learn 3D CAD and use Blender for creating parts. The top engraving is an insert created with the laser. Hey Roel, Outstanding work with the 3D printer! I have made a couple versions of the FGC knobs and they can be very challenging. Yours look great! It looks like you picked up 3D printing and 3D CAD very quickly. These are two areas that I really need to get up to speed with. Please share your other 3D projects with us. Also post up some photos of your 3D printer. I know there are a couple guys interested in 3D printing. Such a cool technology! Hey Roel, Outstanding work with the 3D printer! I have made a couple versions of the FGC knobs and they can be very challenging. Yours look great! It looks like you picked up 3D printing and 3D CAD very quickly. These are two areas that I really need to get up to speed with. Please share your other 3D projects with us. Also post up some photos of your 3D printer. I know there are a couple guys interested in 3D printing. Such a cool technology! Yes, creating 3D parts is different from creating 2D parts. I bought this 3D printer https://www.amazon.nl/dp/B095GD123C?psc=1&ref=ppx_yo2ov_dt_b_product_details I like a printer with a case, since it is in my shed so it is protected of dust and things. I have stl files if people would need them, let me know! Yes, creating 3D parts is different from creating 2D parts. I bought this 3D printer https://www.amazon.nl/dp/B095GD123C?psc=1&ref=ppx_yo2ov_dt_b_product_details I like a printer with a case, since it is in my shed so it is protected of dust and things. I have stl files if people would need them, let me know!Roel's Learjet 45 simulator
![]()
![]()
This also took more time then I assumed.
But once mounted, the sim looks a lot better.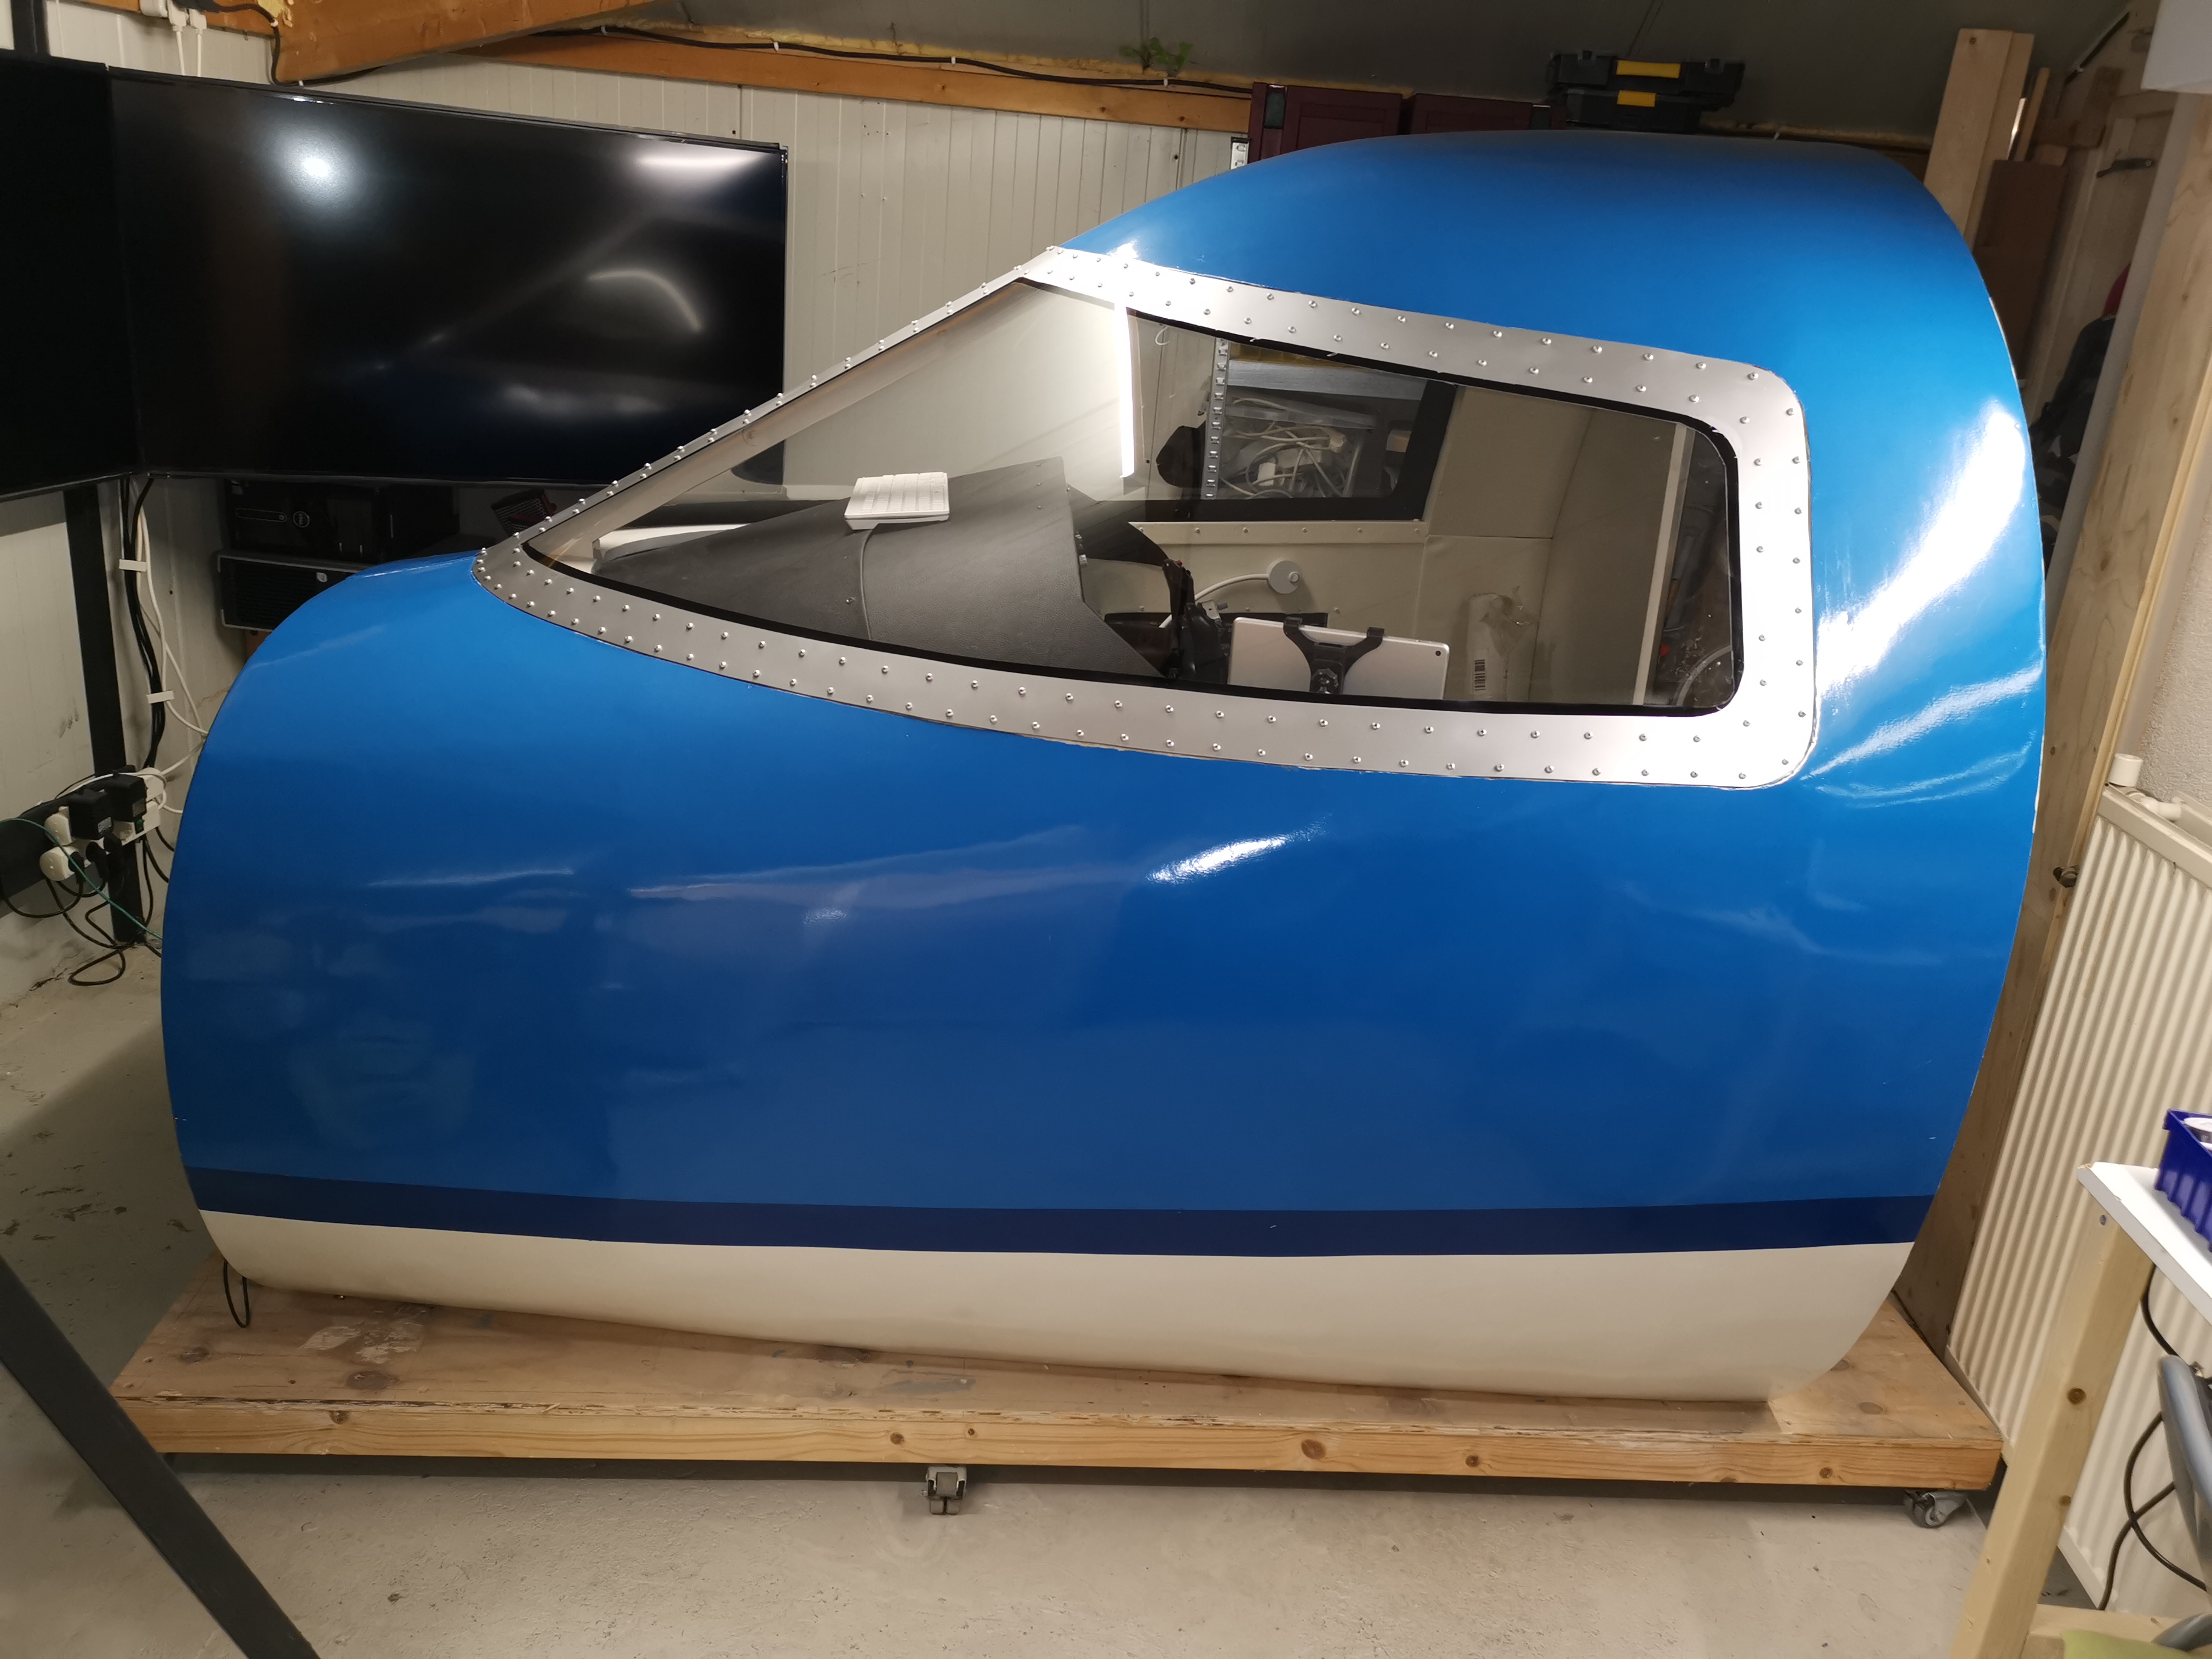


This also took more time then I assumed.
But once mounted, the sim looks a lot better.![]()
![]()
Also had some issue'swith chrome paint i thought would be great but in fact was very fragile and scratches on this chrome were imidiately there.
So used silver instead covered with colourless paint
Also had some issue'swith chrome paint i thought would be great but in fact was very fragile and scratches on this chrome were imidiately there.
So used silver instead covered with colourless paint![]()
I have converted one for use in my sim.
I have used a cheap 28byj-48 stepper motor to use this compass.
These stepper motors need a zero point indicator, therefore I mounted a IR sensor .
I have converted one for use in my sim.
I have used a cheap 28byj-48 stepper motor to use this compass.
These stepper motors need a zero point indicator, therefore I mounted a IR sensor .![]()
All acrylic parts have been cut and engraved with the laser cutter.
The PCB's are created with my CNC milling machine.
It seems you can also laser PCB, but this requires a lot of hassle with chemicals and stuff.
Due to limitation of Air Manager to max have 8 rows and 8 columns in a button array , my first attempt was wrong.
Also PCB was messy with wires soldered over PCB...
So second one now, still have to physically test all, but this should be ok.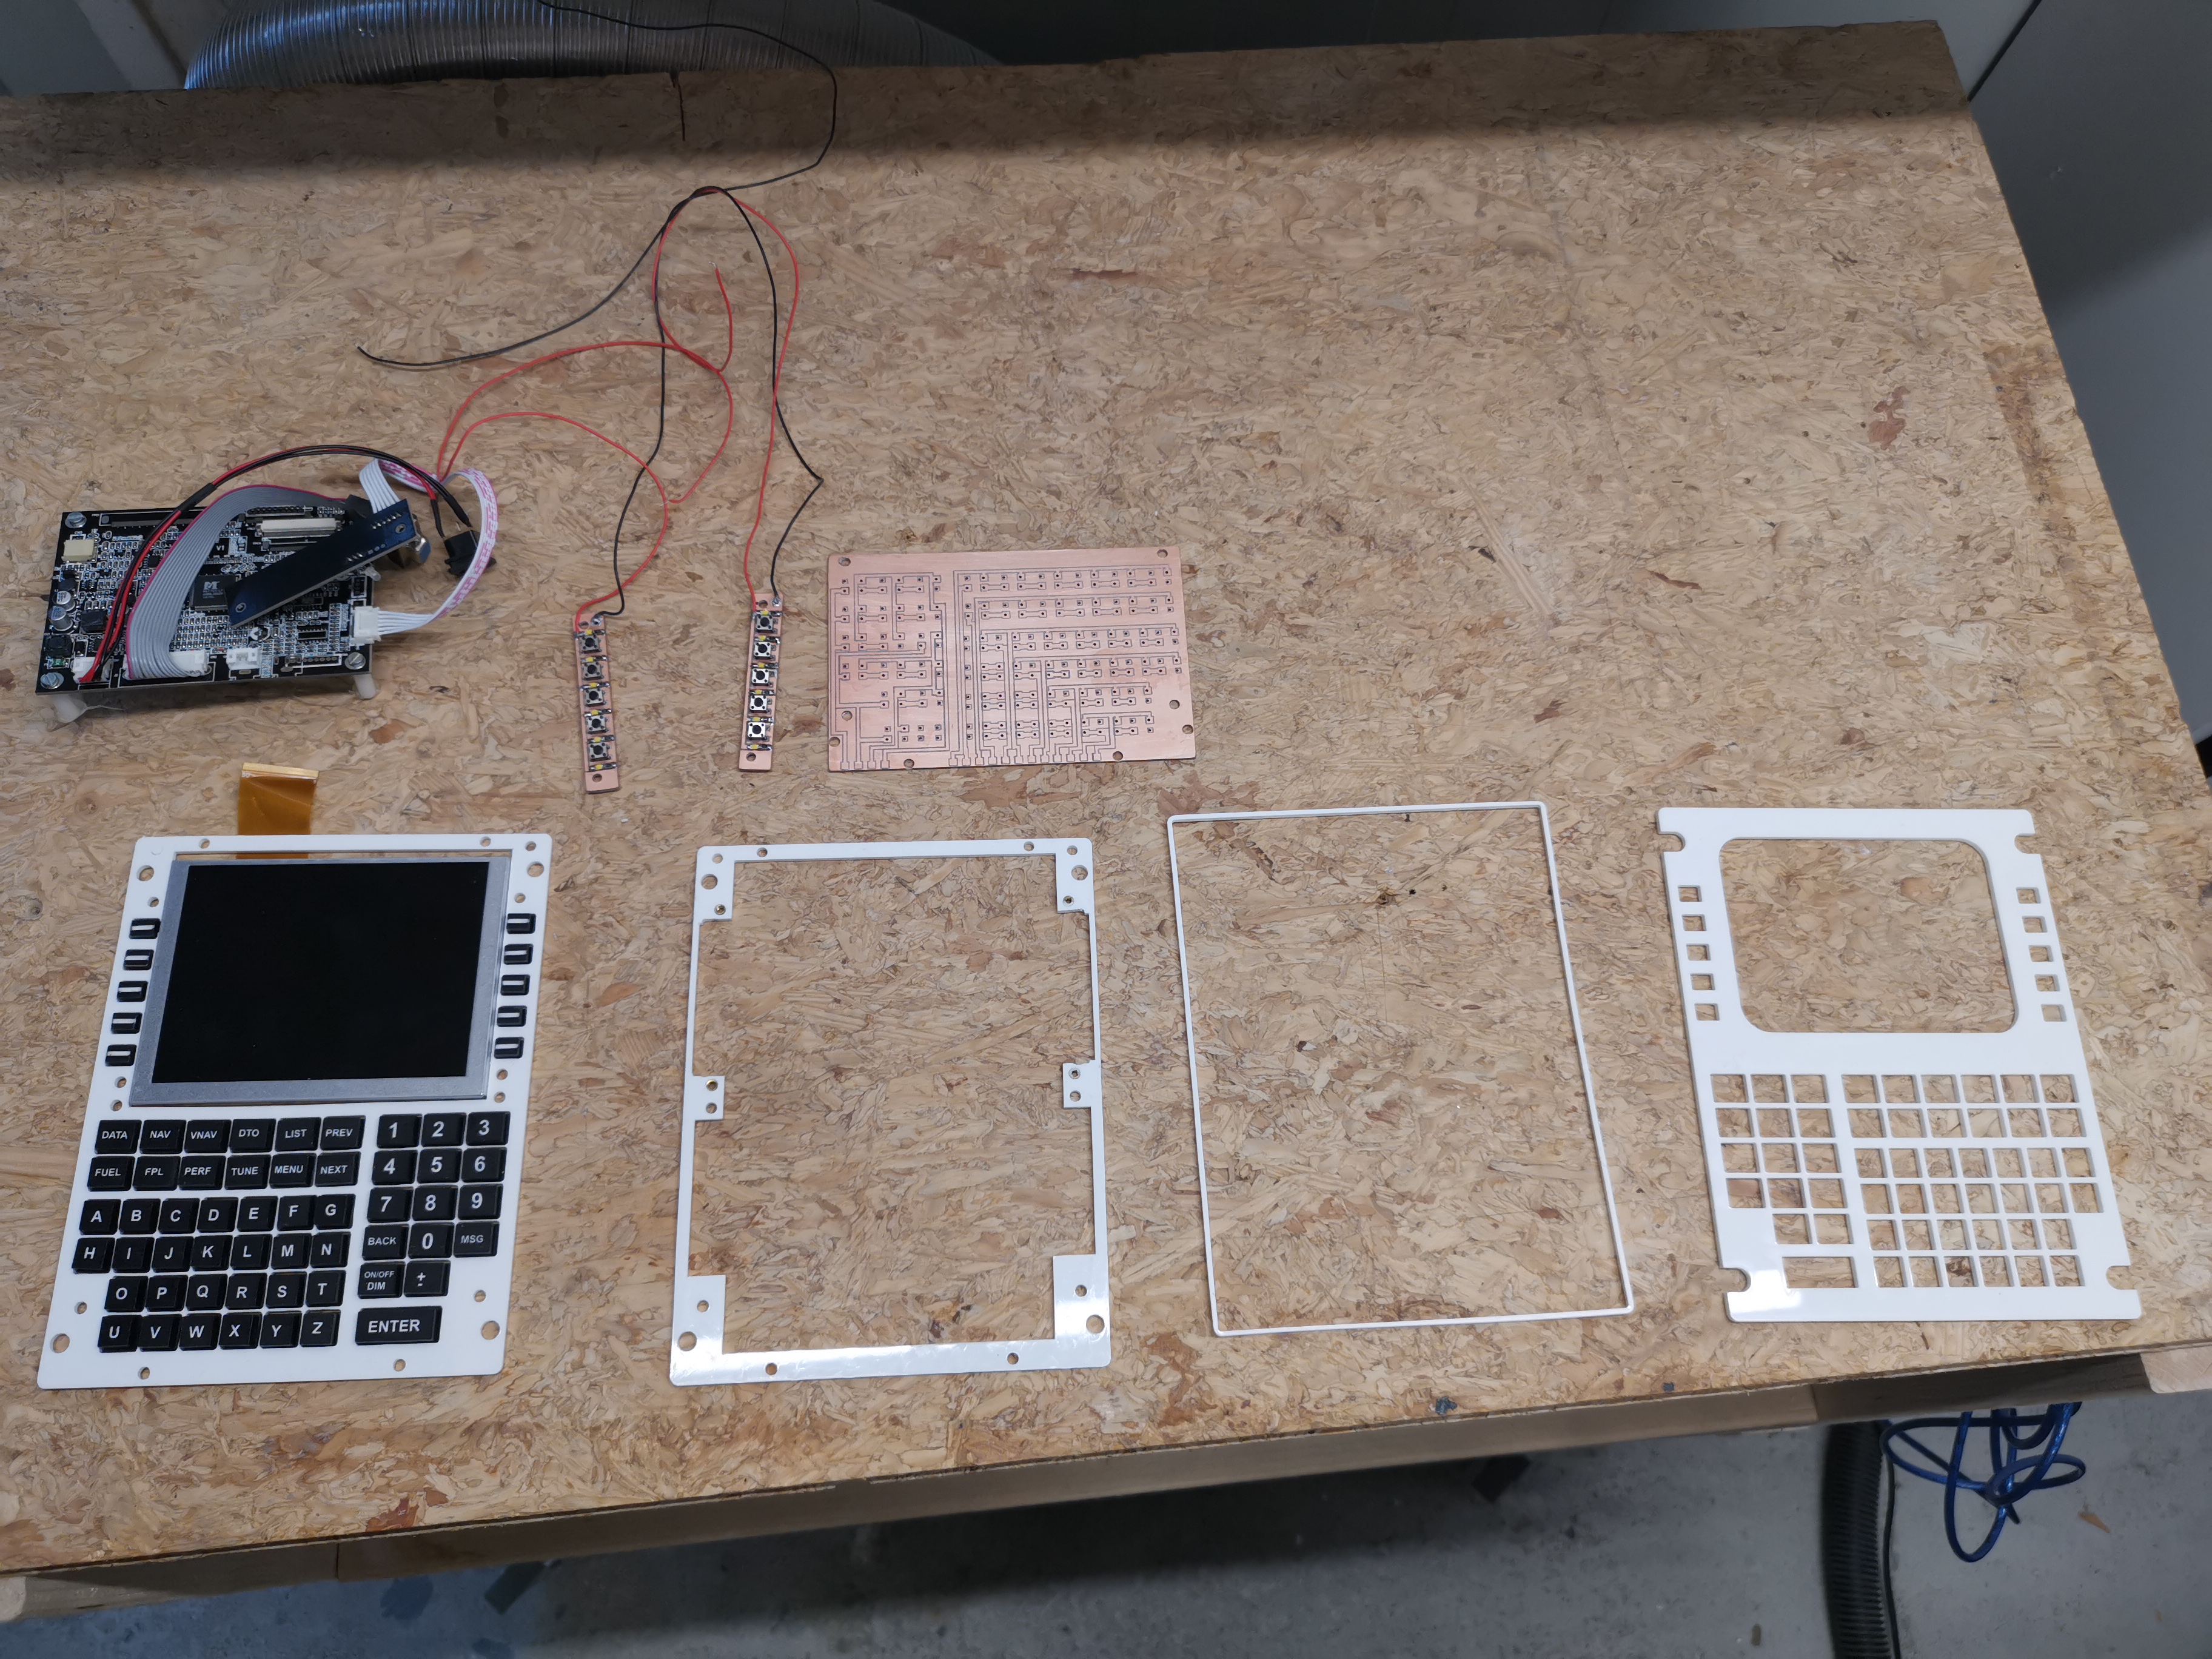
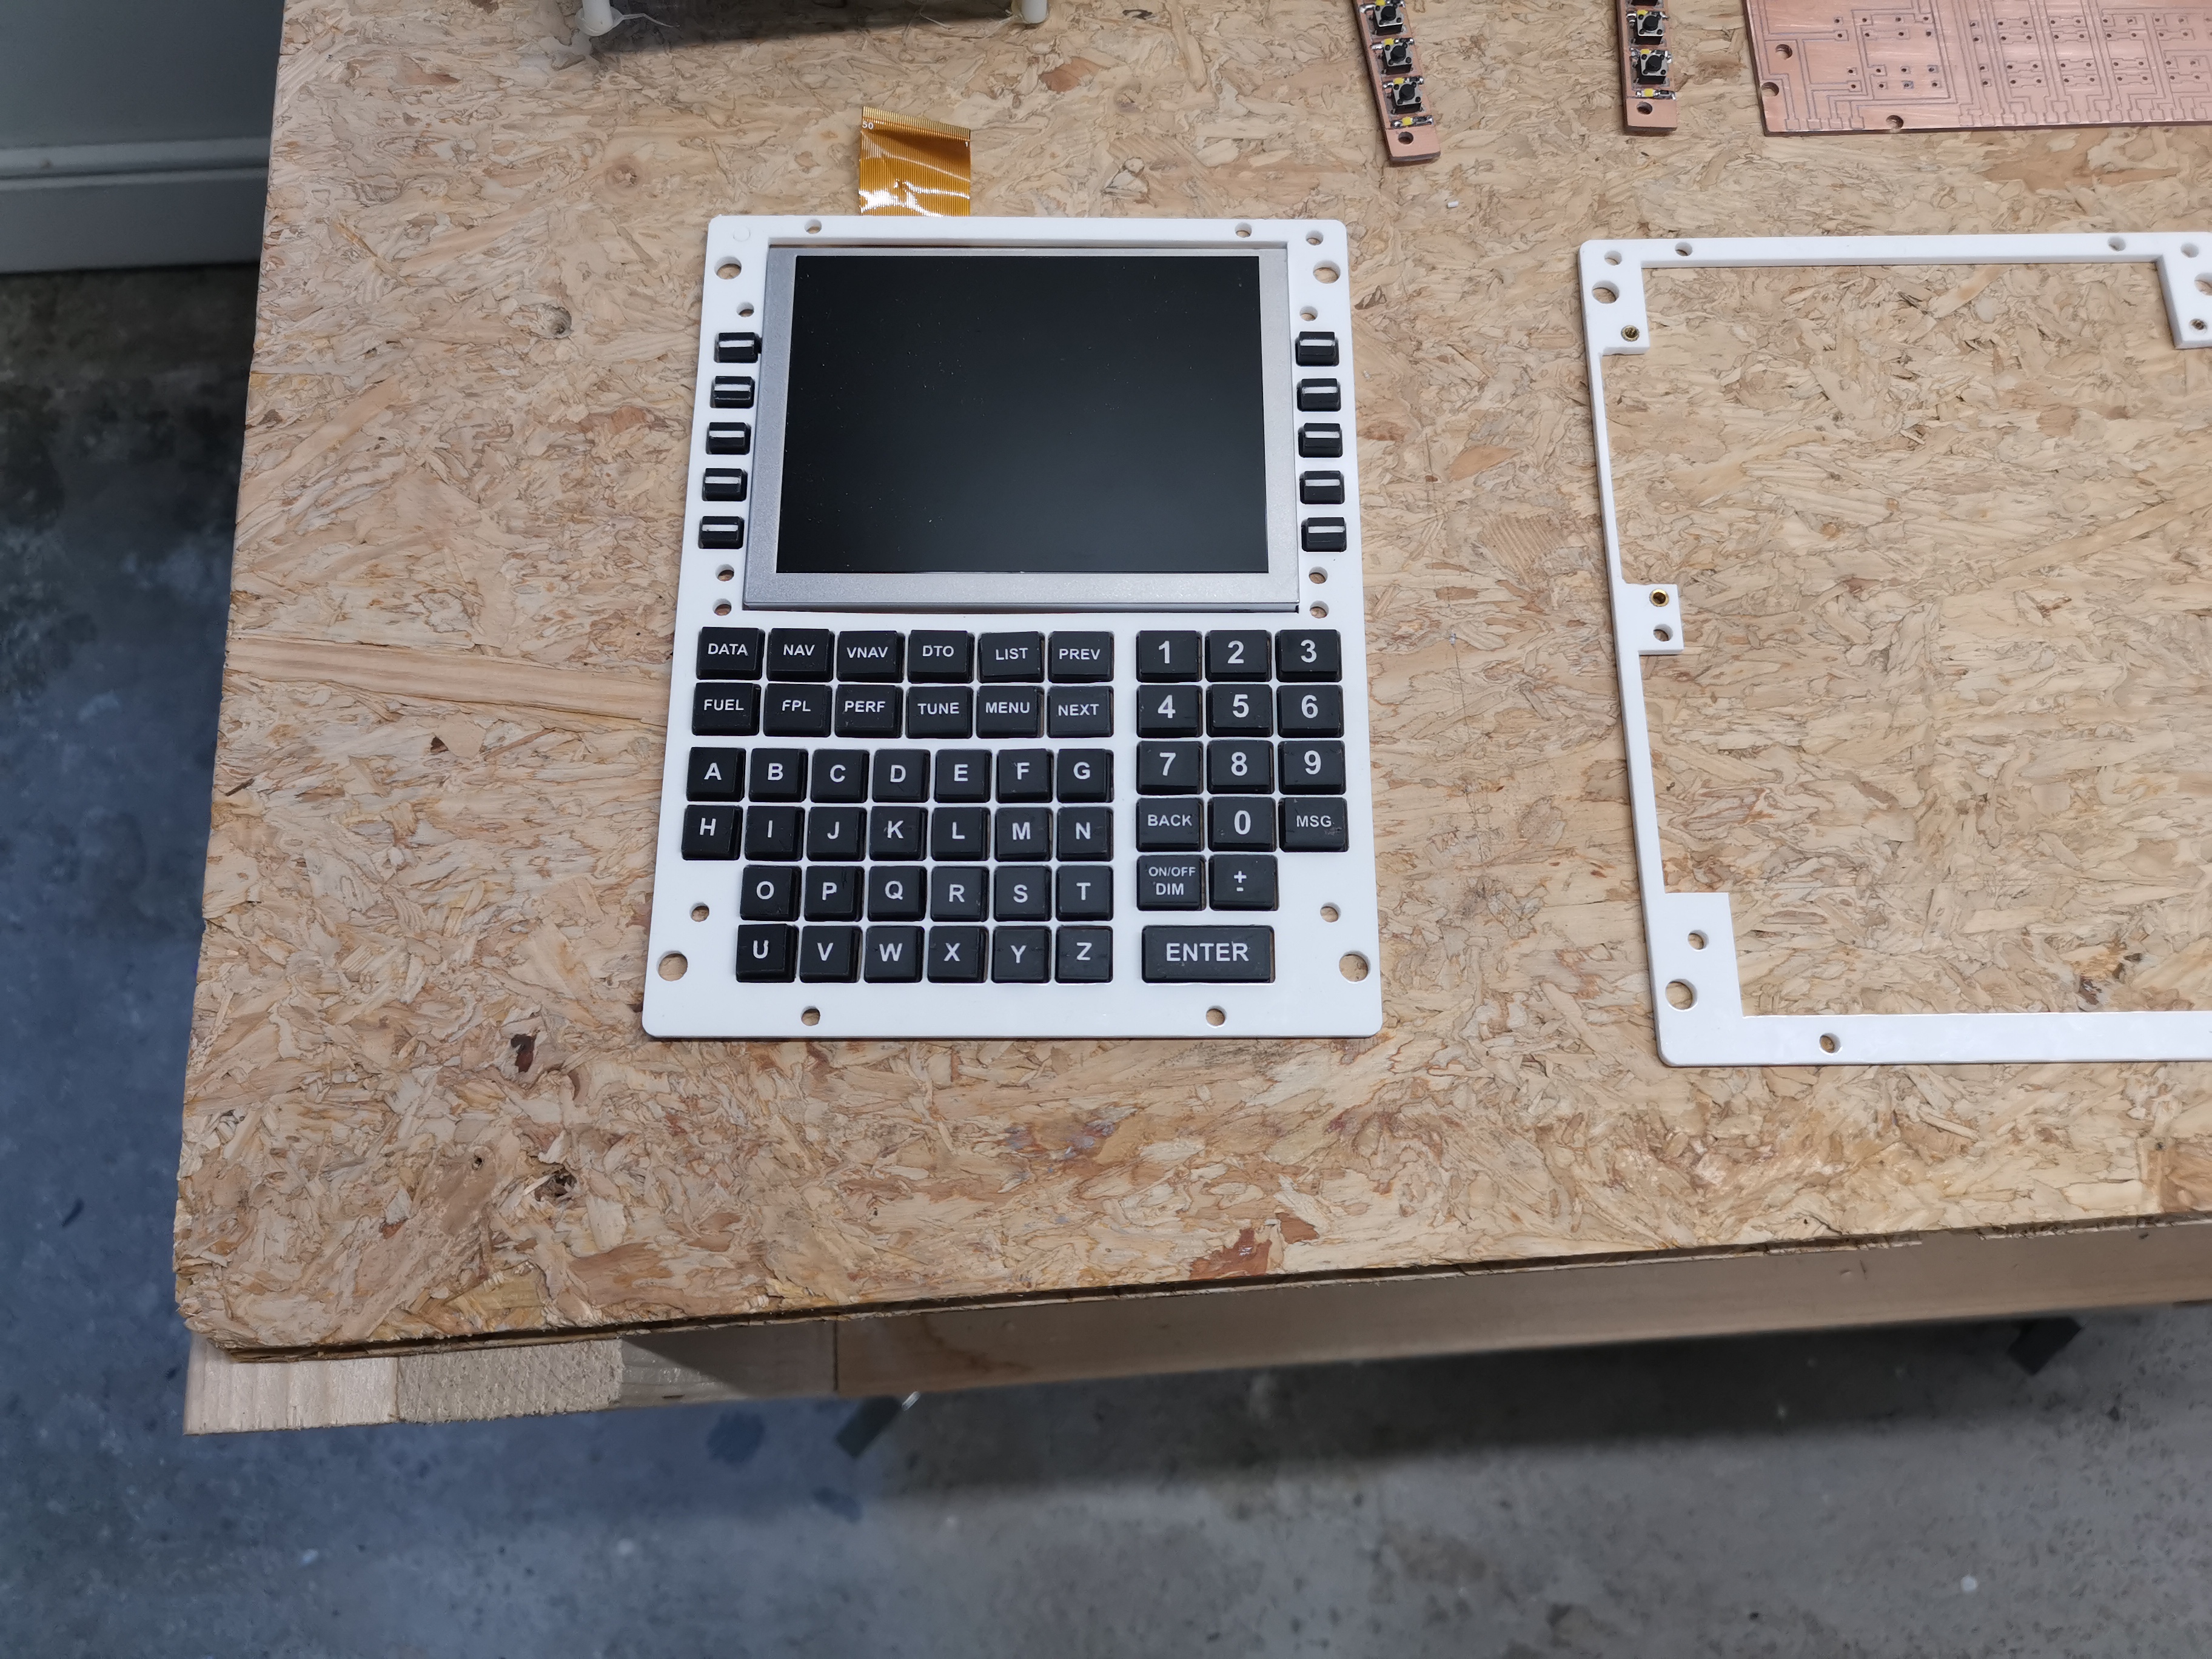
All acrylic parts have been cut and engraved with the laser cutter.
The PCB's are created with my CNC milling machine.
It seems you can also laser PCB, but this requires a lot of hassle with chemicals and stuff.
Due to limitation of Air Manager to max have 8 rows and 8 columns in a button array , my first attempt was wrong.
Also PCB was messy with wires soldered over PCB...
So second one now, still have to physically test all, but this should be ok.![]()
![]()
My CNC laser and milling machines are still great and i did not have the need for a 3D printer.
But for some things a 3D printer is better.
I was struggling to create a cover for the center gyro, and i was not satisfied with my fiber creations.
So there was an Amazon discount and i bought a Flashforge Adventurer 3
There were good reviews , and indeed, it surprised me.
Very smooth prints!
First parts are the FGC knobs, i milled them but are not great.
Now after struggling and getting the hang of it with Blender , i created my first knobs!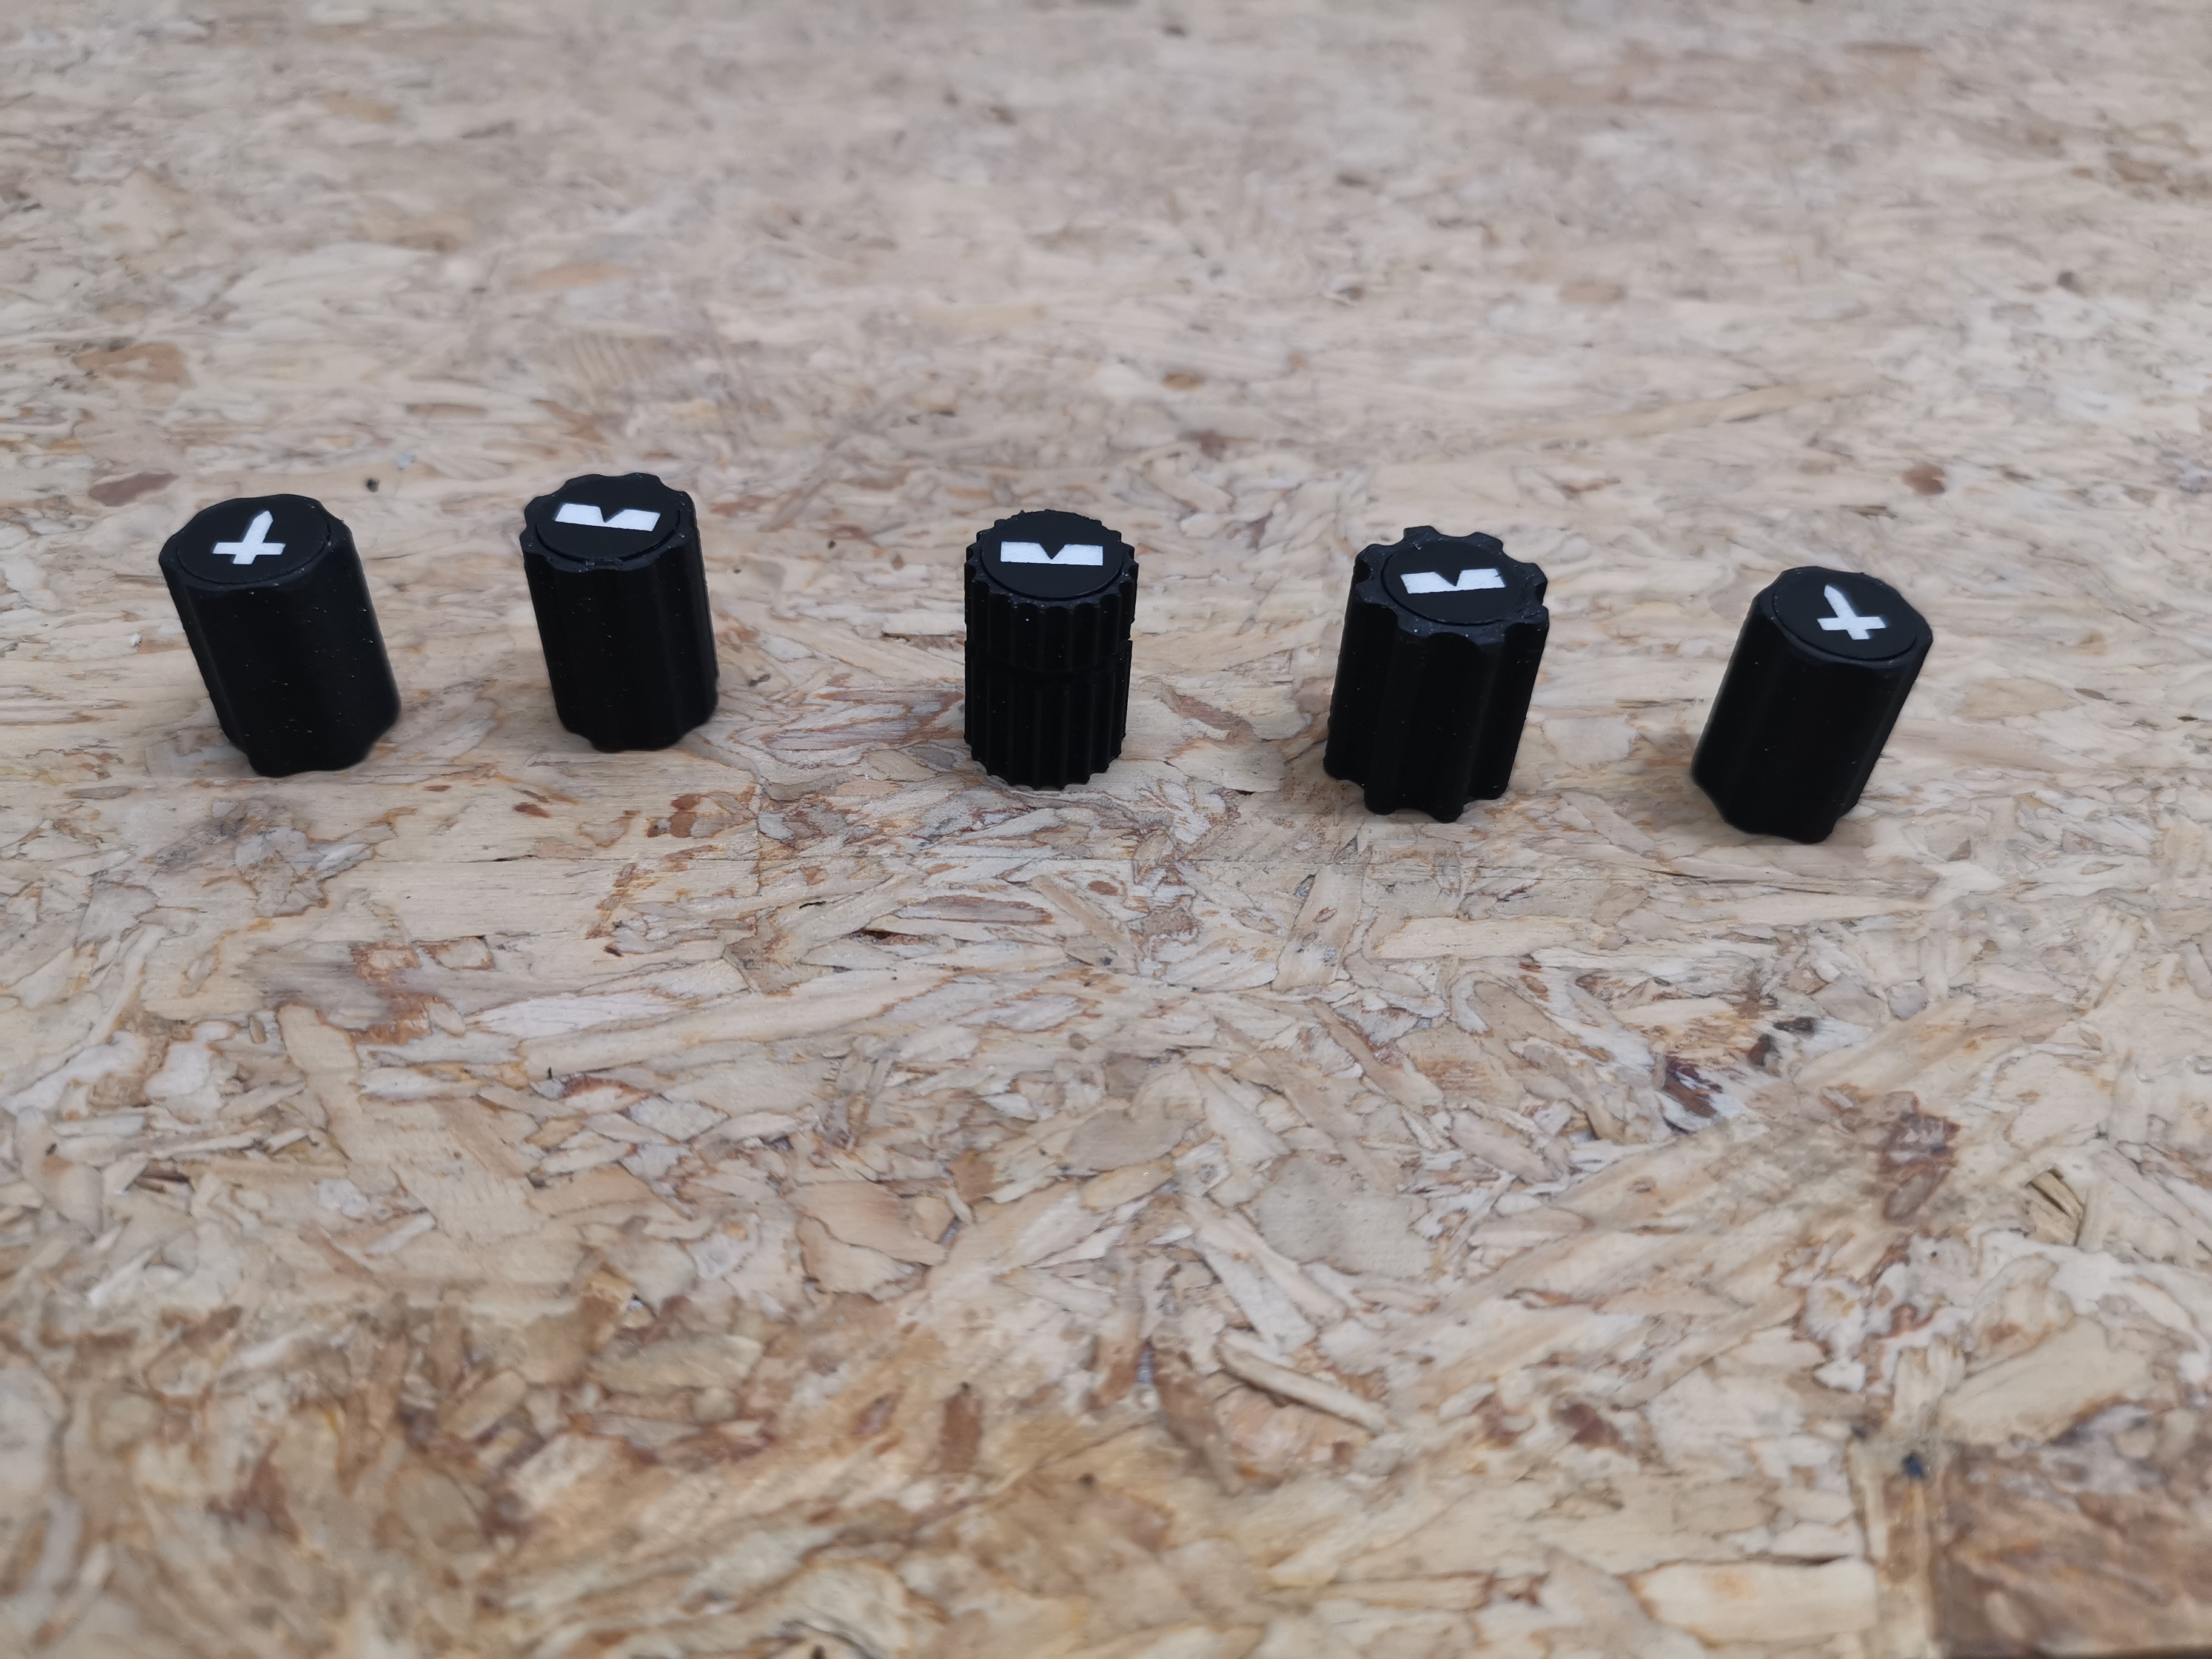
My CNC laser and milling machines are still great and i did not have the need for a 3D printer.
But for some things a 3D printer is better.
I was struggling to create a cover for the center gyro, and i was not satisfied with my fiber creations.
So there was an Amazon discount and i bought a Flashforge Adventurer 3
There were good reviews , and indeed, it surprised me.
Very smooth prints!
First parts are the FGC knobs, i milled them but are not great.
Now after struggling and getting the hang of it with Blender , i created my first knobs!![]()
![]()
But there are a lot of youtube and internet resources of Blender about how to create things.
And also about what to do if something is not as expected.
So for reasonable simple things like knobs and stuff i got pretty fast up to speed.
(it seems i can not attach them in here?)
But there are a lot of youtube and internet resources of Blender about how to create things.
And also about what to do if something is not as expected.
So for reasonable simple things like knobs and stuff i got pretty fast up to speed.
(it seems i can not attach them in here?)
Forum NavigationRoel's Learjet 45 simulator
![]() #151 · June 19, 2022, 11:36 am
#151 · June 19, 2022, 11:36 am![]() #152 · October 19, 2022, 2:47 pm
#152 · October 19, 2022, 2:47 pm![]() #153 · October 20, 2022, 7:29 am
#153 · October 20, 2022, 7:29 am![]() #154 · October 20, 2022, 7:46 am
#154 · October 20, 2022, 7:46 am![]() #155 · November 7, 2022, 5:18 am
#155 · November 7, 2022, 5:18 am![]() #156 · March 7, 2023, 10:48 am
#156 · March 7, 2023, 10:48 am![]() #157 · March 25, 2023, 10:31 am
#157 · March 25, 2023, 10:31 am![]() #158 · August 7, 2023, 1:10 pm
#158 · August 7, 2023, 1:10 pm![]() #159 · August 7, 2023, 11:37 pm
#159 · August 7, 2023, 11:37 pm![]() #160 · August 8, 2023, 4:28 am
#160 · August 8, 2023, 4:28 am
2017-10-10