


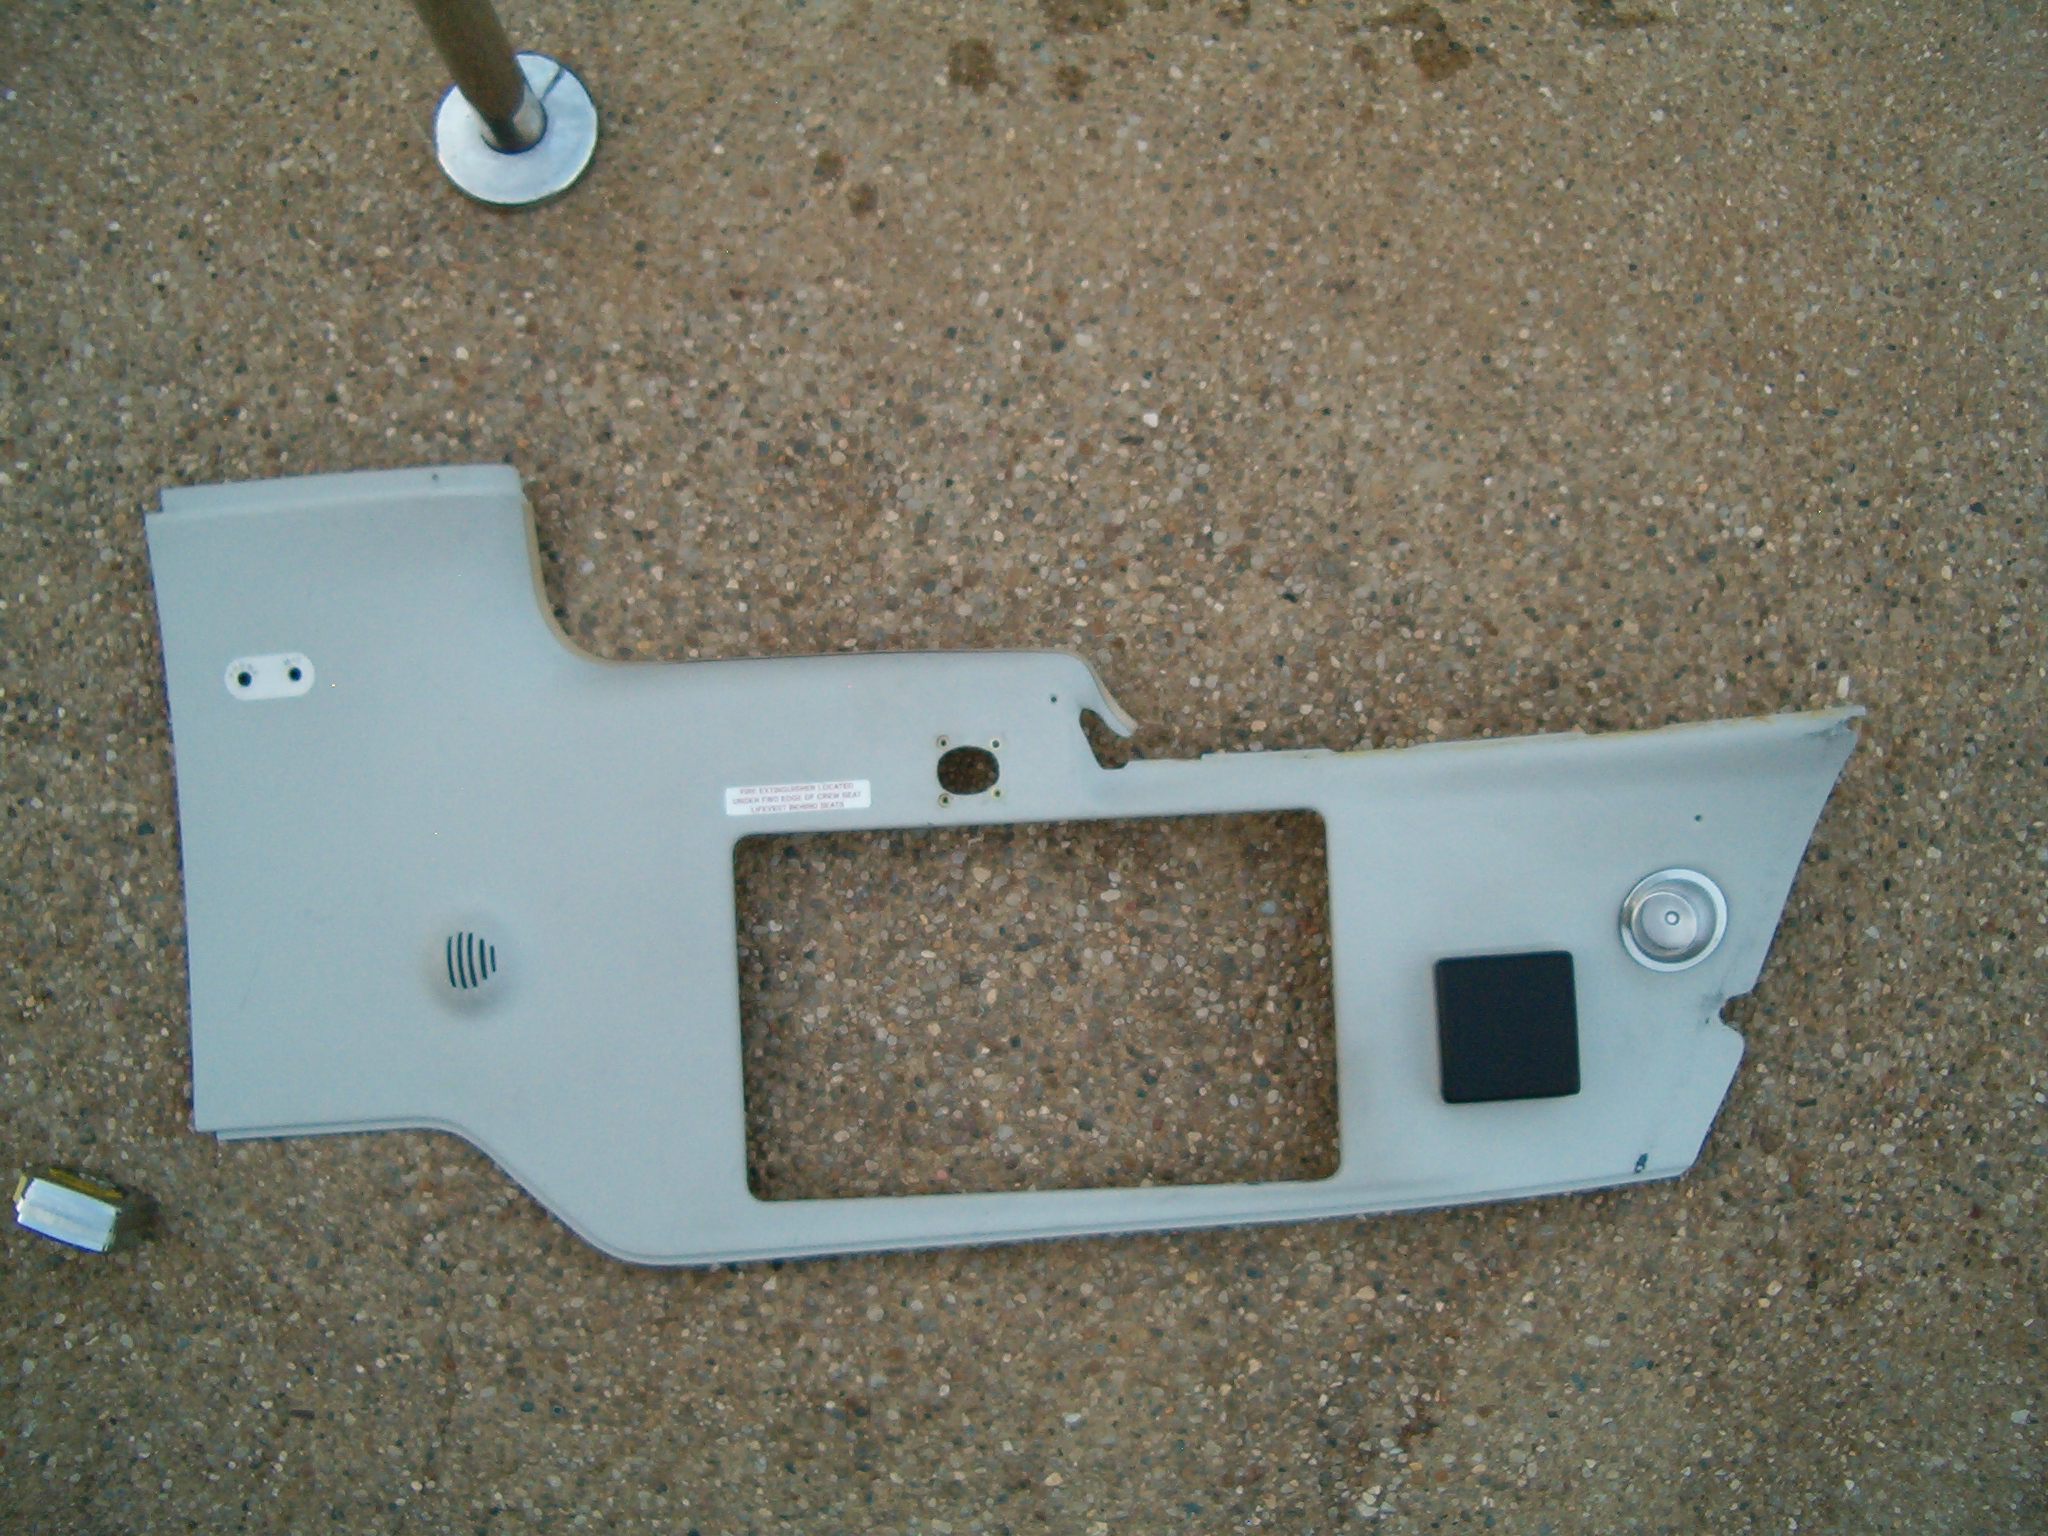
Ok ..it is starting to look like a sim now.... https://youtu.be/9VR93Ahe5fQ Ok ..it is starting to look like a sim now.... I have started working on my interior of the shell. For the side panels i really struggled which way to go. I discovered a glassfiber roller ( i bet you guys have it too) which is great; it tightens the fiber so you get a nice smooth surface which needs very little bondo. First i was planning to paint it all en add some sort of strips over the gaps in between panels (it is too difficult to create only one panel to cover it all. To cover the gap between panels i use a PE strip which i also covered with the leather. I also mounted a flexible light which looks like a real one a bit. I have started working on my interior of the shell. For the side panels i really struggled which way to go. I discovered a glassfiber roller ( i bet you guys have it too) which is great; it tightens the fiber so you get a nice smooth surface which needs very little bondo. First i was planning to paint it all en add some sort of strips over the gaps in between panels (it is too difficult to create only one panel to cover it all. To cover the gap between panels i use a PE strip which i also covered with the leather. I also mounted a flexible light which looks like a real one a bit. Hey Roel, Looking good! I wish I was this far along. I started working on the interior panels several years ago and got severely side tracked with the all new Lear45 2.0 HERE you can find a couple photos of those side panels I was working on if you want to model them a little closer to the real thing. Here are a couple photos taken by Shane Barnes several years ago of some real panels that were salvaged out of a crashed Lear45. It's not the best photos but at least it will give you a really good idea of what is going on with the lower "book shelf" panels. I will say this, I just visited a real Lear45 a couple weeks ago and I was trying to take in as much as I could. Not once did I pay any attention to the side trim panels or the lower book shelf panels. I say that to say this, as long as you get them close, no one will notice if they happen to be a little different than the real thing. Looking forward to seeing what you come up with Roel! Hey Roel, Looking good! I wish I was this far along. I started working on the interior panels several years ago and got severely side tracked with the all new Lear45 2.0 HERE you can find a couple photos of those side panels I was working on if you want to model them a little closer to the real thing. Here are a couple photos taken by Shane Barnes several years ago of some real panels that were salvaged out of a crashed Lear45. It's not the best photos but at least it will give you a really good idea of what is going on with the lower "book shelf" panels. I will say this, I just visited a real Lear45 a couple weeks ago and I was trying to take in as much as I could. Not once did I pay any attention to the side trim panels or the lower book shelf panels. I say that to say this, as long as you get them close, no one will notice if they happen to be a little different than the real thing. Looking forward to seeing what you come up with Roel! Yes i saw those pictures, nothing like the real deal! i still was not able to visit a real lear45 oh well..one day… Yes i saw those pictures, nothing like the real deal! i still was not able to visit a real lear45 oh well..one day… My interior is starting to look like something. My interior is starting to look like something. That is Awesome looking Roel! Your sim looks like it is ready to take it for a spin. You are getting down the the last details. I went back and took a look at some of your shell photos and they are very impressive as well. I am always impressed with the work you guys put into the shell especially when starting from just the paper plans. I will say this, I am not sure if we can ever say this project is complete. Just when you think you are nearing completion you start seeing things that you can do a little differently. If that starts to happen to you, try to keep your sim up and running as much as possible and enjoy it. Again, your sim looks awesome and very flyable! That is Awesome looking Roel! Your sim looks like it is ready to take it for a spin. You are getting down the the last details. I went back and took a look at some of your shell photos and they are very impressive as well. I am always impressed with the work you guys put into the shell especially when starting from just the paper plans. I will say this, I am not sure if we can ever say this project is complete. Just when you think you are nearing completion you start seeing things that you can do a little differently. If that starts to happen to you, try to keep your sim up and running as much as possible and enjoy it. Again, your sim looks awesome and very flyable! Stunning images! It looks really really good Roel! How did you mount LED strip under glare shield? To be more specific, which surface did you use to mount it on? There is an L-shaped aluminum piece screwed to the glare shield bottom surface that hides LED strip but Im curious which way LEDs are facing, towards the instruments or down? Stunning images! It looks really really good Roel! How did you mount LED strip under glare shield? To be more specific, which surface did you use to mount it on? There is an L-shaped aluminum piece screwed to the glare shield bottom surface that hides LED strip but Im curious which way LEDs are facing, towards the instruments or down? This week i was able to buy an OEM stickshaker, not sure of which aircraft it is from. https://youtu.be/Z1bWM12yG2s This week i was able to buy an OEM stickshaker, not sure of which aircraft it is from. Roel, Yes it can scare the hell out of you when it goes off. Definitely worth the added realism. If I remember rightly mine is an old washing machine part. So think outside the square in looking for parts that you need. Mark S. Roel, Yes it can scare the hell out of you when it goes off. Definitely worth the added realism. If I remember rightly mine is an old washing machine part. So think outside the square in looking for parts that you need. Mark S.Roel's Learjet 45 simulator
![]()
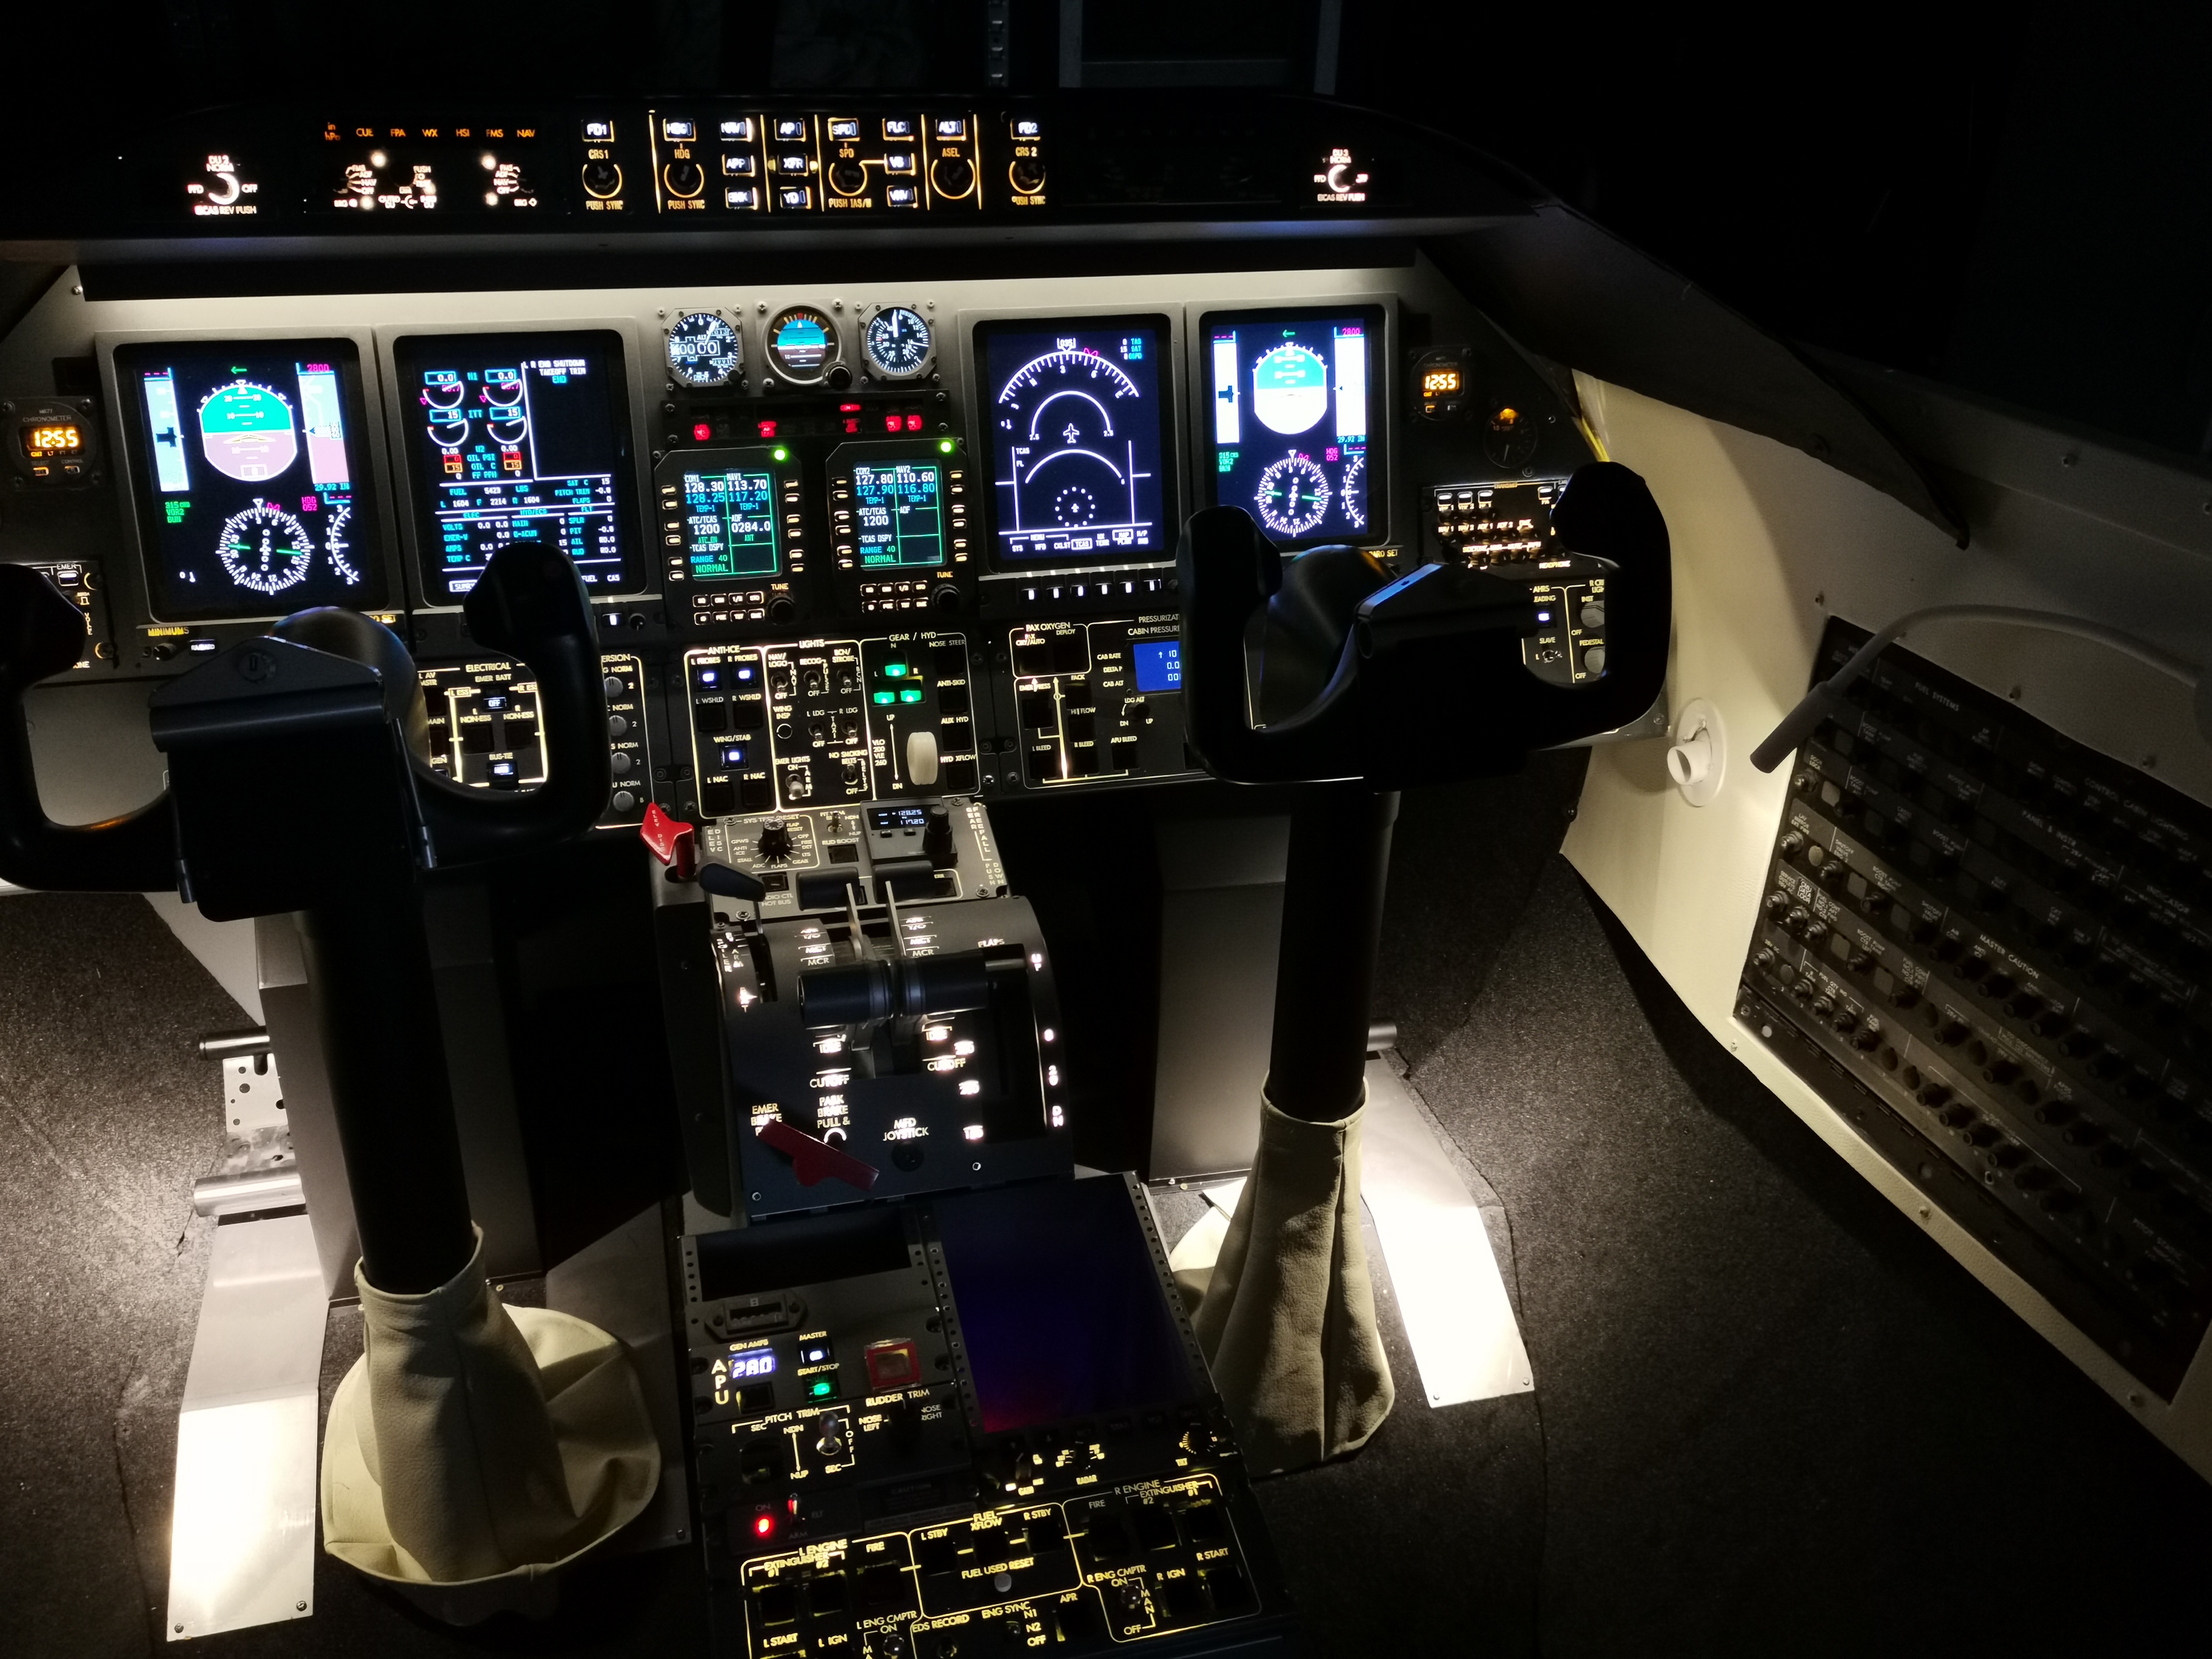
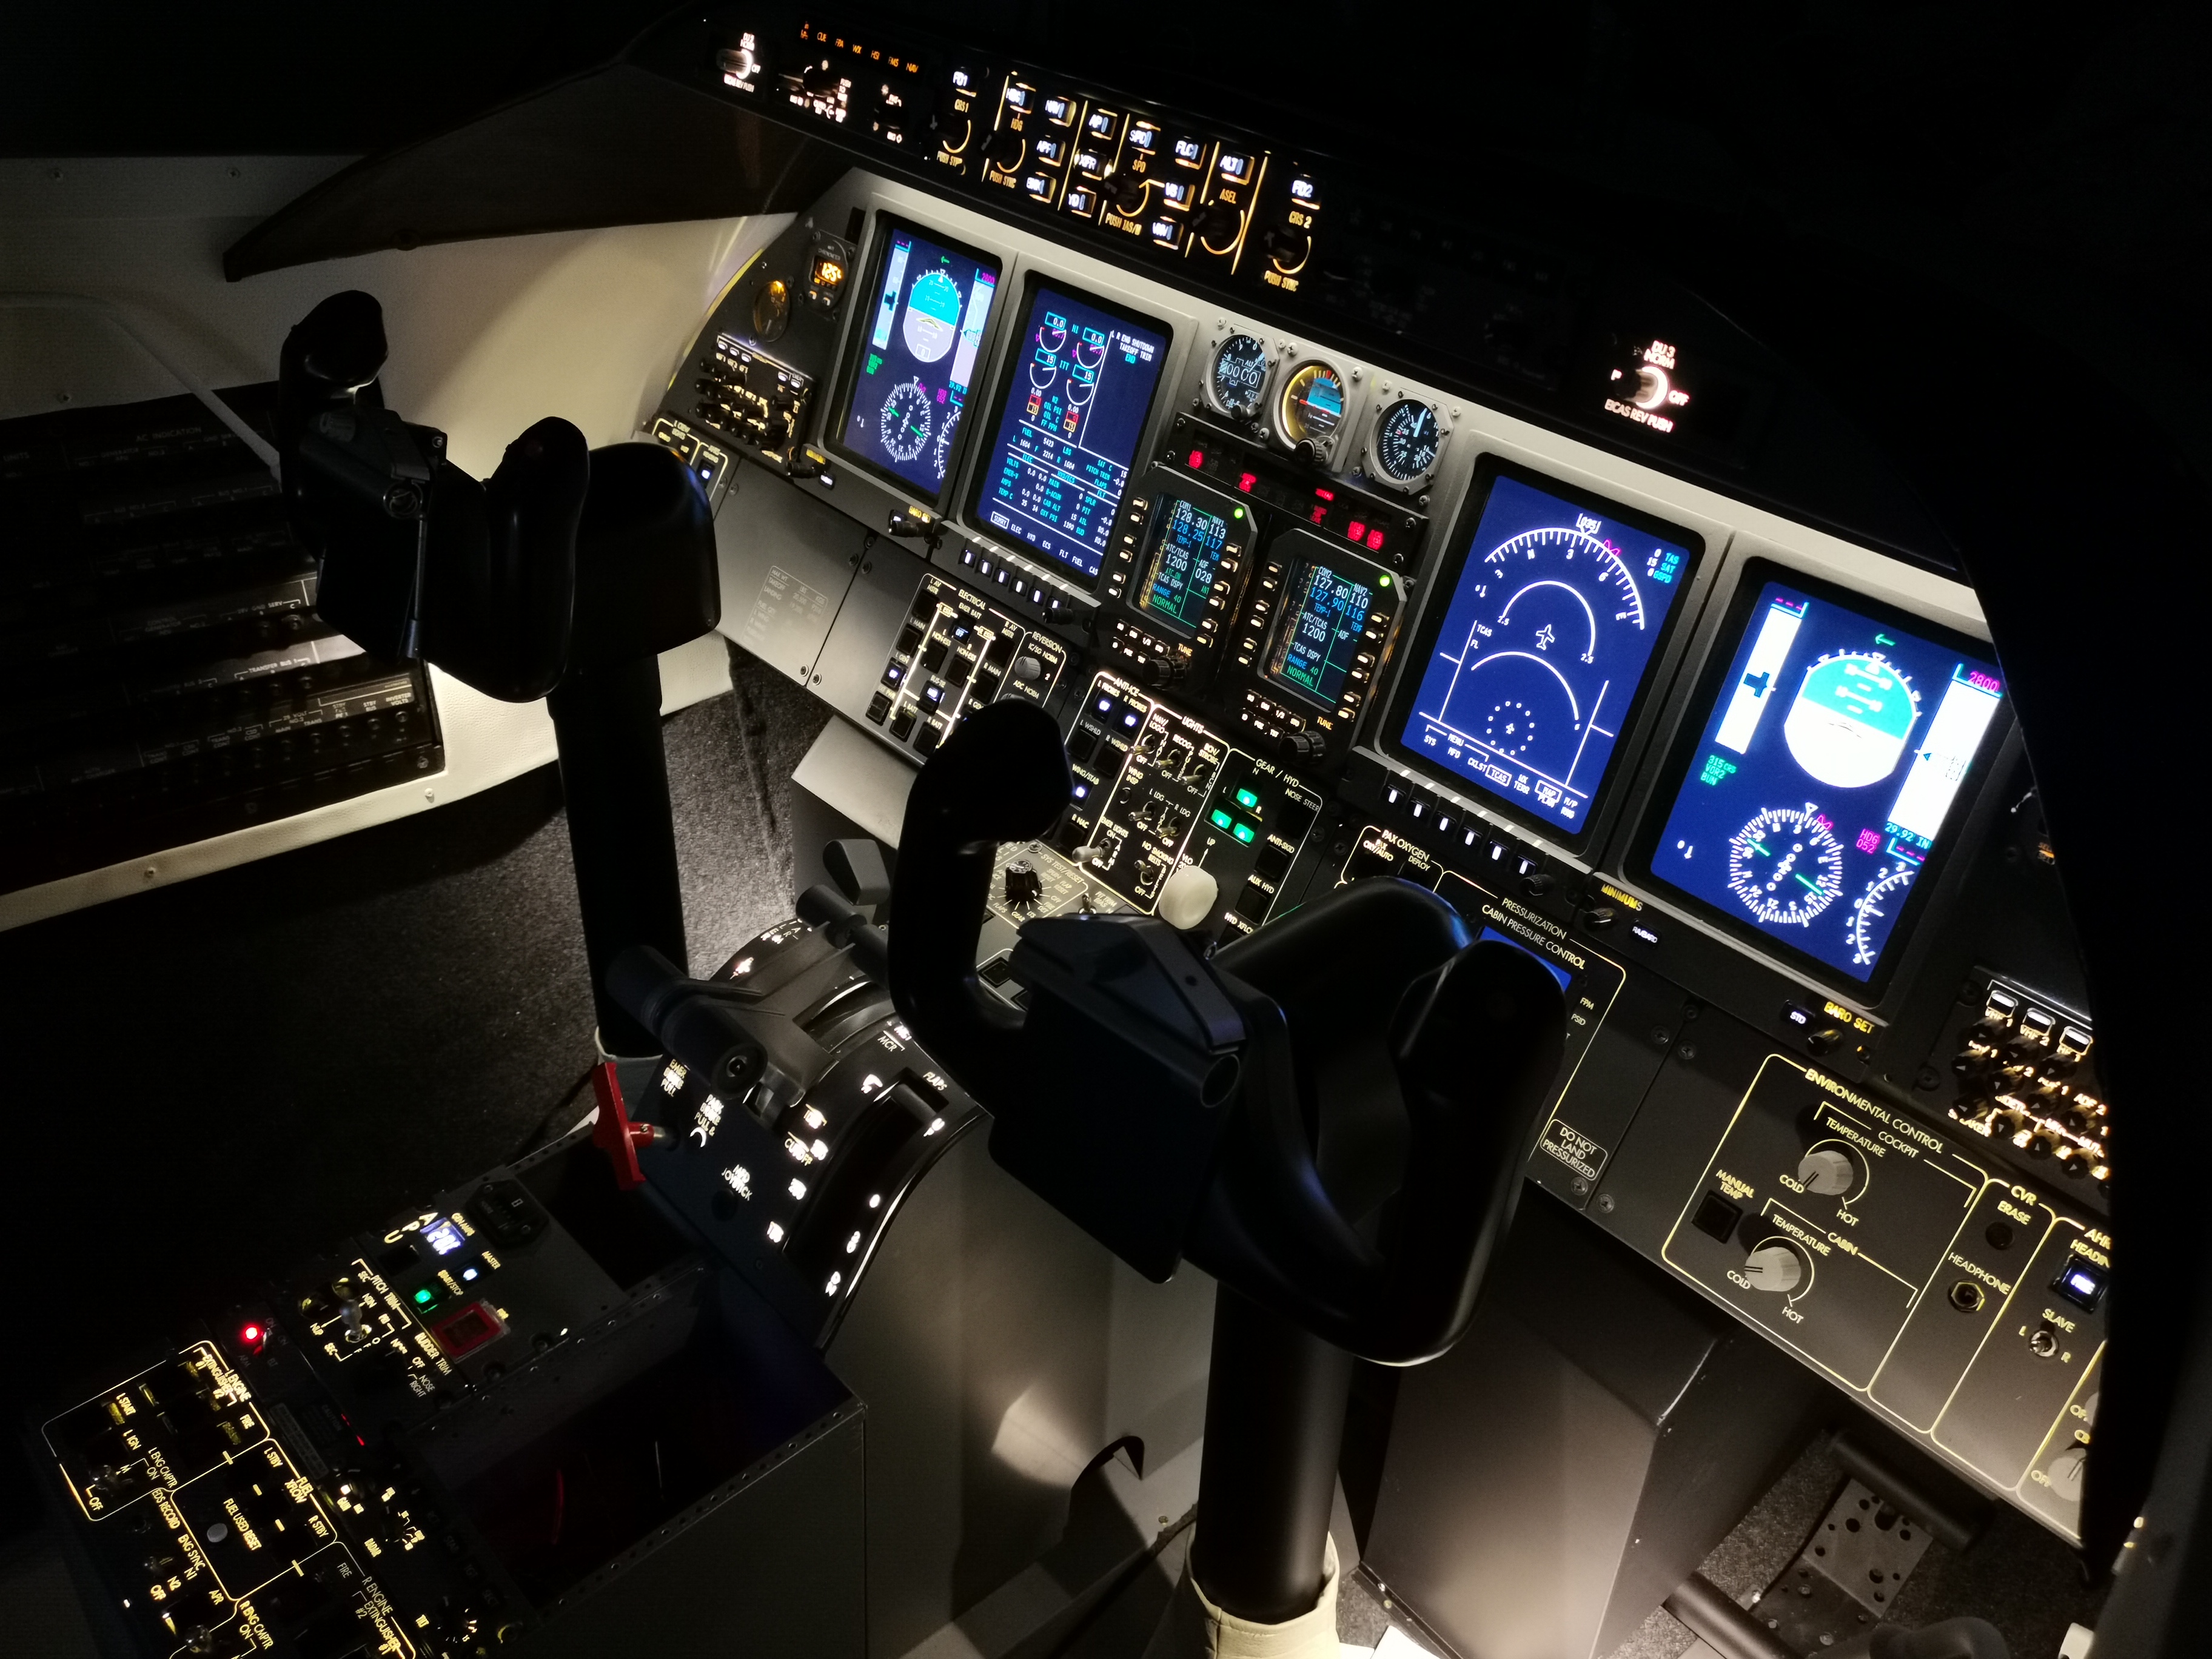
Sound system is installed, all is interfaced.
Not all buttons / LED's function as designed i guess; still have to study that...but... most of the Lear 45 avionics are operational!
Here is a vid of the engine startup
Sound system is installed, all is interfaced.
Not all buttons / LED's function as designed i guess; still have to study that...but... most of the Lear 45 avionics are operational!
Here is a vid of the engine startup![]()
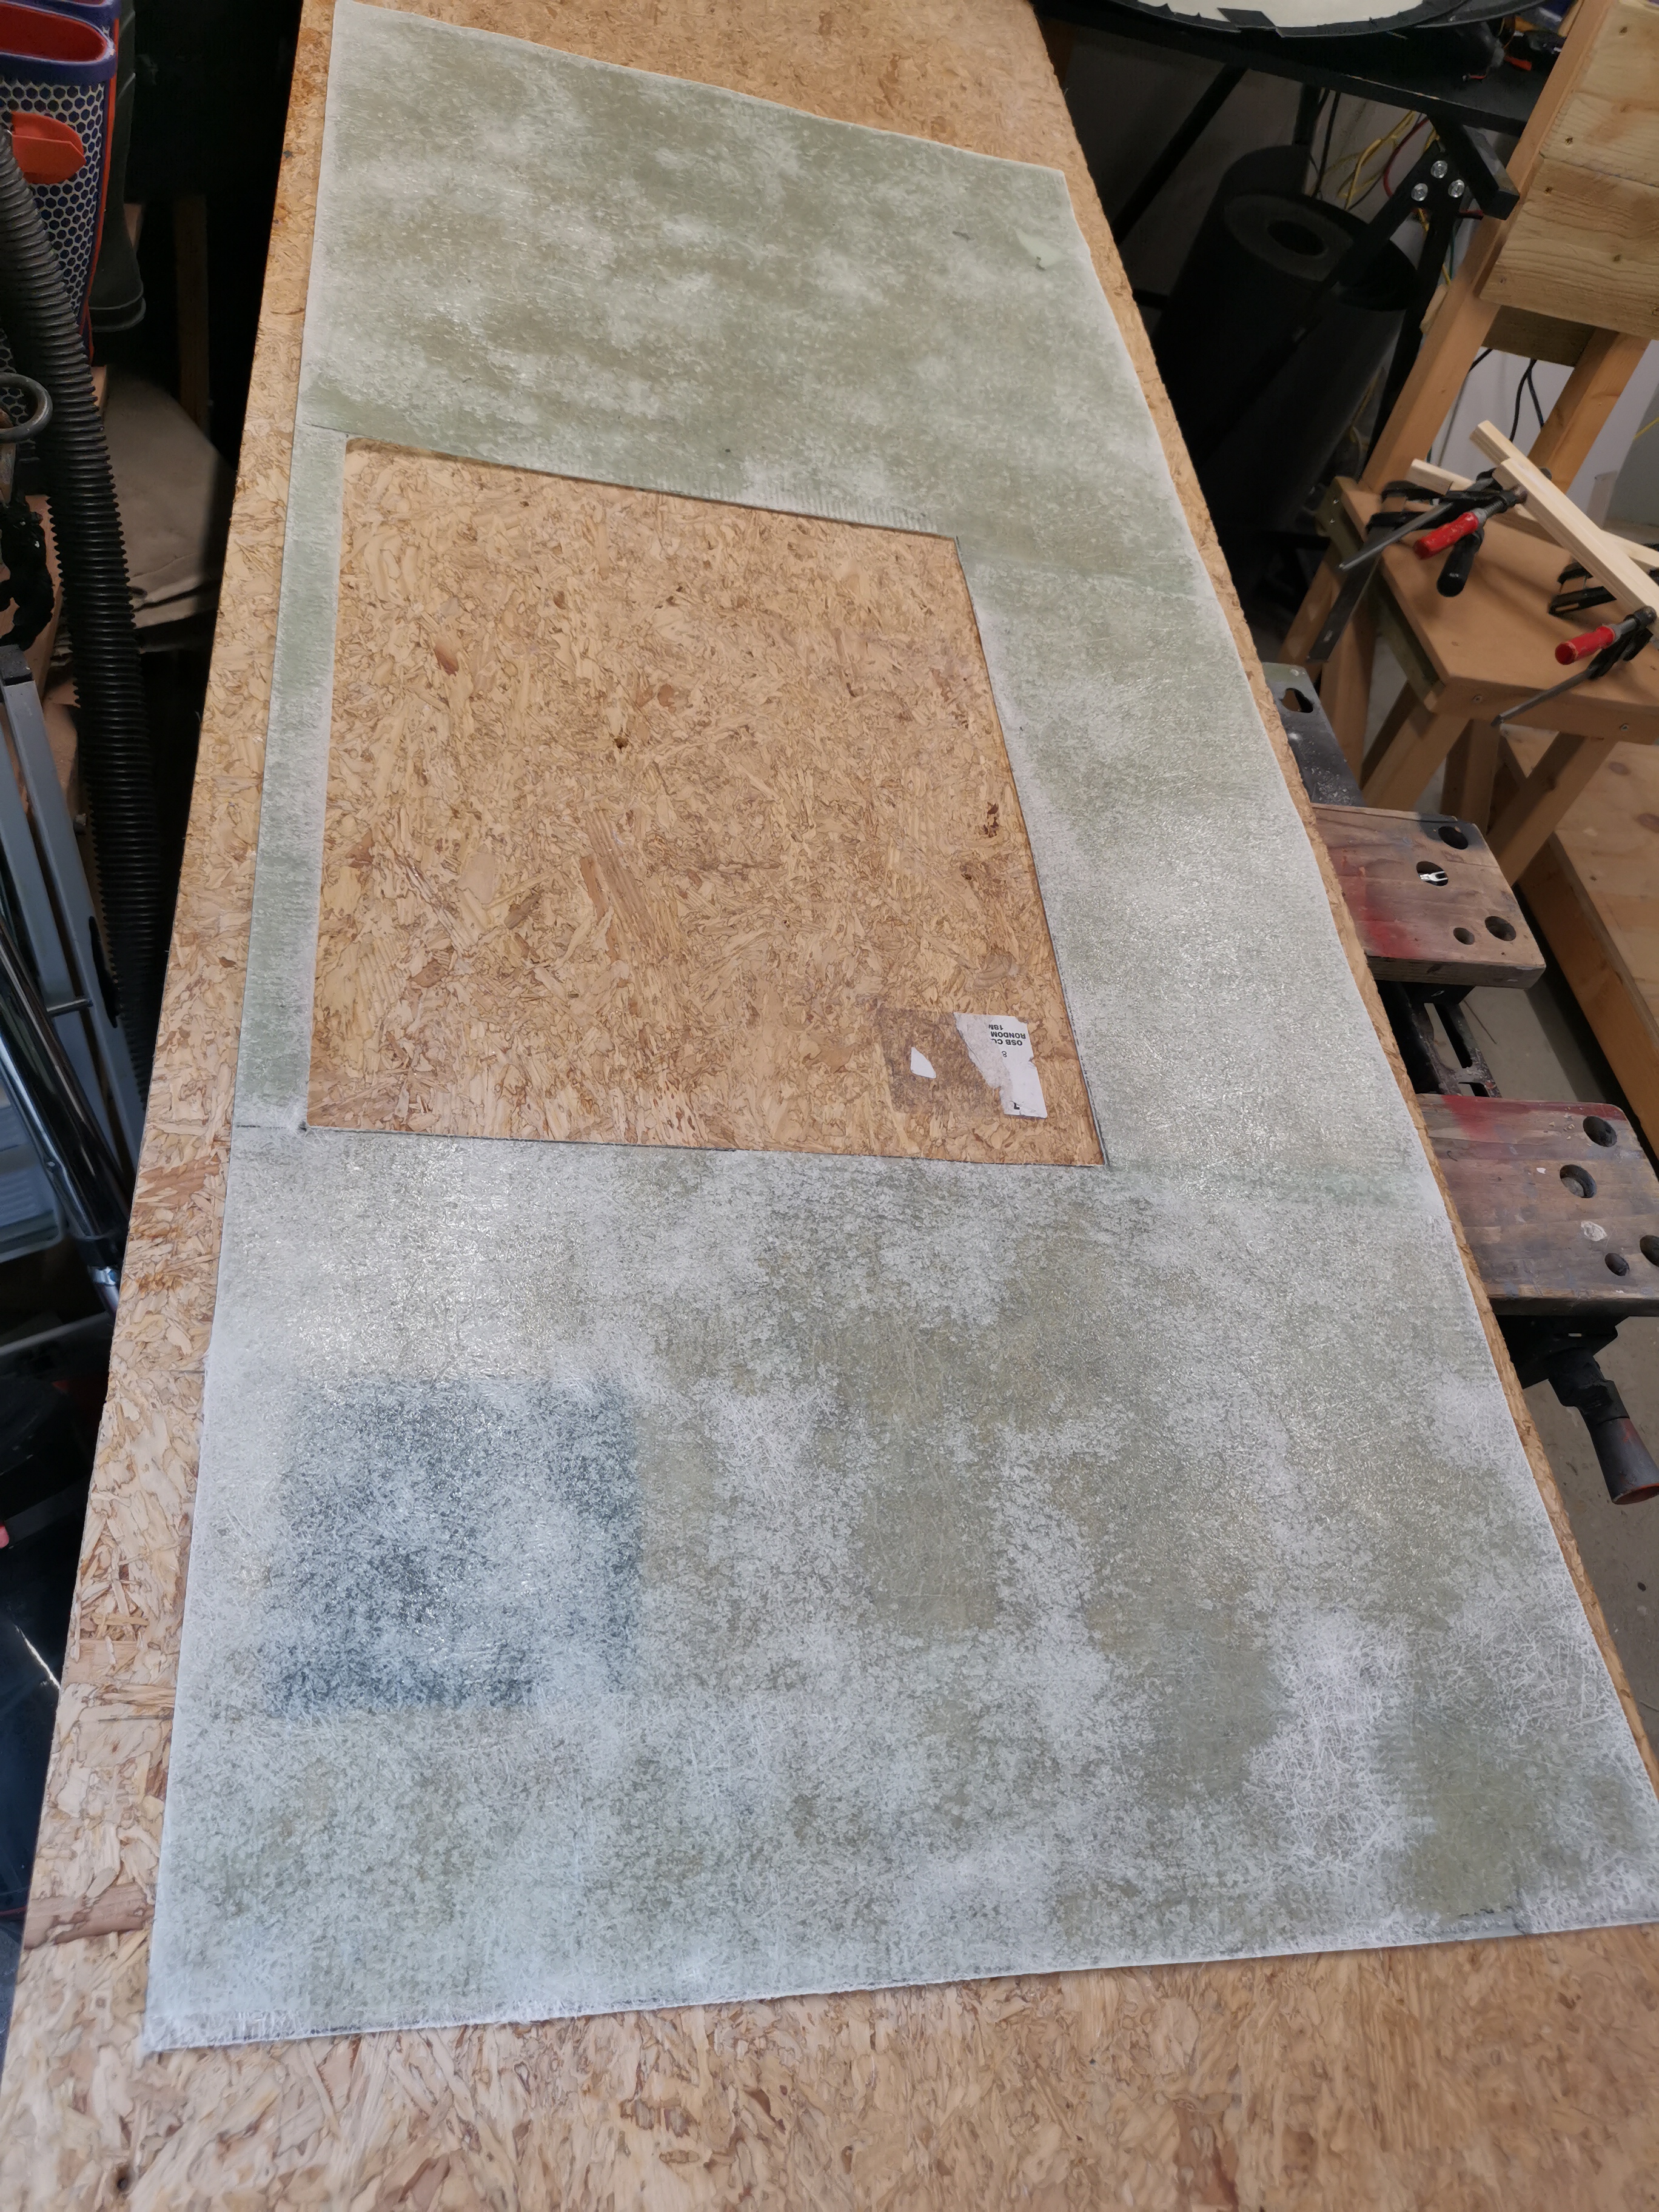
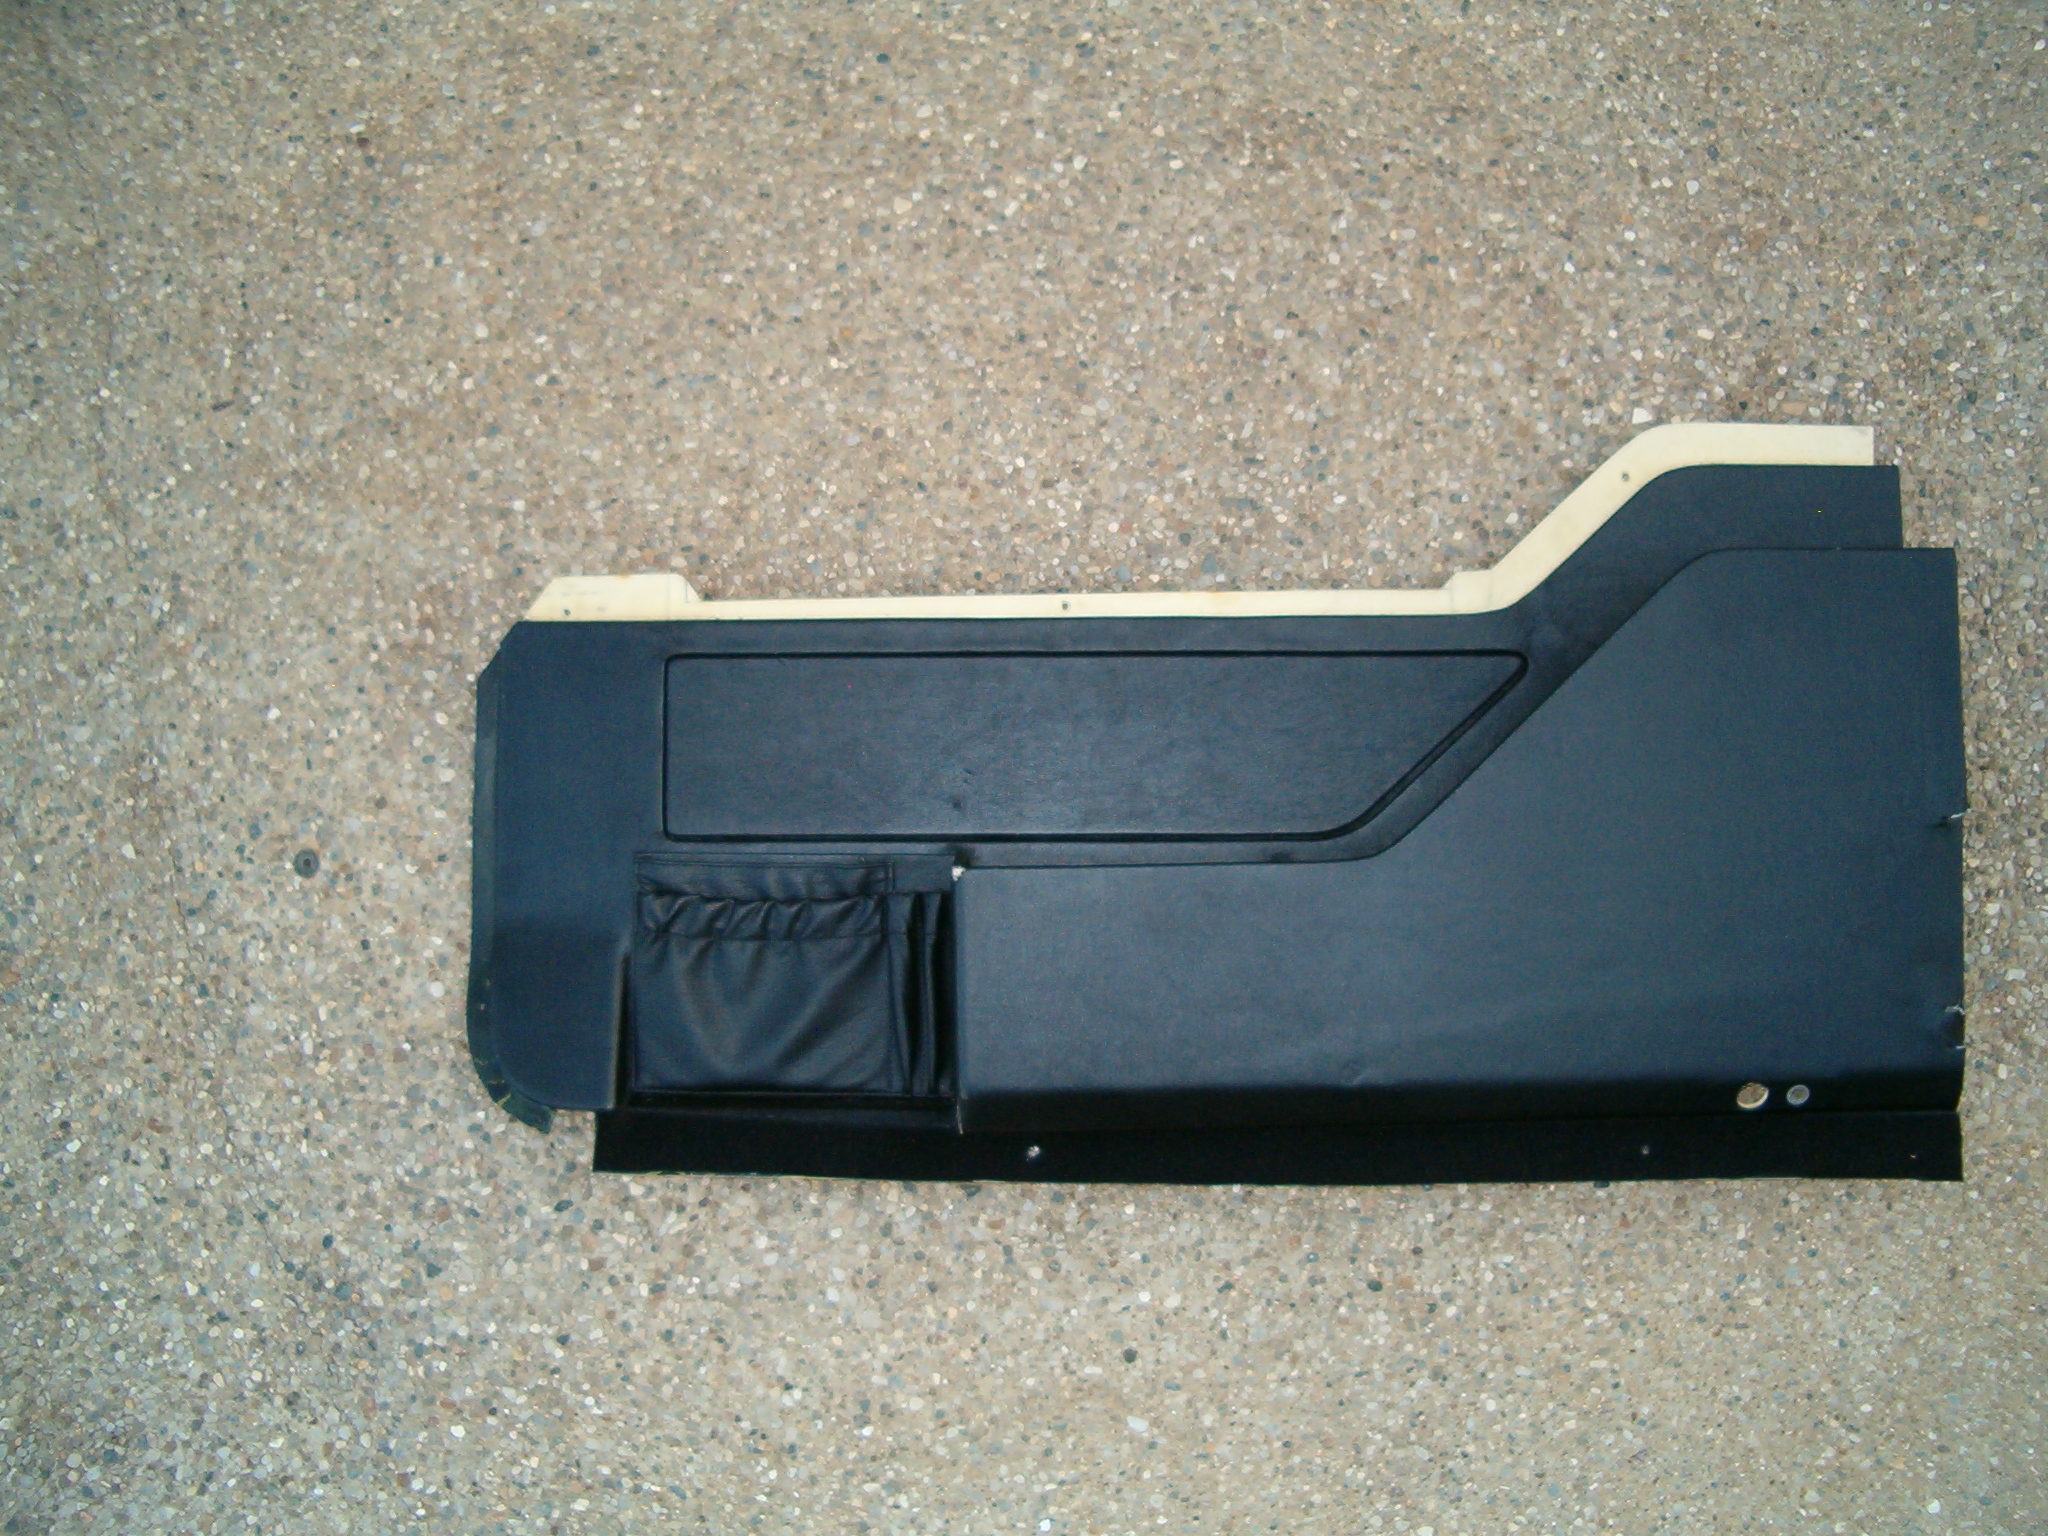
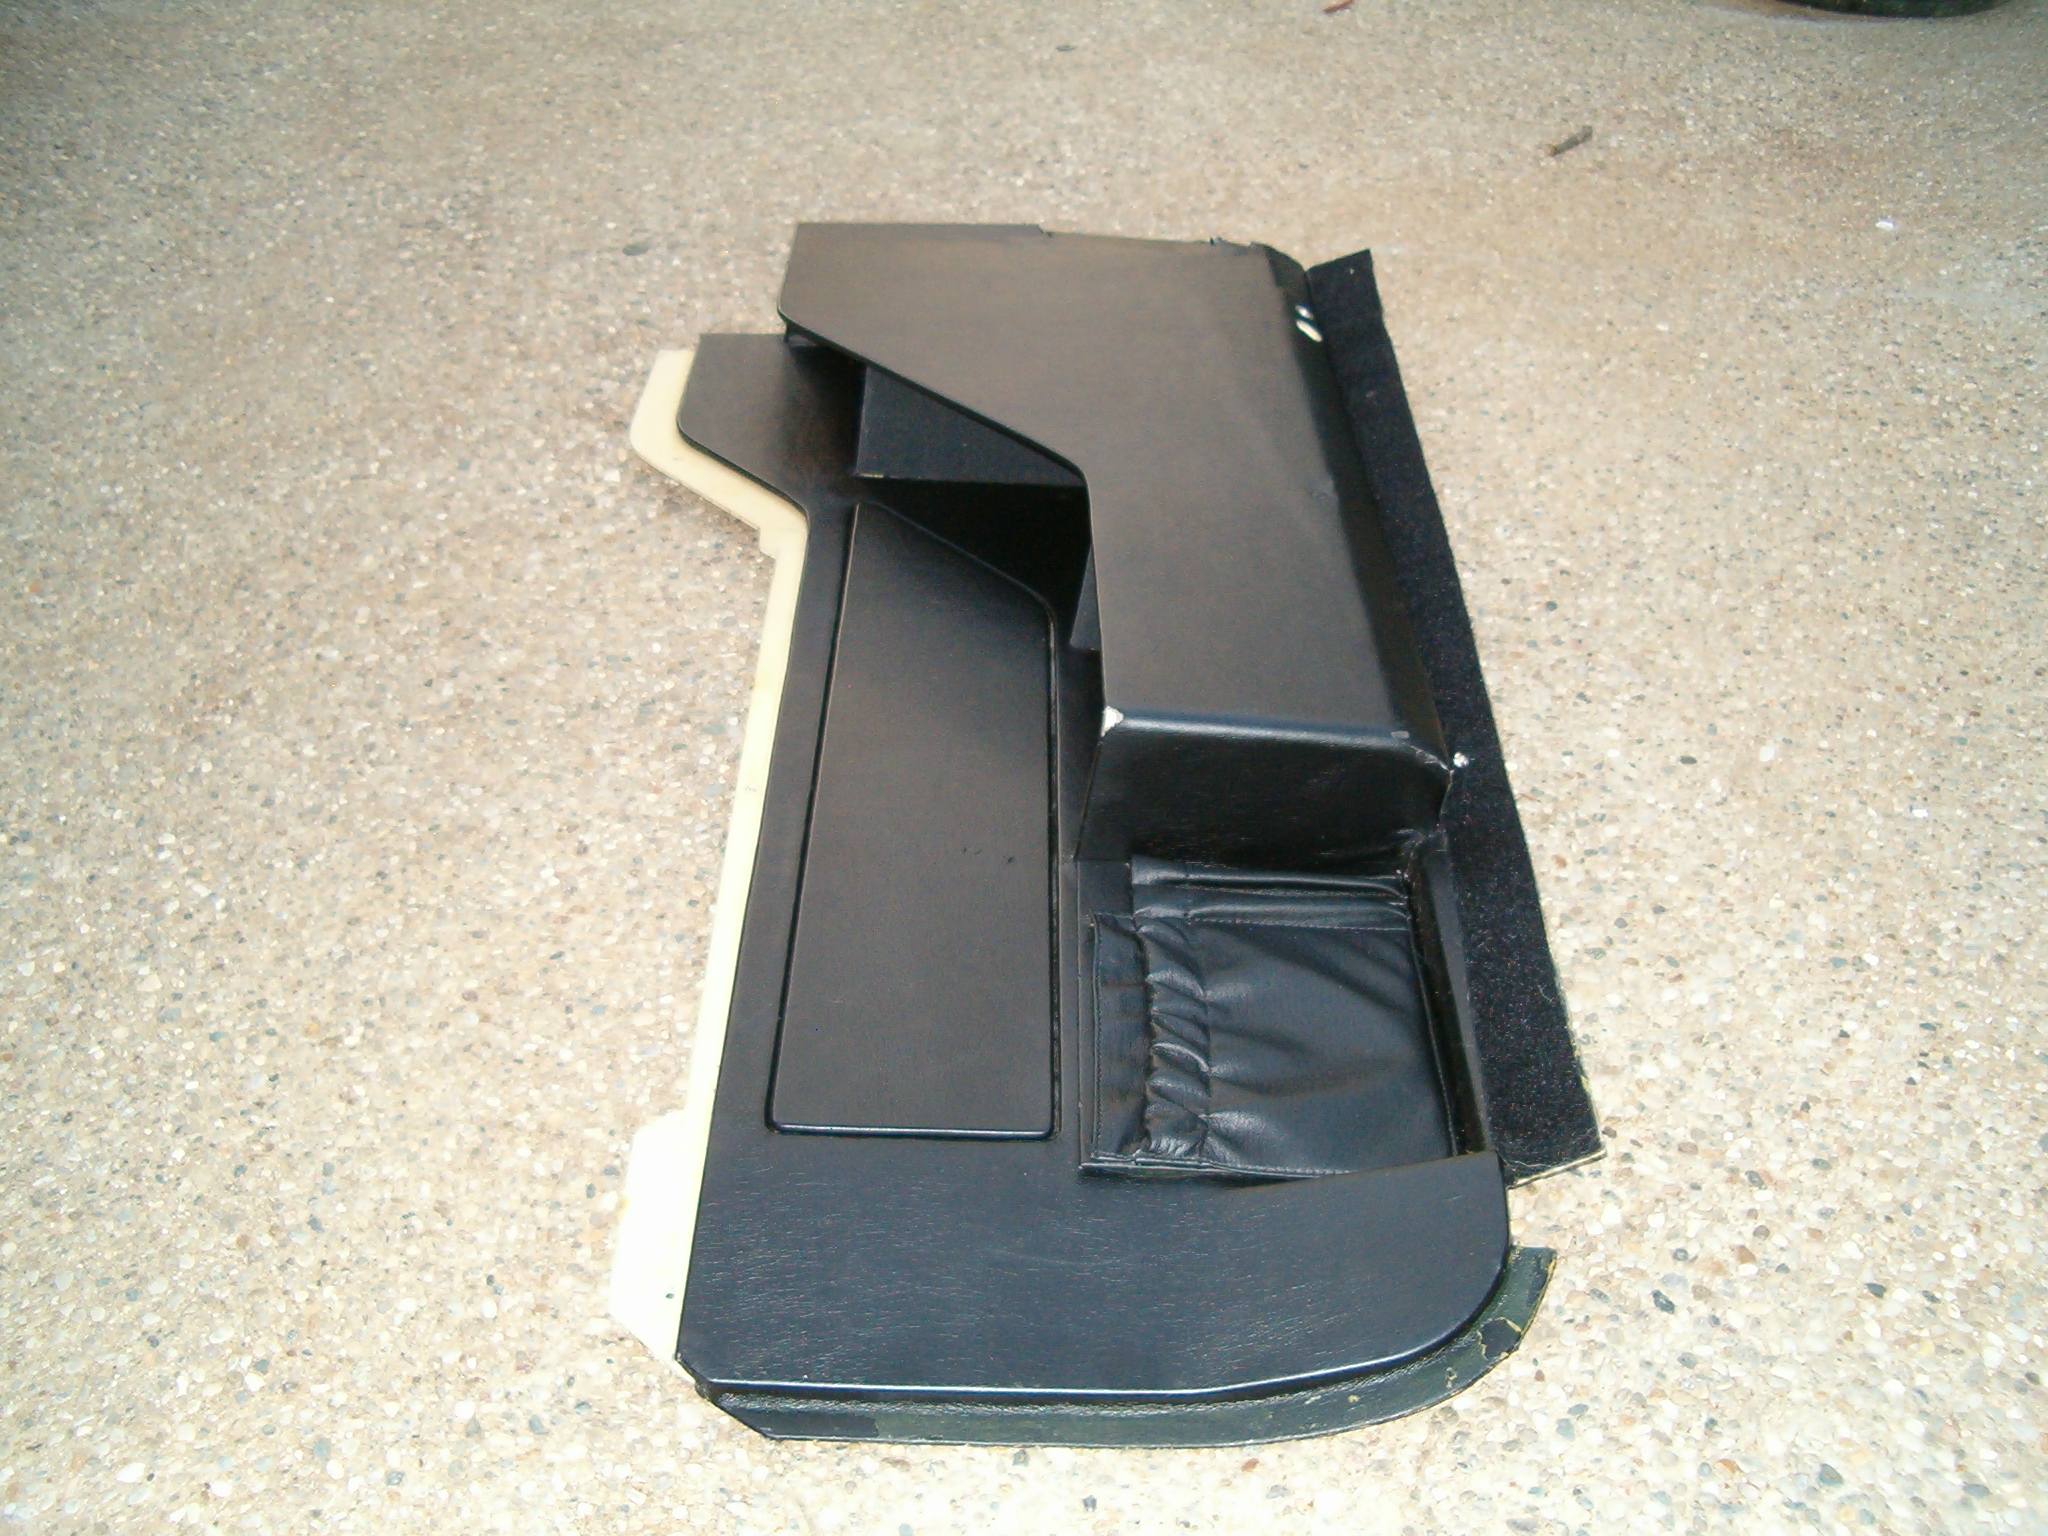
I was not sure which material to use, i have tried hardboard which i have used on the inside of the shell, but this is hard to bend and not very rigid.
So for the ceiling i used a sort of hard foam, which bends nicely and is available in several colors.
In the end i created glassfibre panels.
Whish i noticed it when creating my shell :S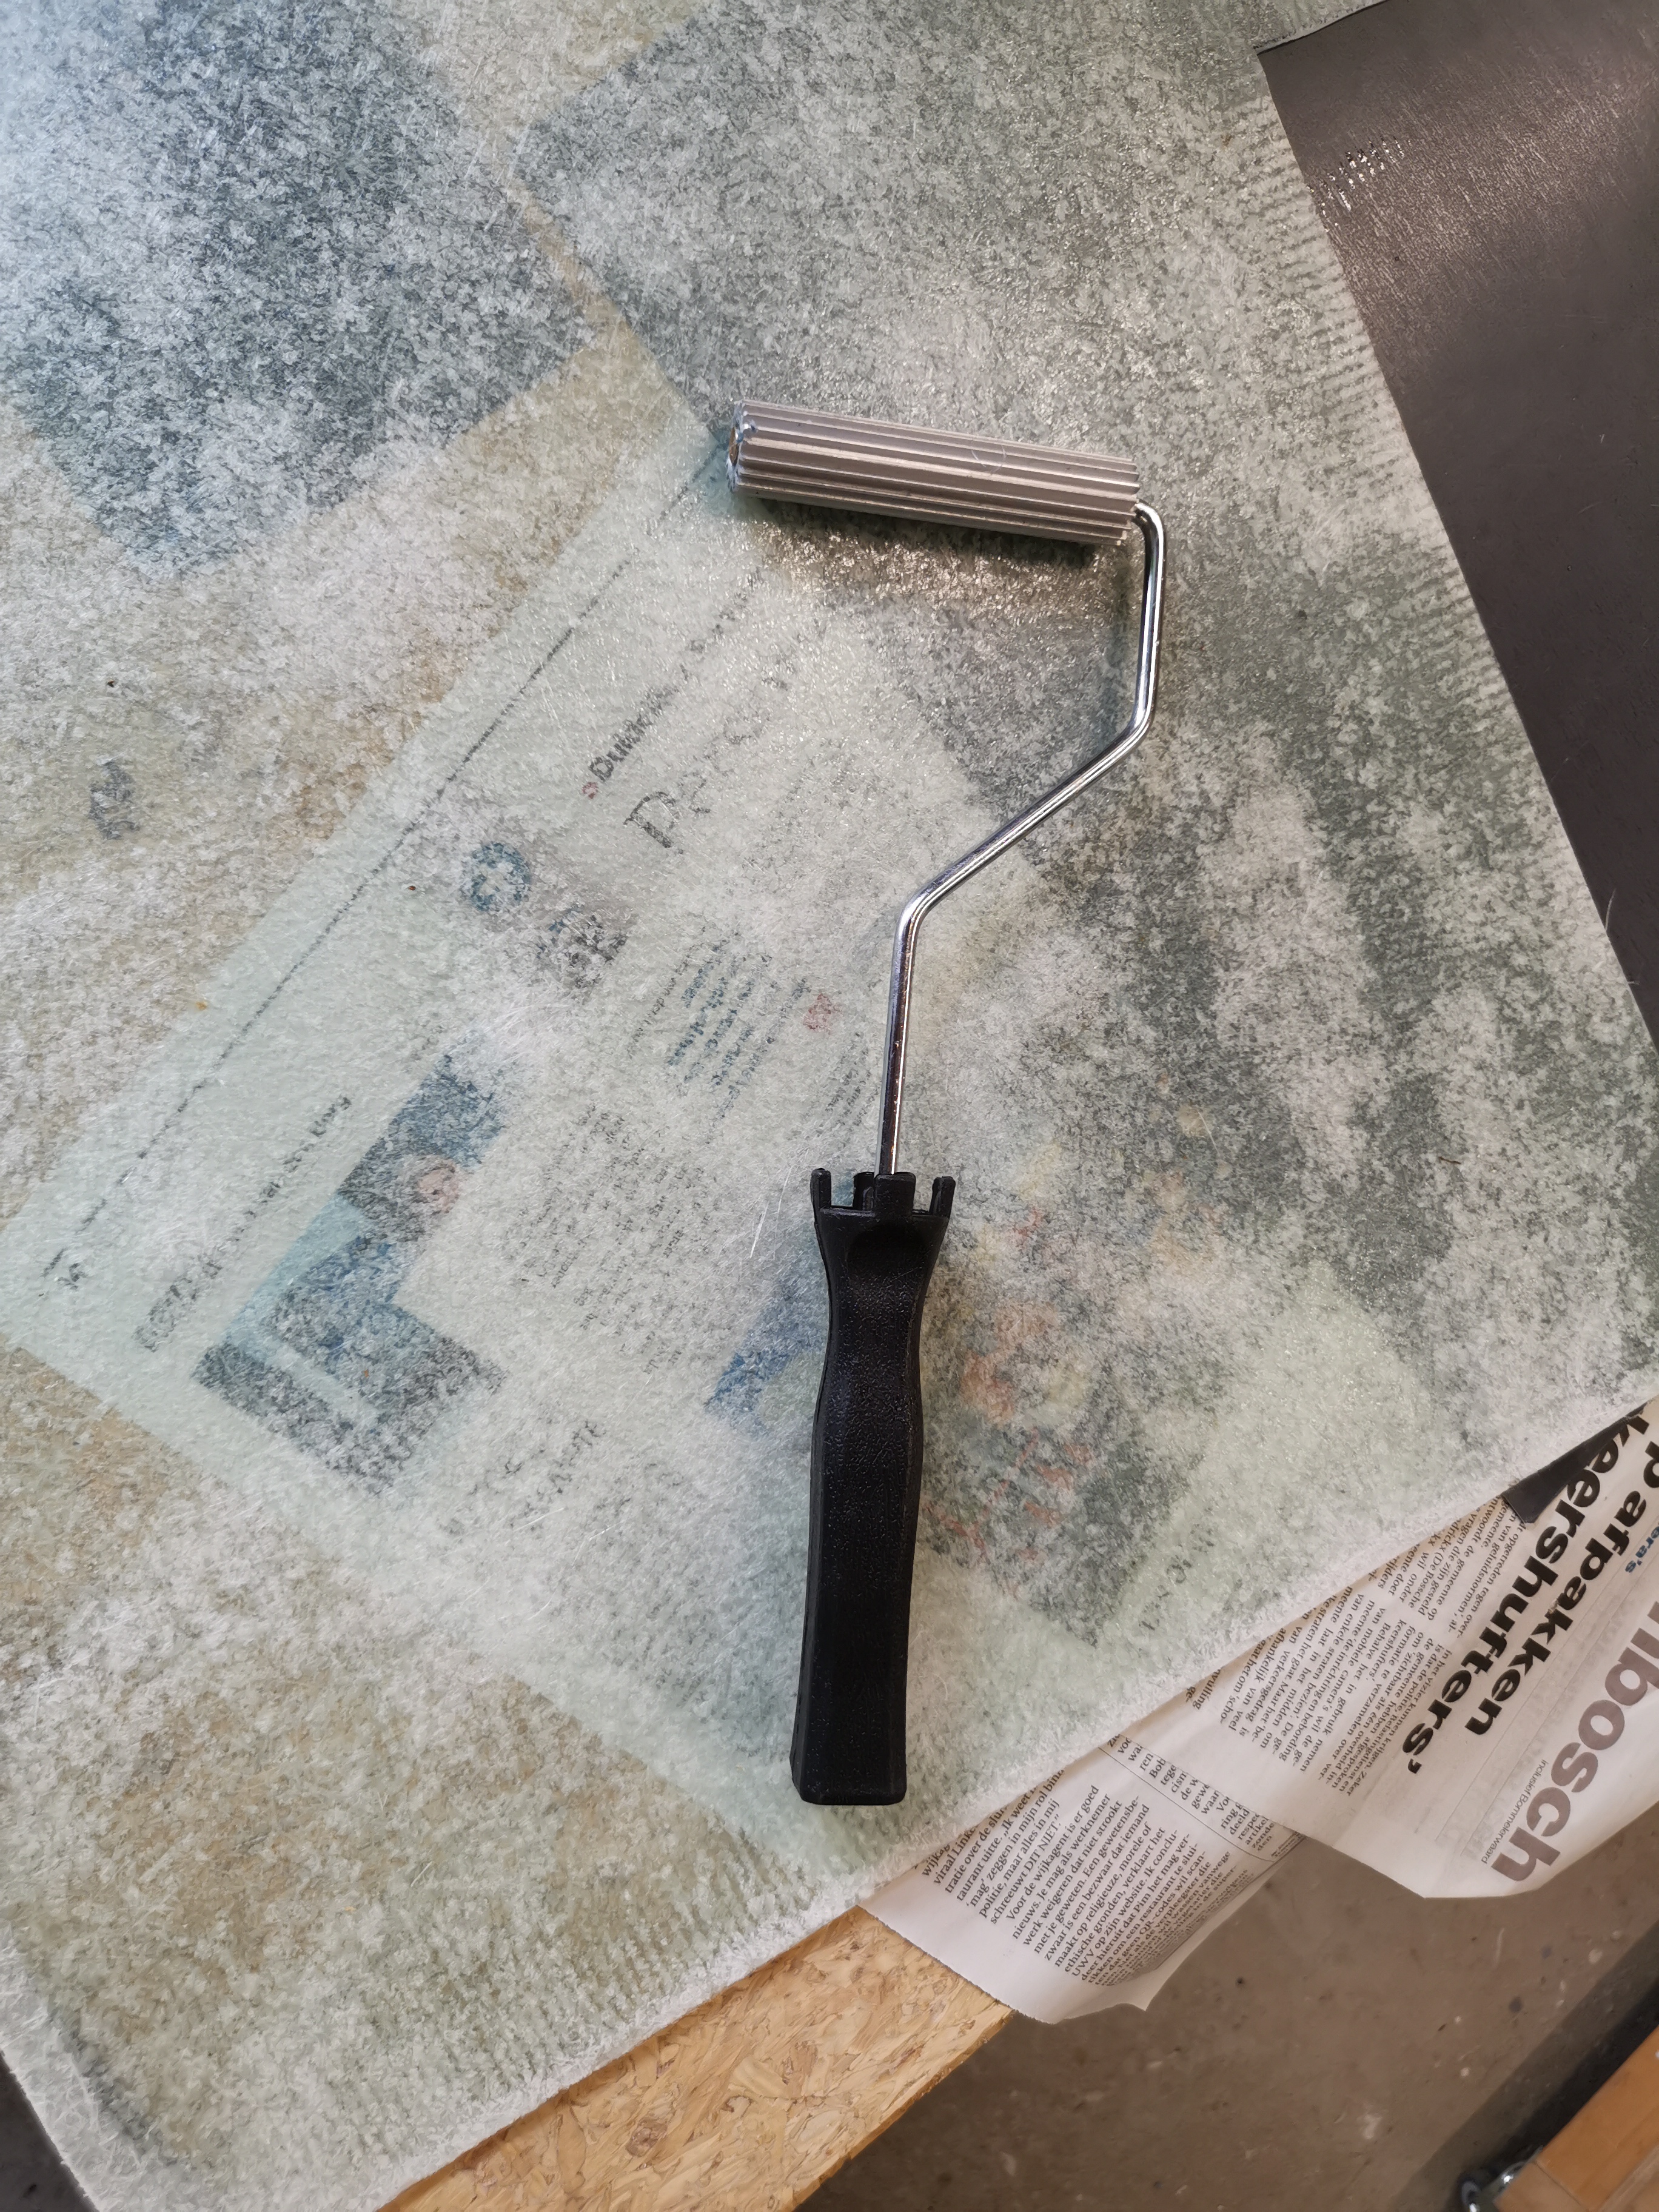
But then i ordered some of then same artificial leather as i used for my glareshield.
So i covered all the panels, top and side with this leather in white (RAL 9001) and it looks great!!, better then painting.
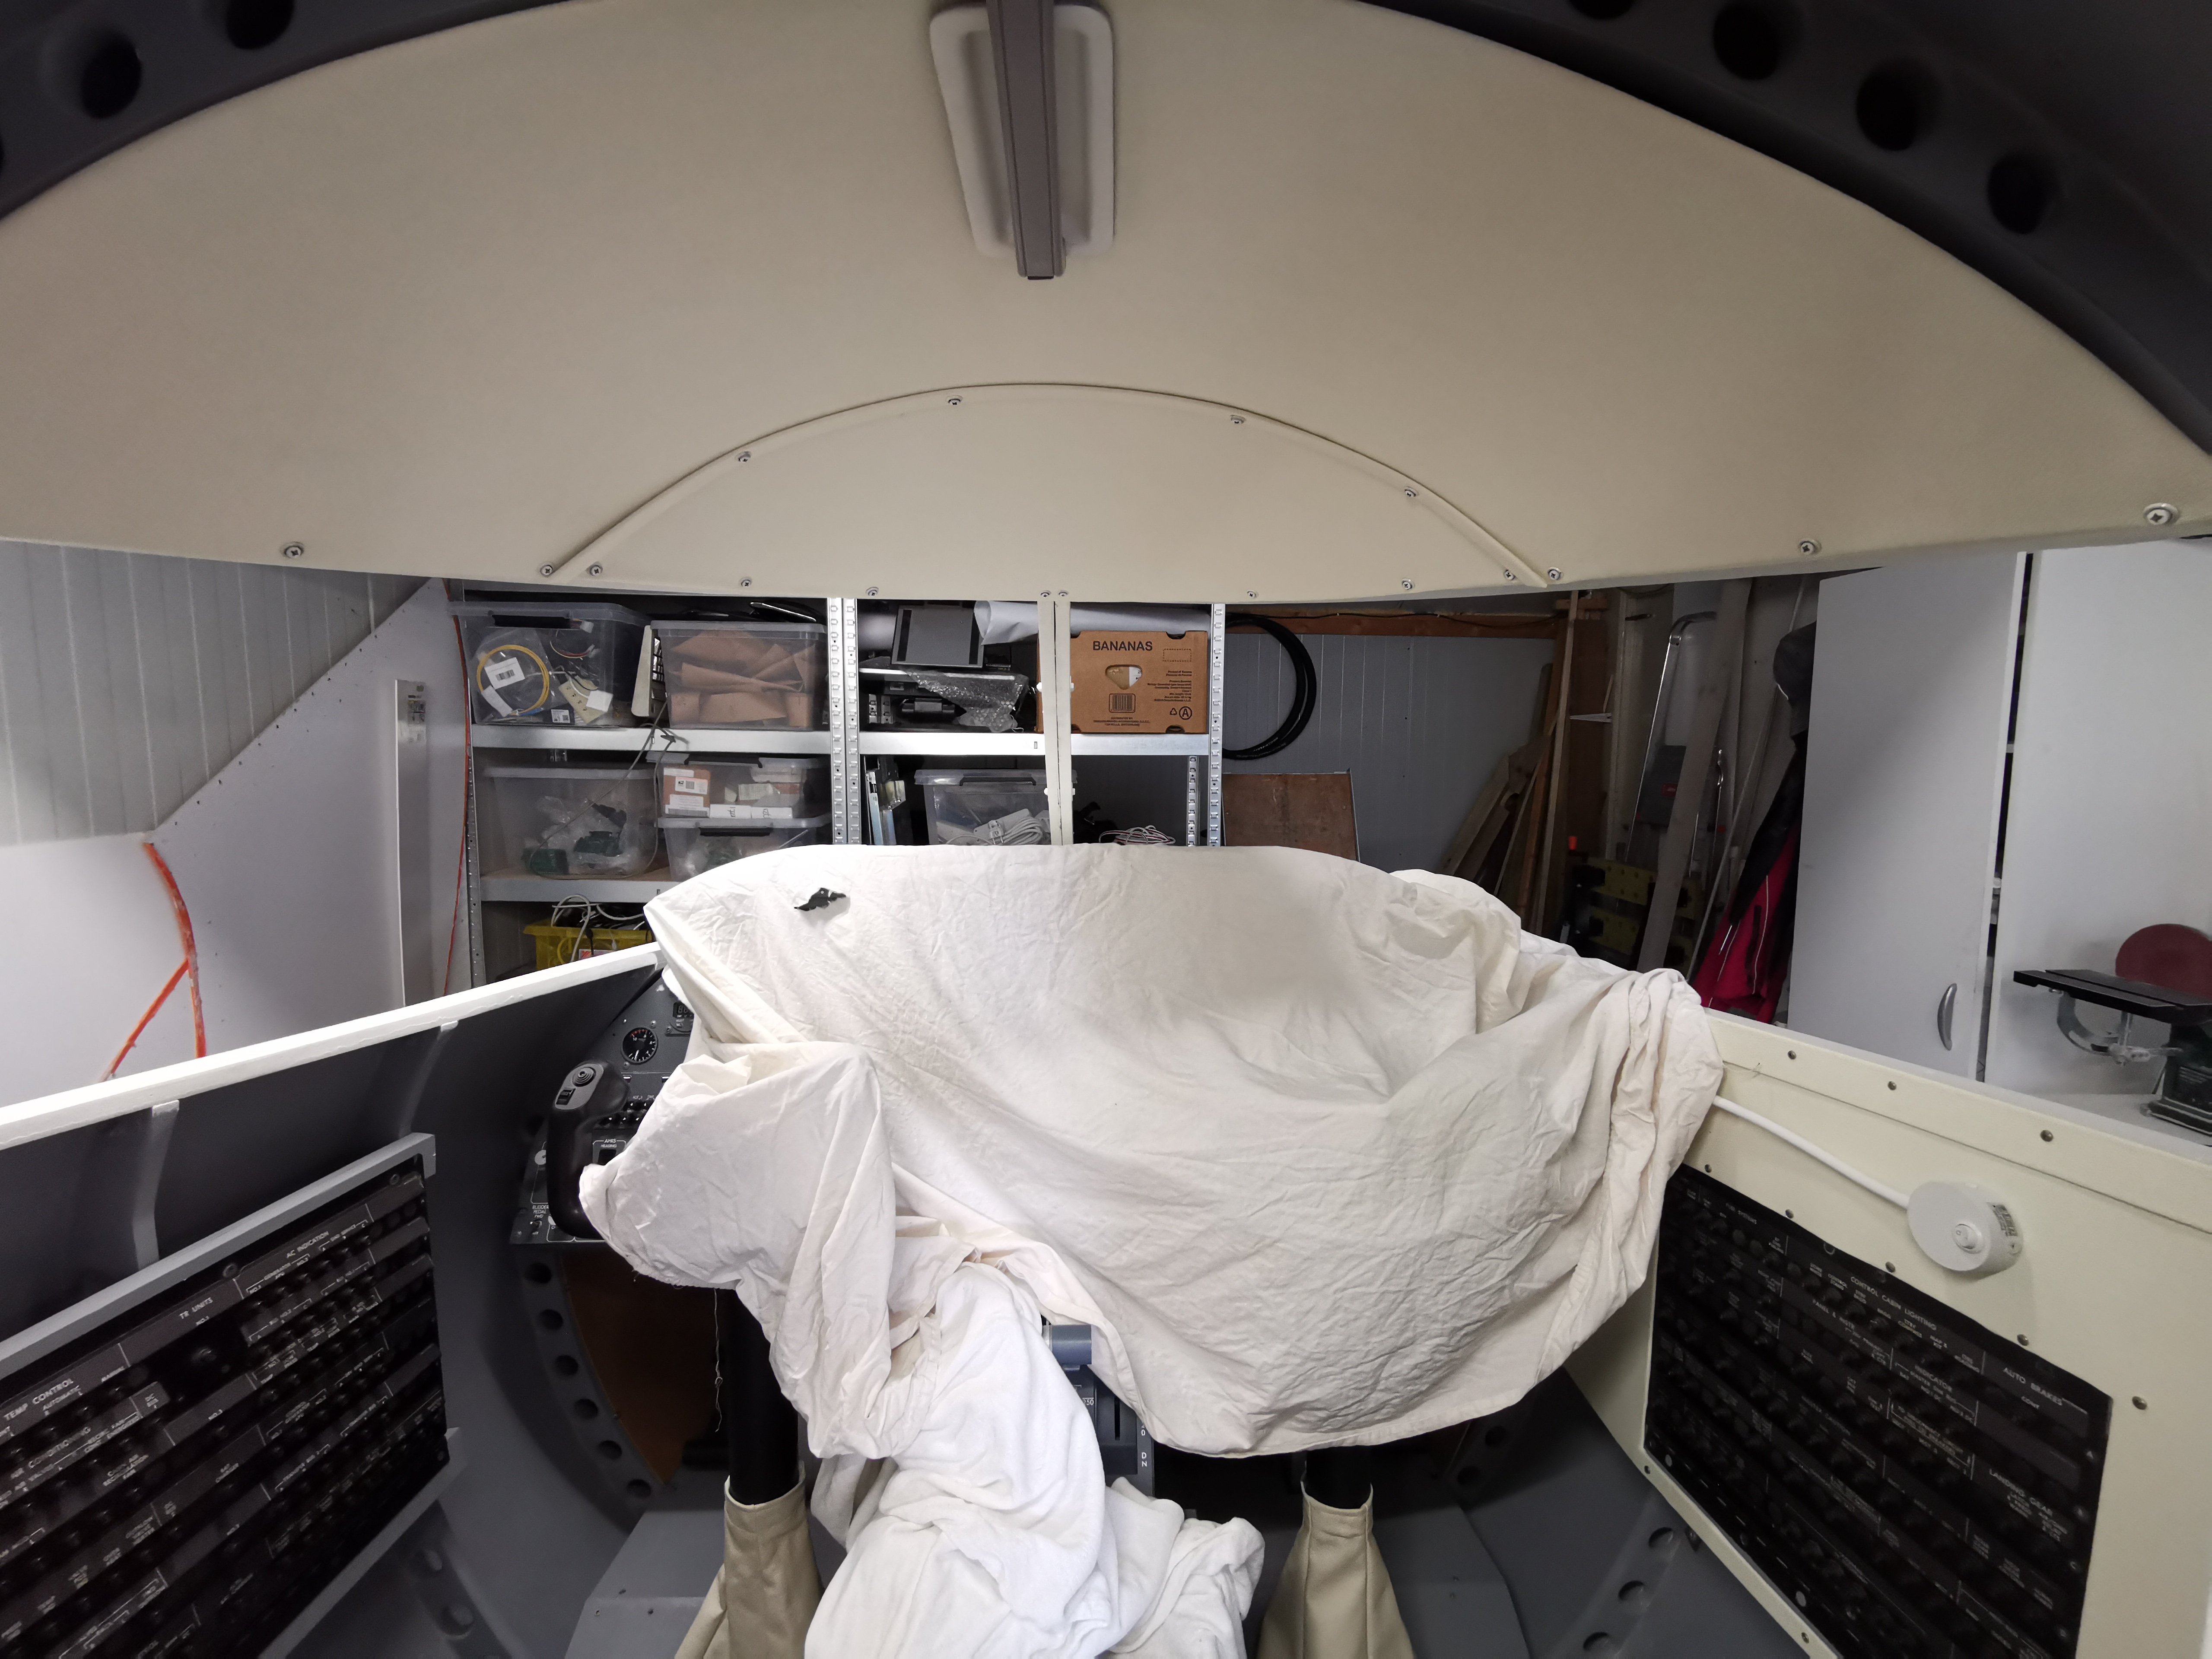
All is mounted with M4 inserts in the shell.
So i am working on the captain side panel , after that the lower panels with carpet.
I was not sure which material to use, i have tried hardboard which i have used on the inside of the shell, but this is hard to bend and not very rigid.
So for the ceiling i used a sort of hard foam, which bends nicely and is available in several colors.
In the end i created glassfibre panels.
Whish i noticed it when creating my shell :S
But then i ordered some of then same artificial leather as i used for my glareshield.
So i covered all the panels, top and side with this leather in white (RAL 9001) and it looks great!!, better then painting.
All is mounted with M4 inserts in the shell.
So i am working on the captain side panel , after that the lower panels with carpet.![]()
![]()
mine are different because i have my oem boeing fusepanels.
i know there is a company in germany who flies medical flights.
but after contacting them several times, still no luck …
mine are different because i have my oem boeing fusepanels.
i know there is a company in germany who flies medical flights.
but after contacting them several times, still no luck …![]()
Still have to make some of the trimming on the back of the shell.
Also chairs,windows and outside views still have to be done, but the end, if that ever will be, is in sight.
Still have to make some of the trimming on the back of the shell.
Also chairs,windows and outside views still have to be done, but the end, if that ever will be, is in sight.![]()
![]()
![]()
![]()
I fitted it to the captain side steering column , wired it up (it is 28v ) and connected it to one of the Arduino's.
I decided to leave it in the original grey color
It sure gives an extra reaslism dimension, it scares me when stalling 🙂
I fitted it to the captain side steering column , wired it up (it is 28v ) and connected it to one of the Arduino's.
I decided to leave it in the original grey color
It sure gives an extra reaslism dimension, it scares me when stalling 🙂![]()
Forum NavigationRoel's Learjet 45 simulator
![]() #141 · August 12, 2021, 10:08 am
#141 · August 12, 2021, 10:08 am![]() #142 · October 11, 2021, 10:44 am
#142 · October 11, 2021, 10:44 am![]() #143 · October 11, 2021, 3:09 pm
#143 · October 11, 2021, 3:09 pm![]() #144 · October 11, 2021, 3:47 pm
#144 · October 11, 2021, 3:47 pm![]() #145 · November 15, 2021, 3:21 pm
#145 · November 15, 2021, 3:21 pm![]() #146 · November 15, 2021, 5:49 pm
#146 · November 15, 2021, 5:49 pm![]() #147 · November 18, 2021, 9:07 am
#147 · November 18, 2021, 9:07 am![]() #148 · November 18, 2021, 9:47 am
#148 · November 18, 2021, 9:47 am![]() #149 · June 18, 2022, 12:50 pm
#149 · June 18, 2022, 12:50 pm![]() #150 · June 19, 2022, 7:39 am
#150 · June 19, 2022, 7:39 am
2017-10-10