


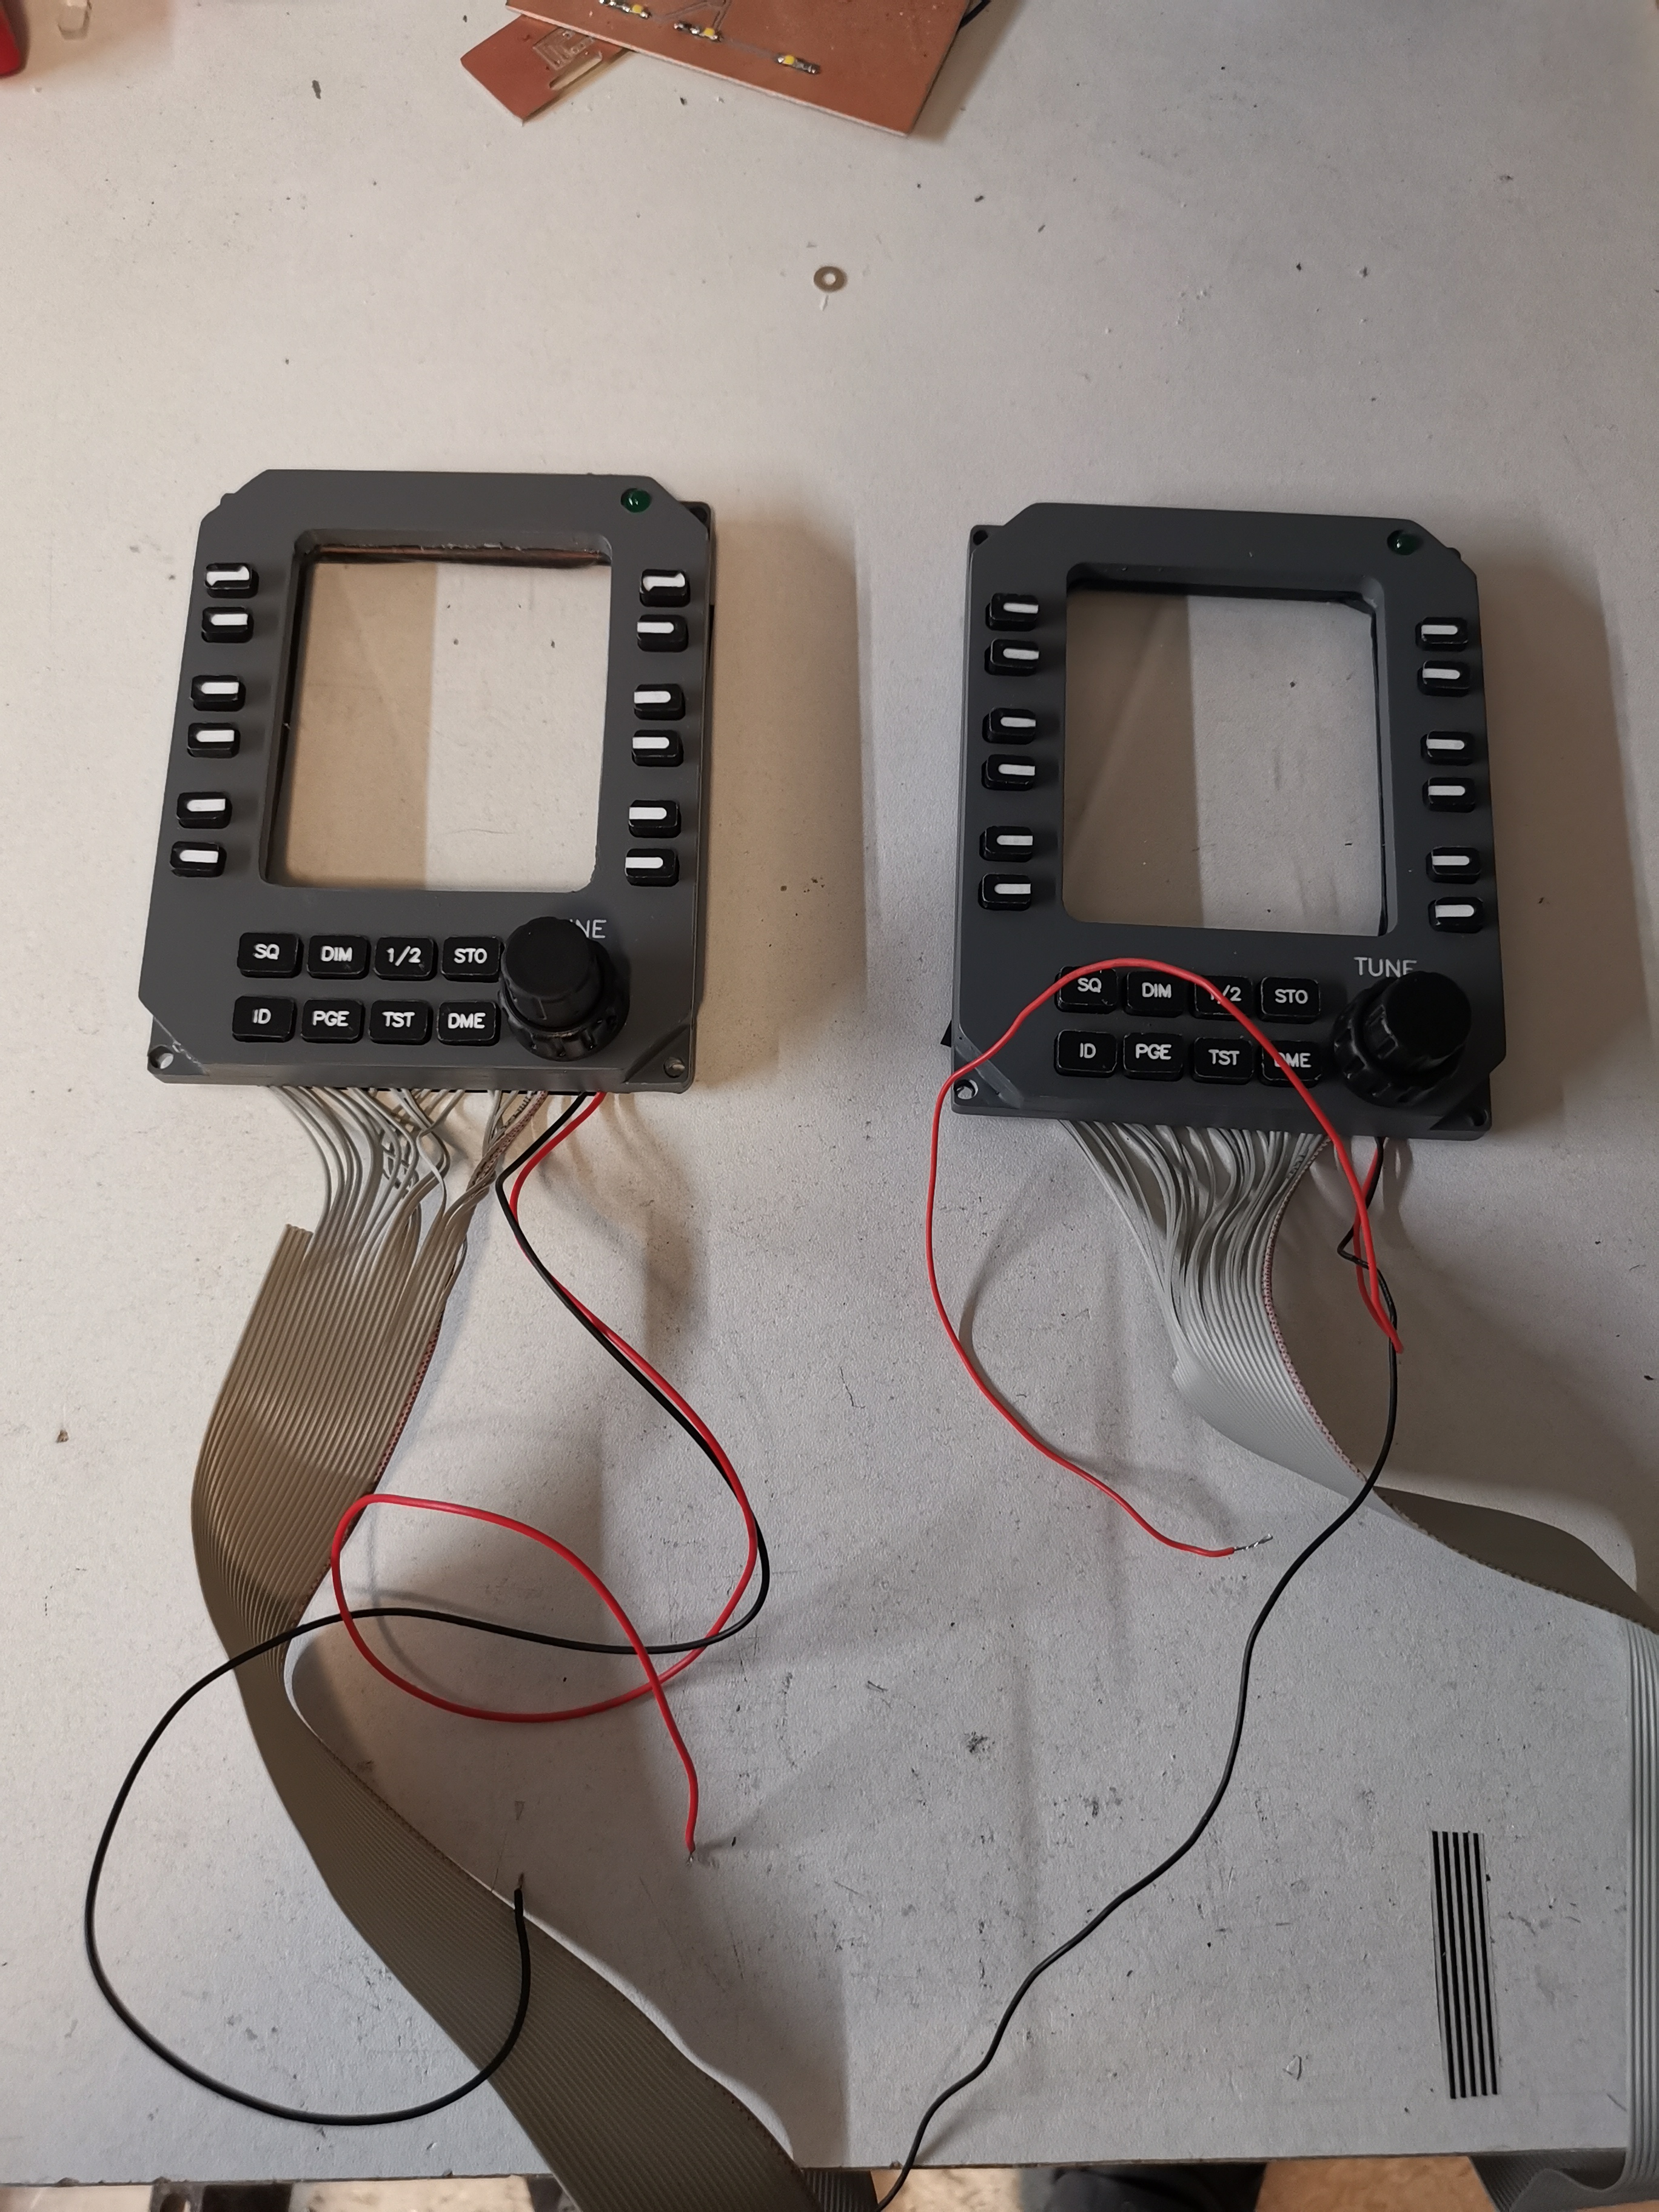
Well i was planning to backlight it with LED's, I have some decals spare because it didnt matter if i ordered 1 or 20, so i ordered 20 😉 Well i was planning to backlight it with LED's, I have some decals spare because it didnt matter if i ordered 1 or 20, so i ordered 20 😉 Hey Roel, Yes, the back lighting is the trick with these and just about everything that we do. I think this solution or something along the same path as what you have here is going to be the key to the back lighting problem. Yes, please send a couple this way for testing. Thanks Roel! Hey Roel, Yes, the back lighting is the trick with these and just about everything that we do. I think this solution or something along the same path as what you have here is going to be the key to the back lighting problem. Yes, please send a couple this way for testing. Thanks Roel! I managed to create my 2 RMU's After some expirimenting my RMU is build of 5 layers of 3 mm acryl. All the parts toghether. So MIP parts allmost ready. Oh and do alot of wiring ... I managed to create my 2 RMU's After some expirimenting my RMU is build of 5 layers of 3 mm acryl. All the parts toghether. So MIP parts allmost ready. Oh and do alot of wiring ... The RMUs are one of the most difficult panels to build but also one of the most satisfying panels once they are complete. And they will be backlit! Great work Roel! Your project is coming along nicely. The RMUs are one of the most difficult panels to build but also one of the most satisfying panels once they are complete. And they will be backlit! Great work Roel! Your project is coming along nicely. Roel, do you have any pictures of how you installed your Saitek yokes on the column heads? I did a hack job but I'm curious on how you did it. Do you have any pictures on how you installed the Saitek Yoke onto the column head? I did a hack job, but curious how you did it. Roel, do you have any pictures of how you installed your Saitek yokes on the column heads? I did a hack job but I'm curious on how you did it. Do you have any pictures on how you installed the Saitek Yoke onto the column head? I did a hack job, but curious how you did it. Today i finished a chronometer. So i decided to make them myselves. The Arduino TM1637 clock display looks perfect and is in amber color available. I will explain when it is finished in my arduino topic more about this. Today i finished a chronometer. So i decided to make them myselves. The Arduino TM1637 clock display looks perfect and is in amber color available. I will explain when it is finished in my arduino topic more about this. Next time you need something shipped from US homeland, let me know, just be prepared for a month of waiting. USPS shipping timing for international packages is horribly long but that’s cheapest option. Next time you need something shipped from US homeland, let me know, just be prepared for a month of waiting. USPS shipping timing for international packages is horribly long but that’s cheapest option. Hey Roel, that is some very impressive work on the chronometers! Where were you ten years ago? LOL Most of us spent the money and have a set of real Davtron clocks. As you said, they are nice but expensive. Keep us posted on this clock work. It is an area of our build that could certainly use some additional options for our builders. Hey Roel, that is some very impressive work on the chronometers! Where were you ten years ago? LOL Most of us spent the money and have a set of real Davtron clocks. As you said, they are nice but expensive. Keep us posted on this clock work. It is an area of our build that could certainly use some additional options for our builders. Next time you need something shipped from US homeland, let me know, just be prepared for a month of waiting. USPS shipping timing for international packages is horribly long but that’s cheapest option. Oh that would be great. Next time you need something shipped from US homeland, let me know, just be prepared for a month of waiting. USPS shipping timing for international packages is horribly long but that’s cheapest option. Oh that would be great. Progress on my Sim is going well. Also my panels which were present were backlighted with a sort of 12v lightbulbs, i replaced them all with 5V smd LED's wich is easier to interface. I decided to replace my 17" DU monitors with 15", so ordered some from China, but they did not light up.... So now the wiring of it all has started. Progress on my Sim is going well. Also my panels which were present were backlighted with a sort of 12v lightbulbs, i replaced them all with 5V smd LED's wich is easier to interface. I decided to replace my 17" DU monitors with 15", so ordered some from China, but they did not light up.... So now the wiring of it all has started. Roel's Learjet 45 simulator
![]()
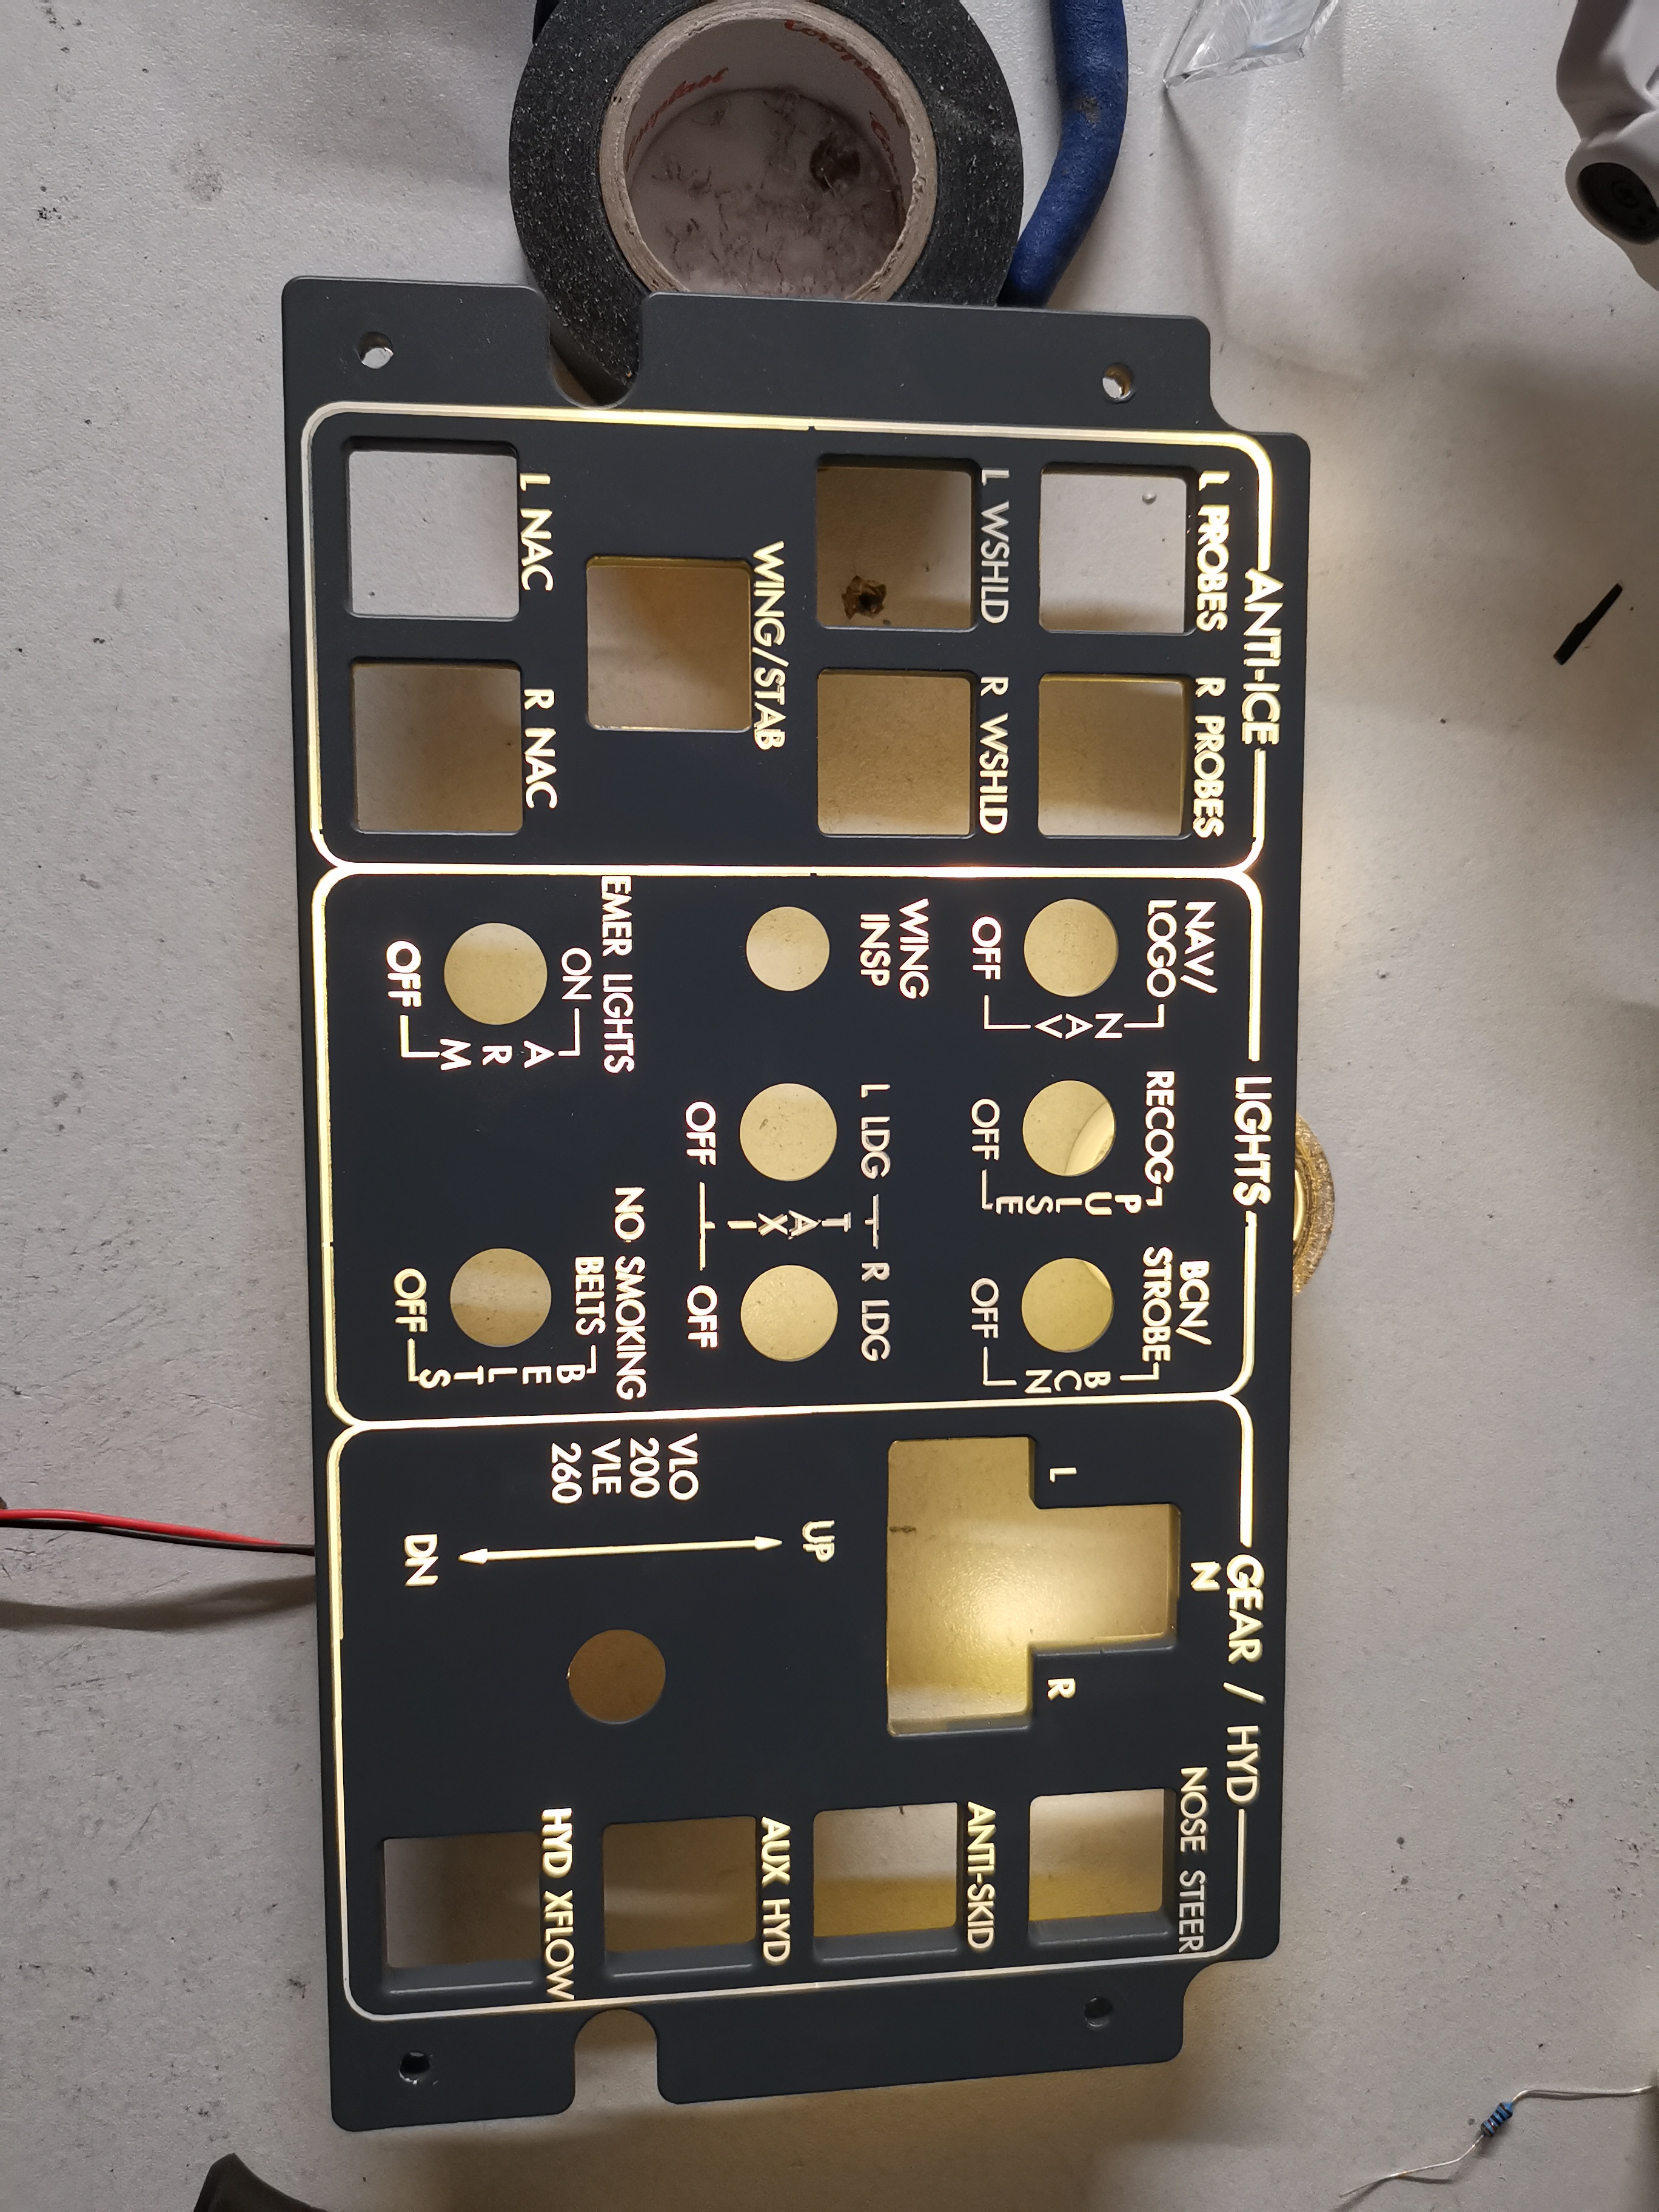
I ordered stickers at a webshop; i converted an jpeg image of the dialplate to a vector and they delivered nice decals.
But i was assuming the stickermaterial was white, but is was grey, so that was no good for backligjhting.
I saw that these gauges use illimination with a little lightbulb or led, so instead of ordering new decals i tried this option, and this also looks ok.
I can send you some if you like.
I ordered stickers at a webshop; i converted an jpeg image of the dialplate to a vector and they delivered nice decals.
But i was assuming the stickermaterial was white, but is was grey, so that was no good for backligjhting.
I saw that these gauges use illimination with a little lightbulb or led, so instead of ordering new decals i tried this option, and this also looks ok.
I can send you some if you like.![]()
![]()
The more stuff i create the better it works, but that is obvious i think.
Because of my chinese milling machine I do limit myselve to 3mm acryl, this means i have to make layers and glue them together.
But this seems to work pretty well.
PCB is of Ron's design.
I tried different options with illuminated led switches, but since there is limited space to mount them i followed Ron's PCB and it looks great.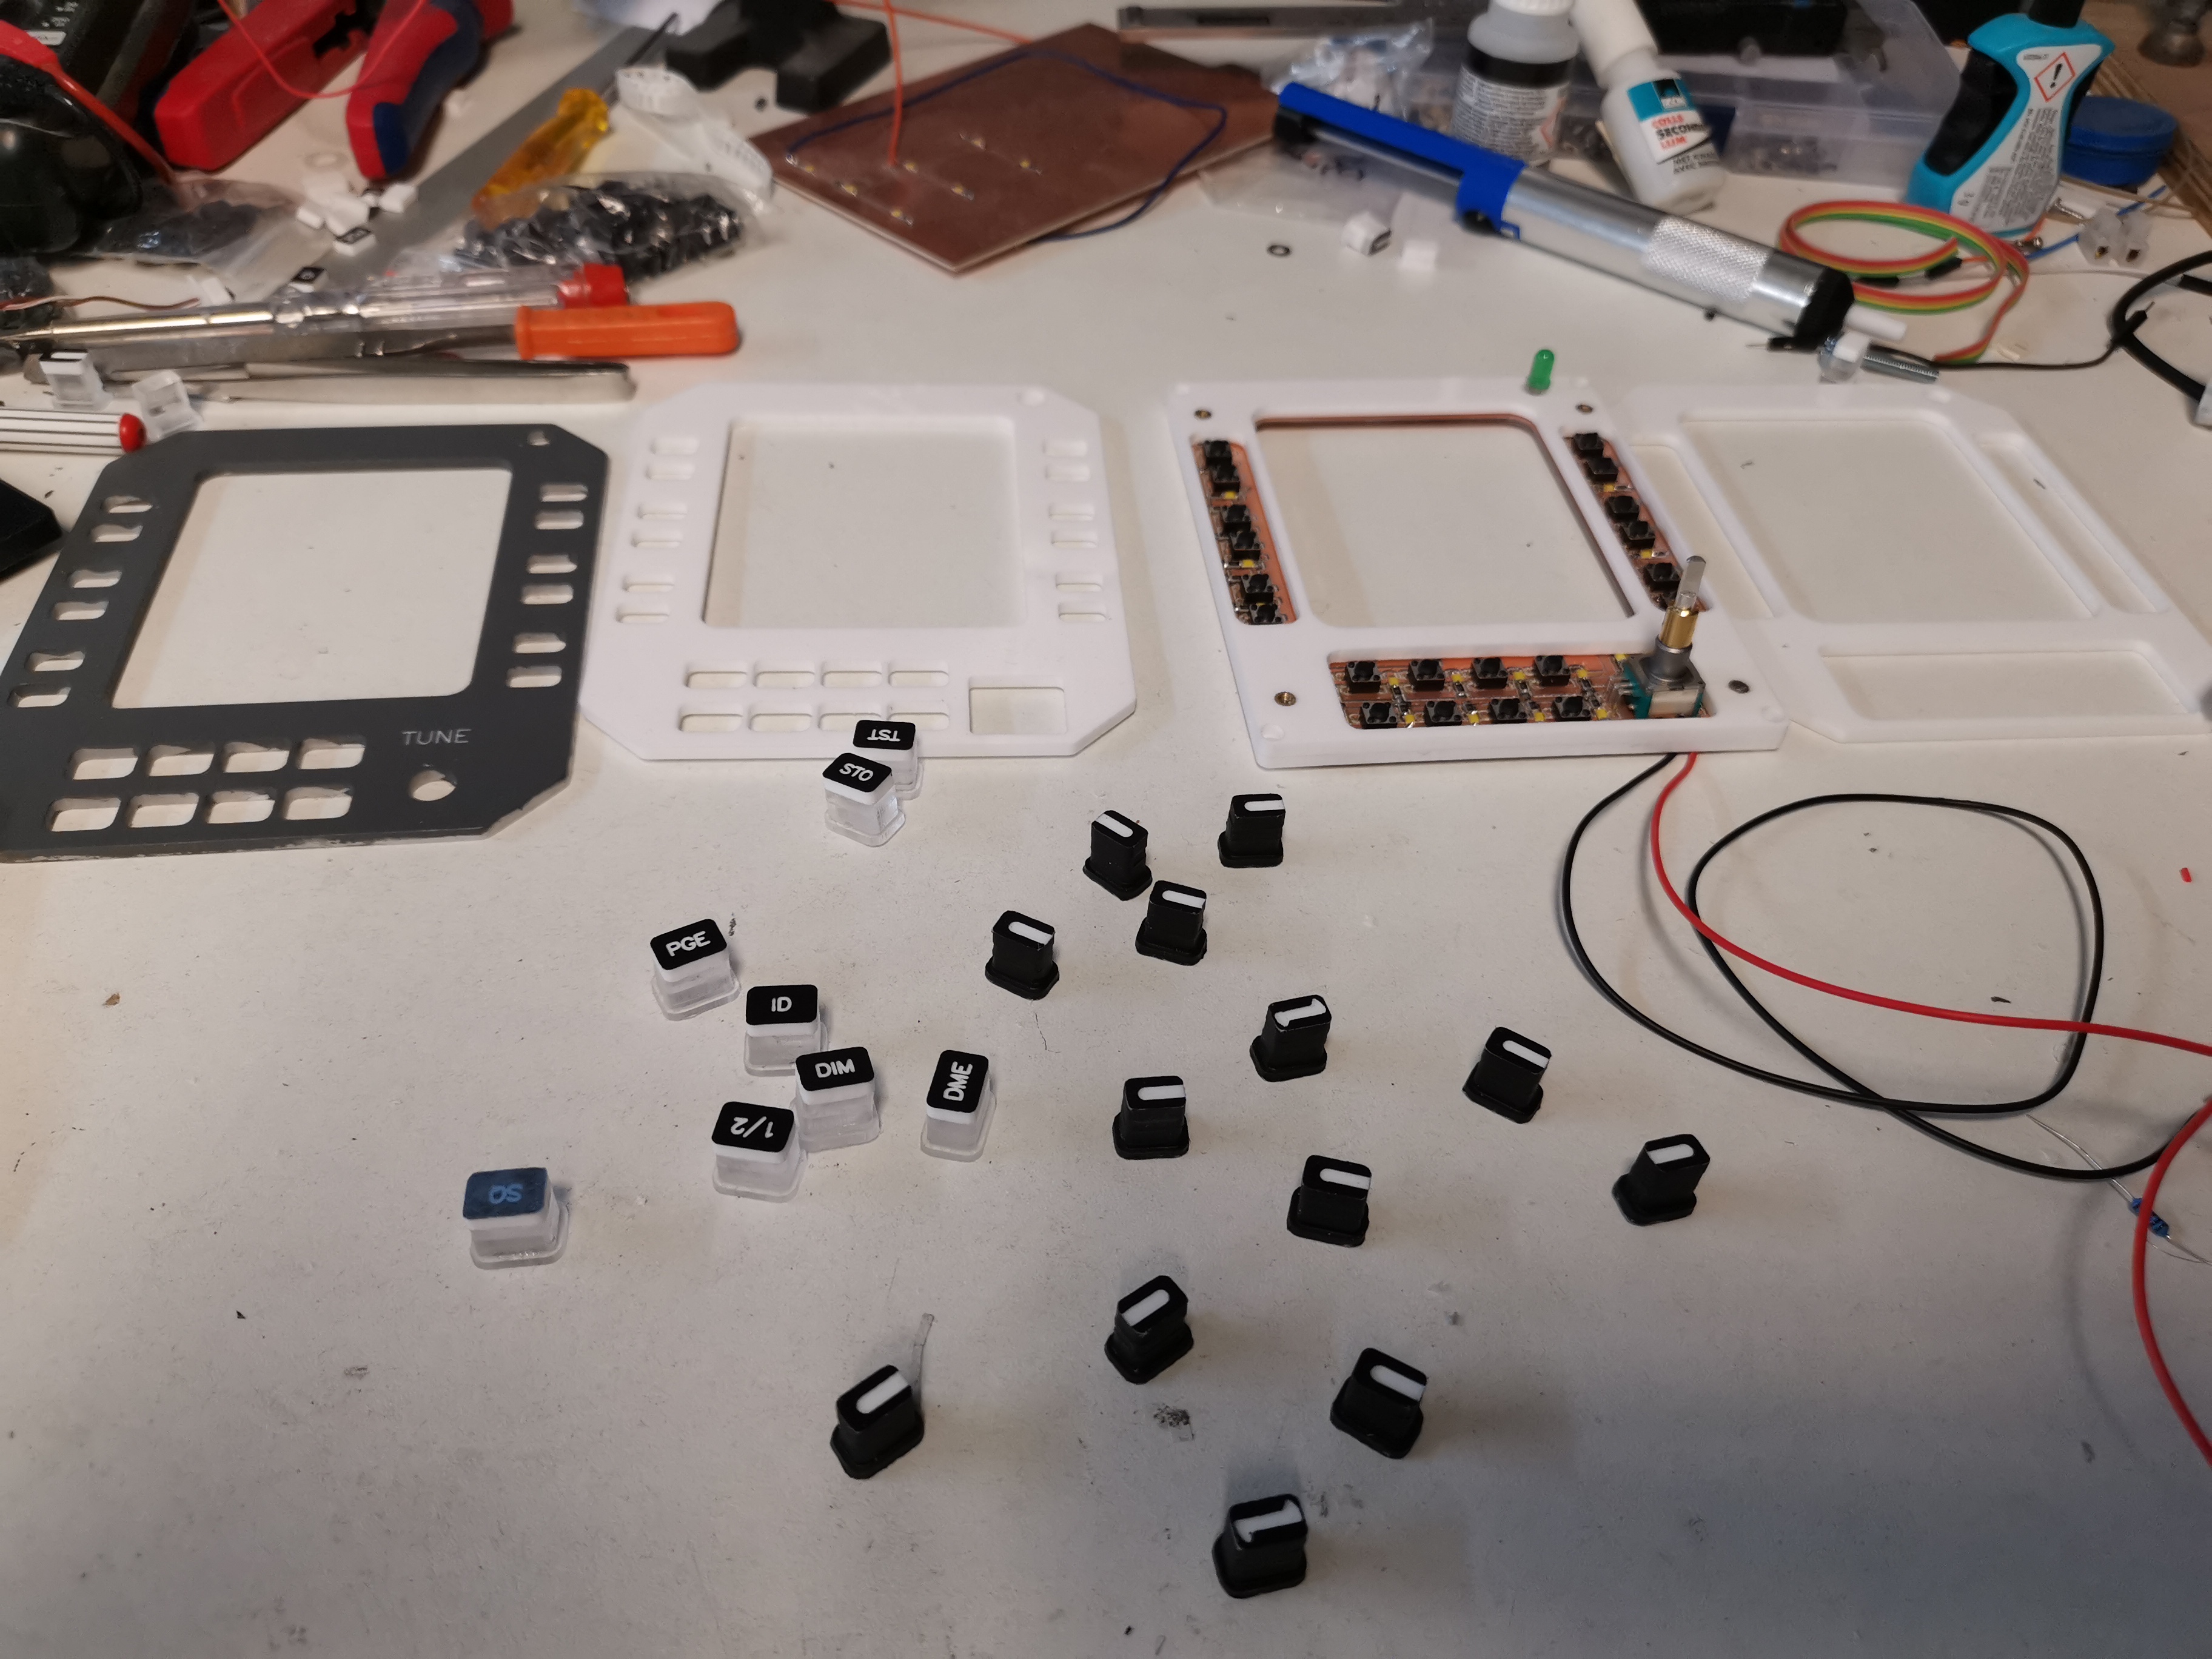
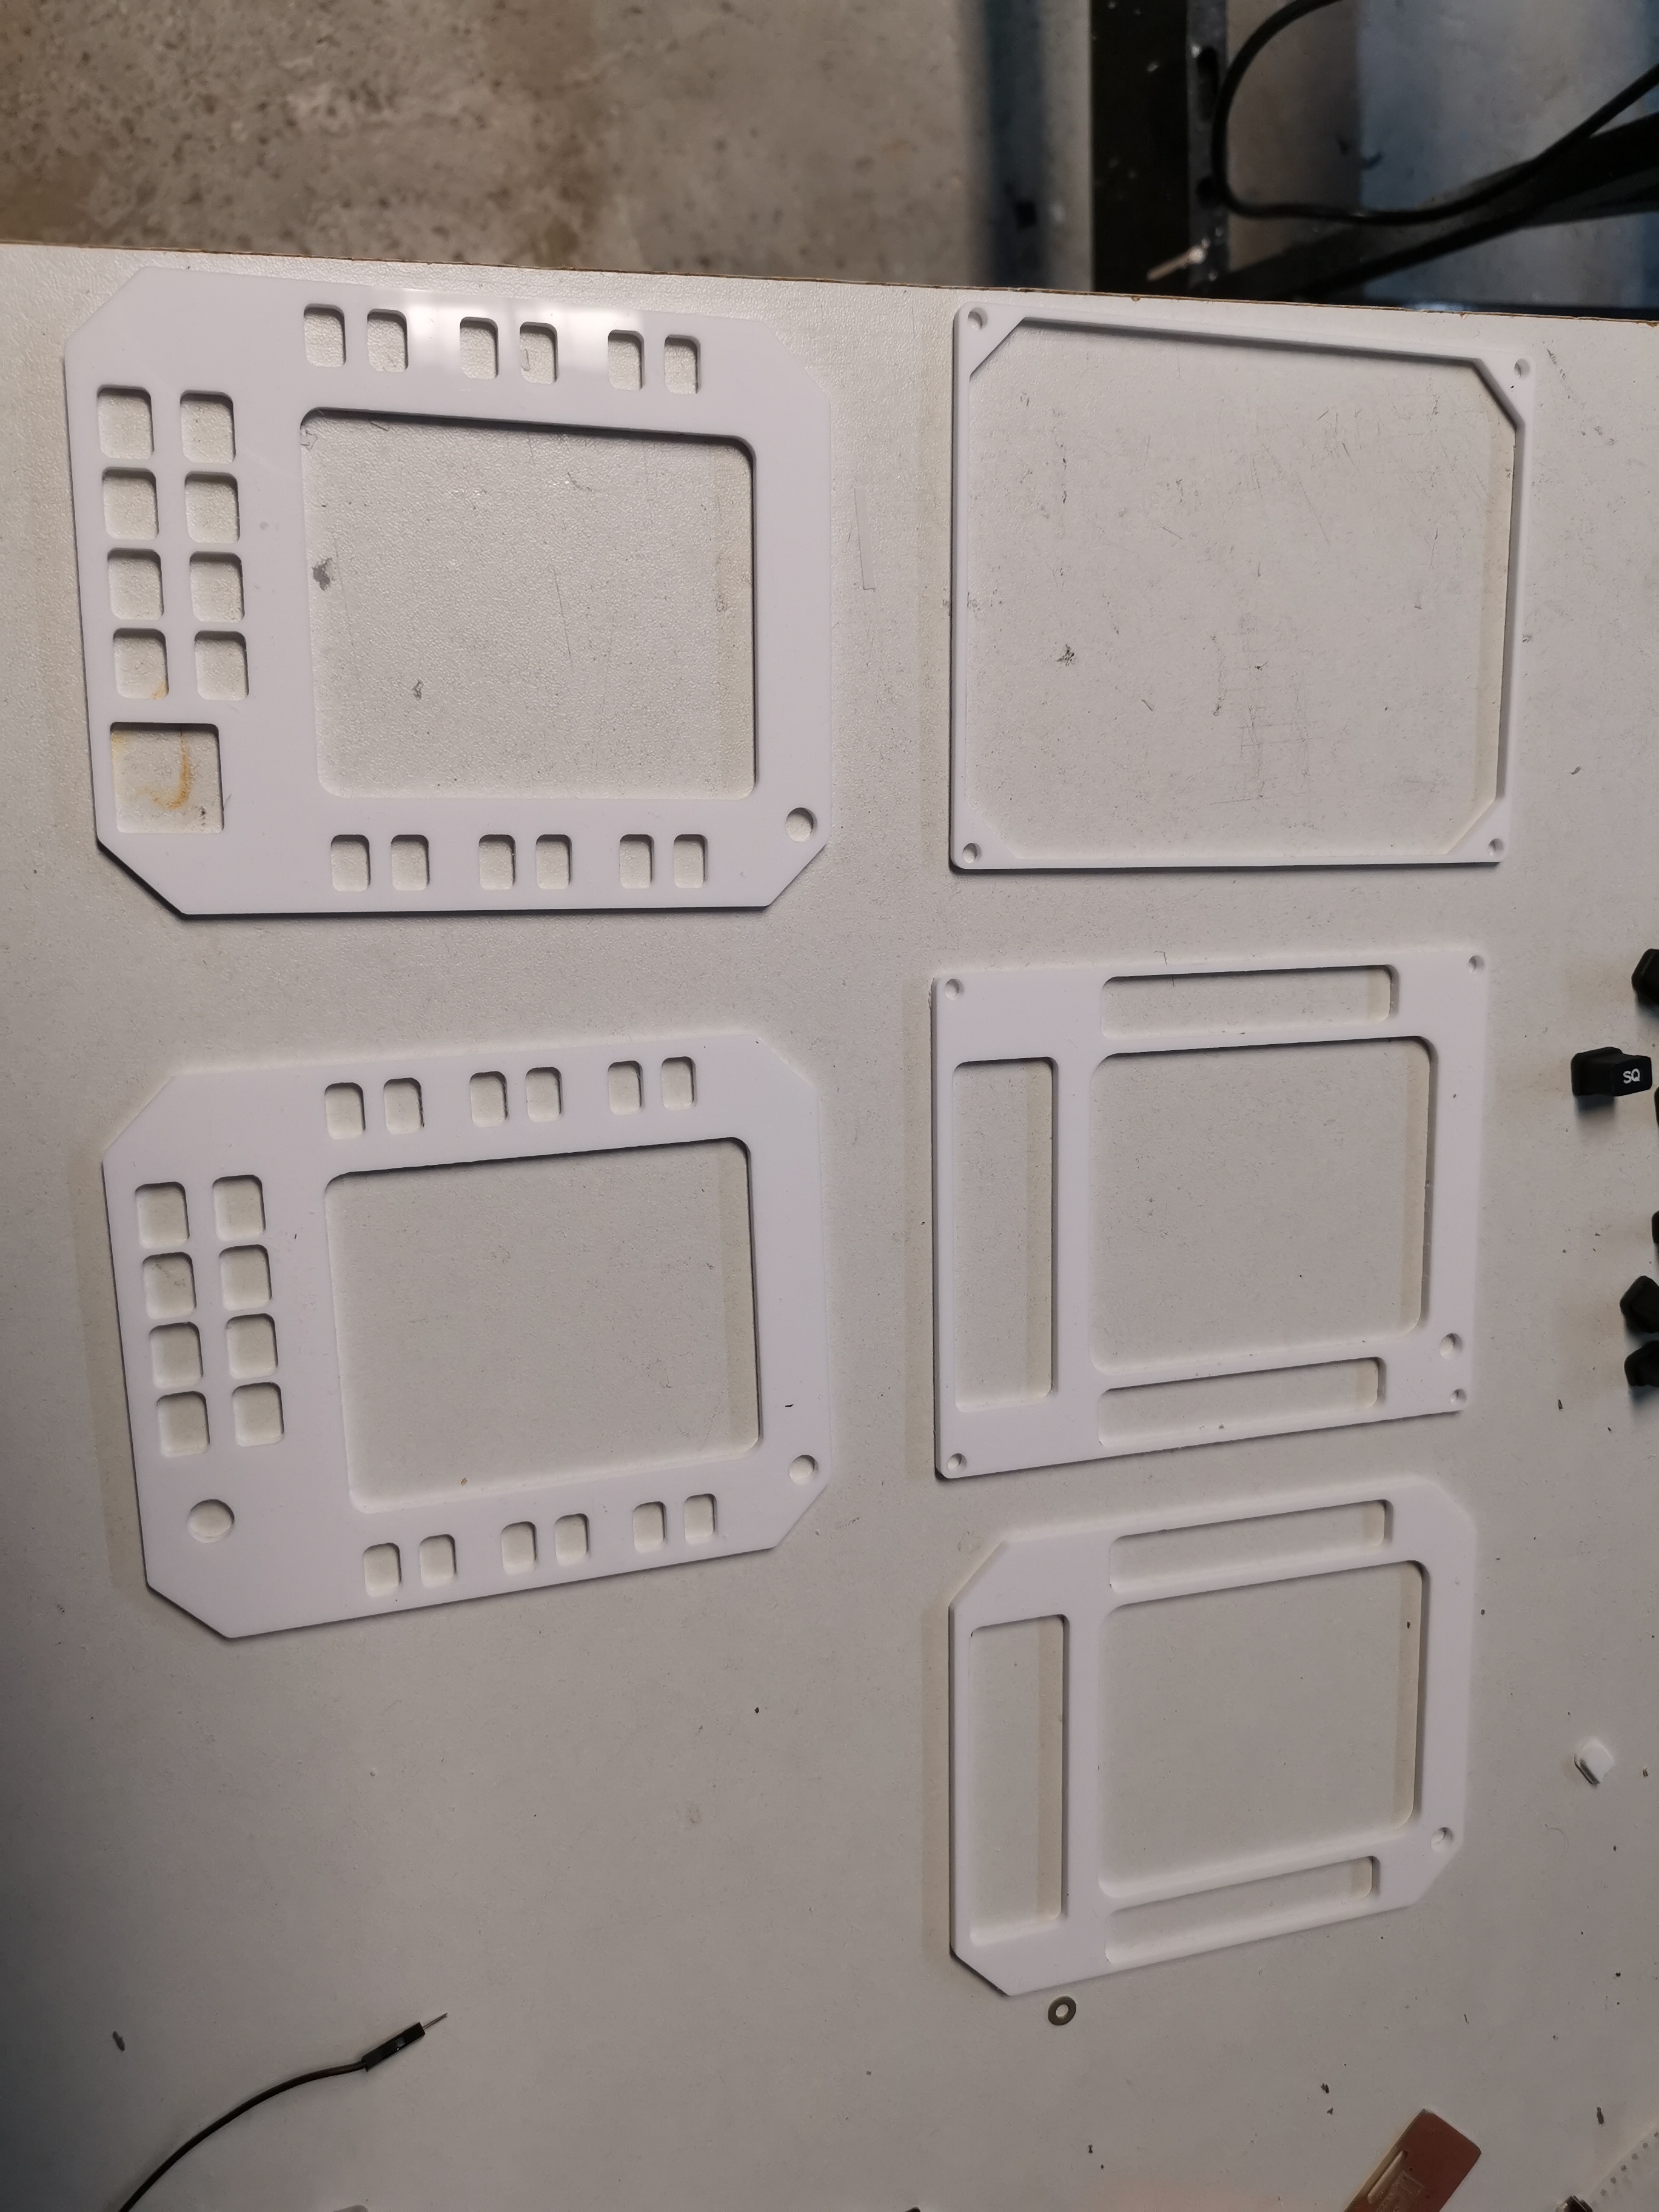
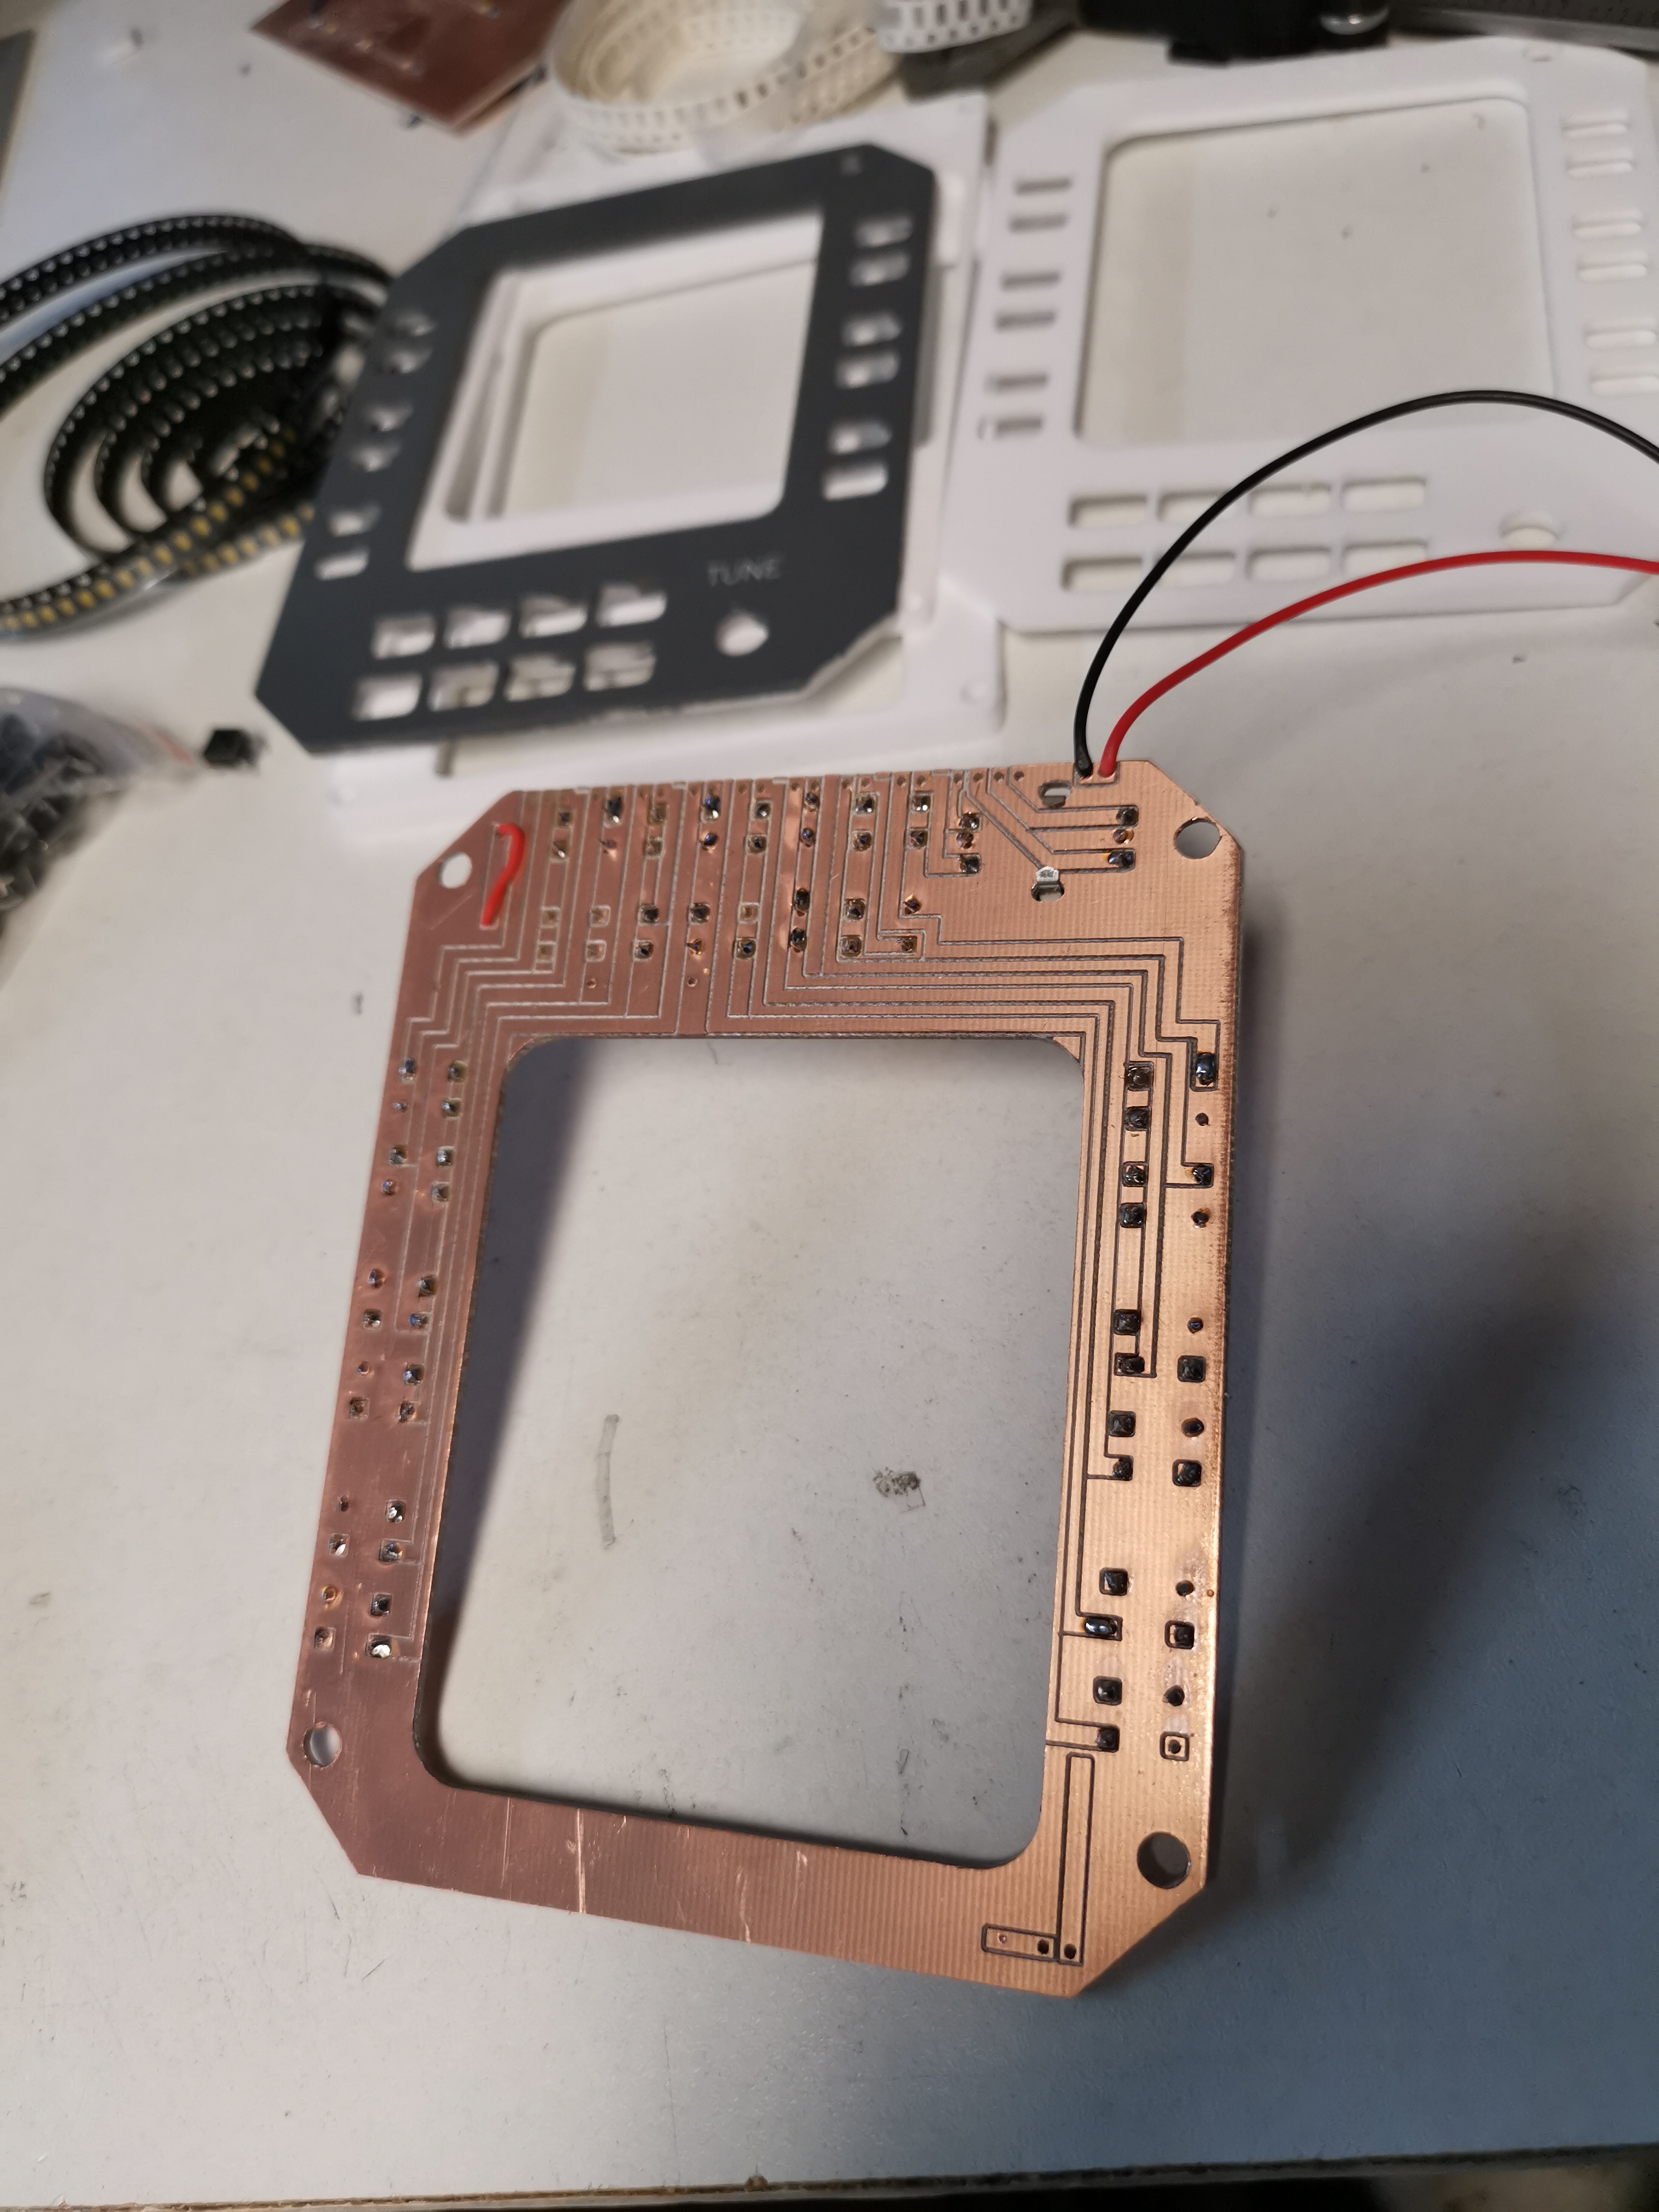
Only the GPWS anunciators and chrono's
The more stuff i create the better it works, but that is obvious i think.
Because of my chinese milling machine I do limit myselve to 3mm acryl, this means i have to make layers and glue them together.
But this seems to work pretty well.
PCB is of Ron's design.
I tried different options with illuminated led switches, but since there is limited space to mount them i followed Ron's PCB and it looks great.
Only the GPWS anunciators and chrono's![]()
![]()
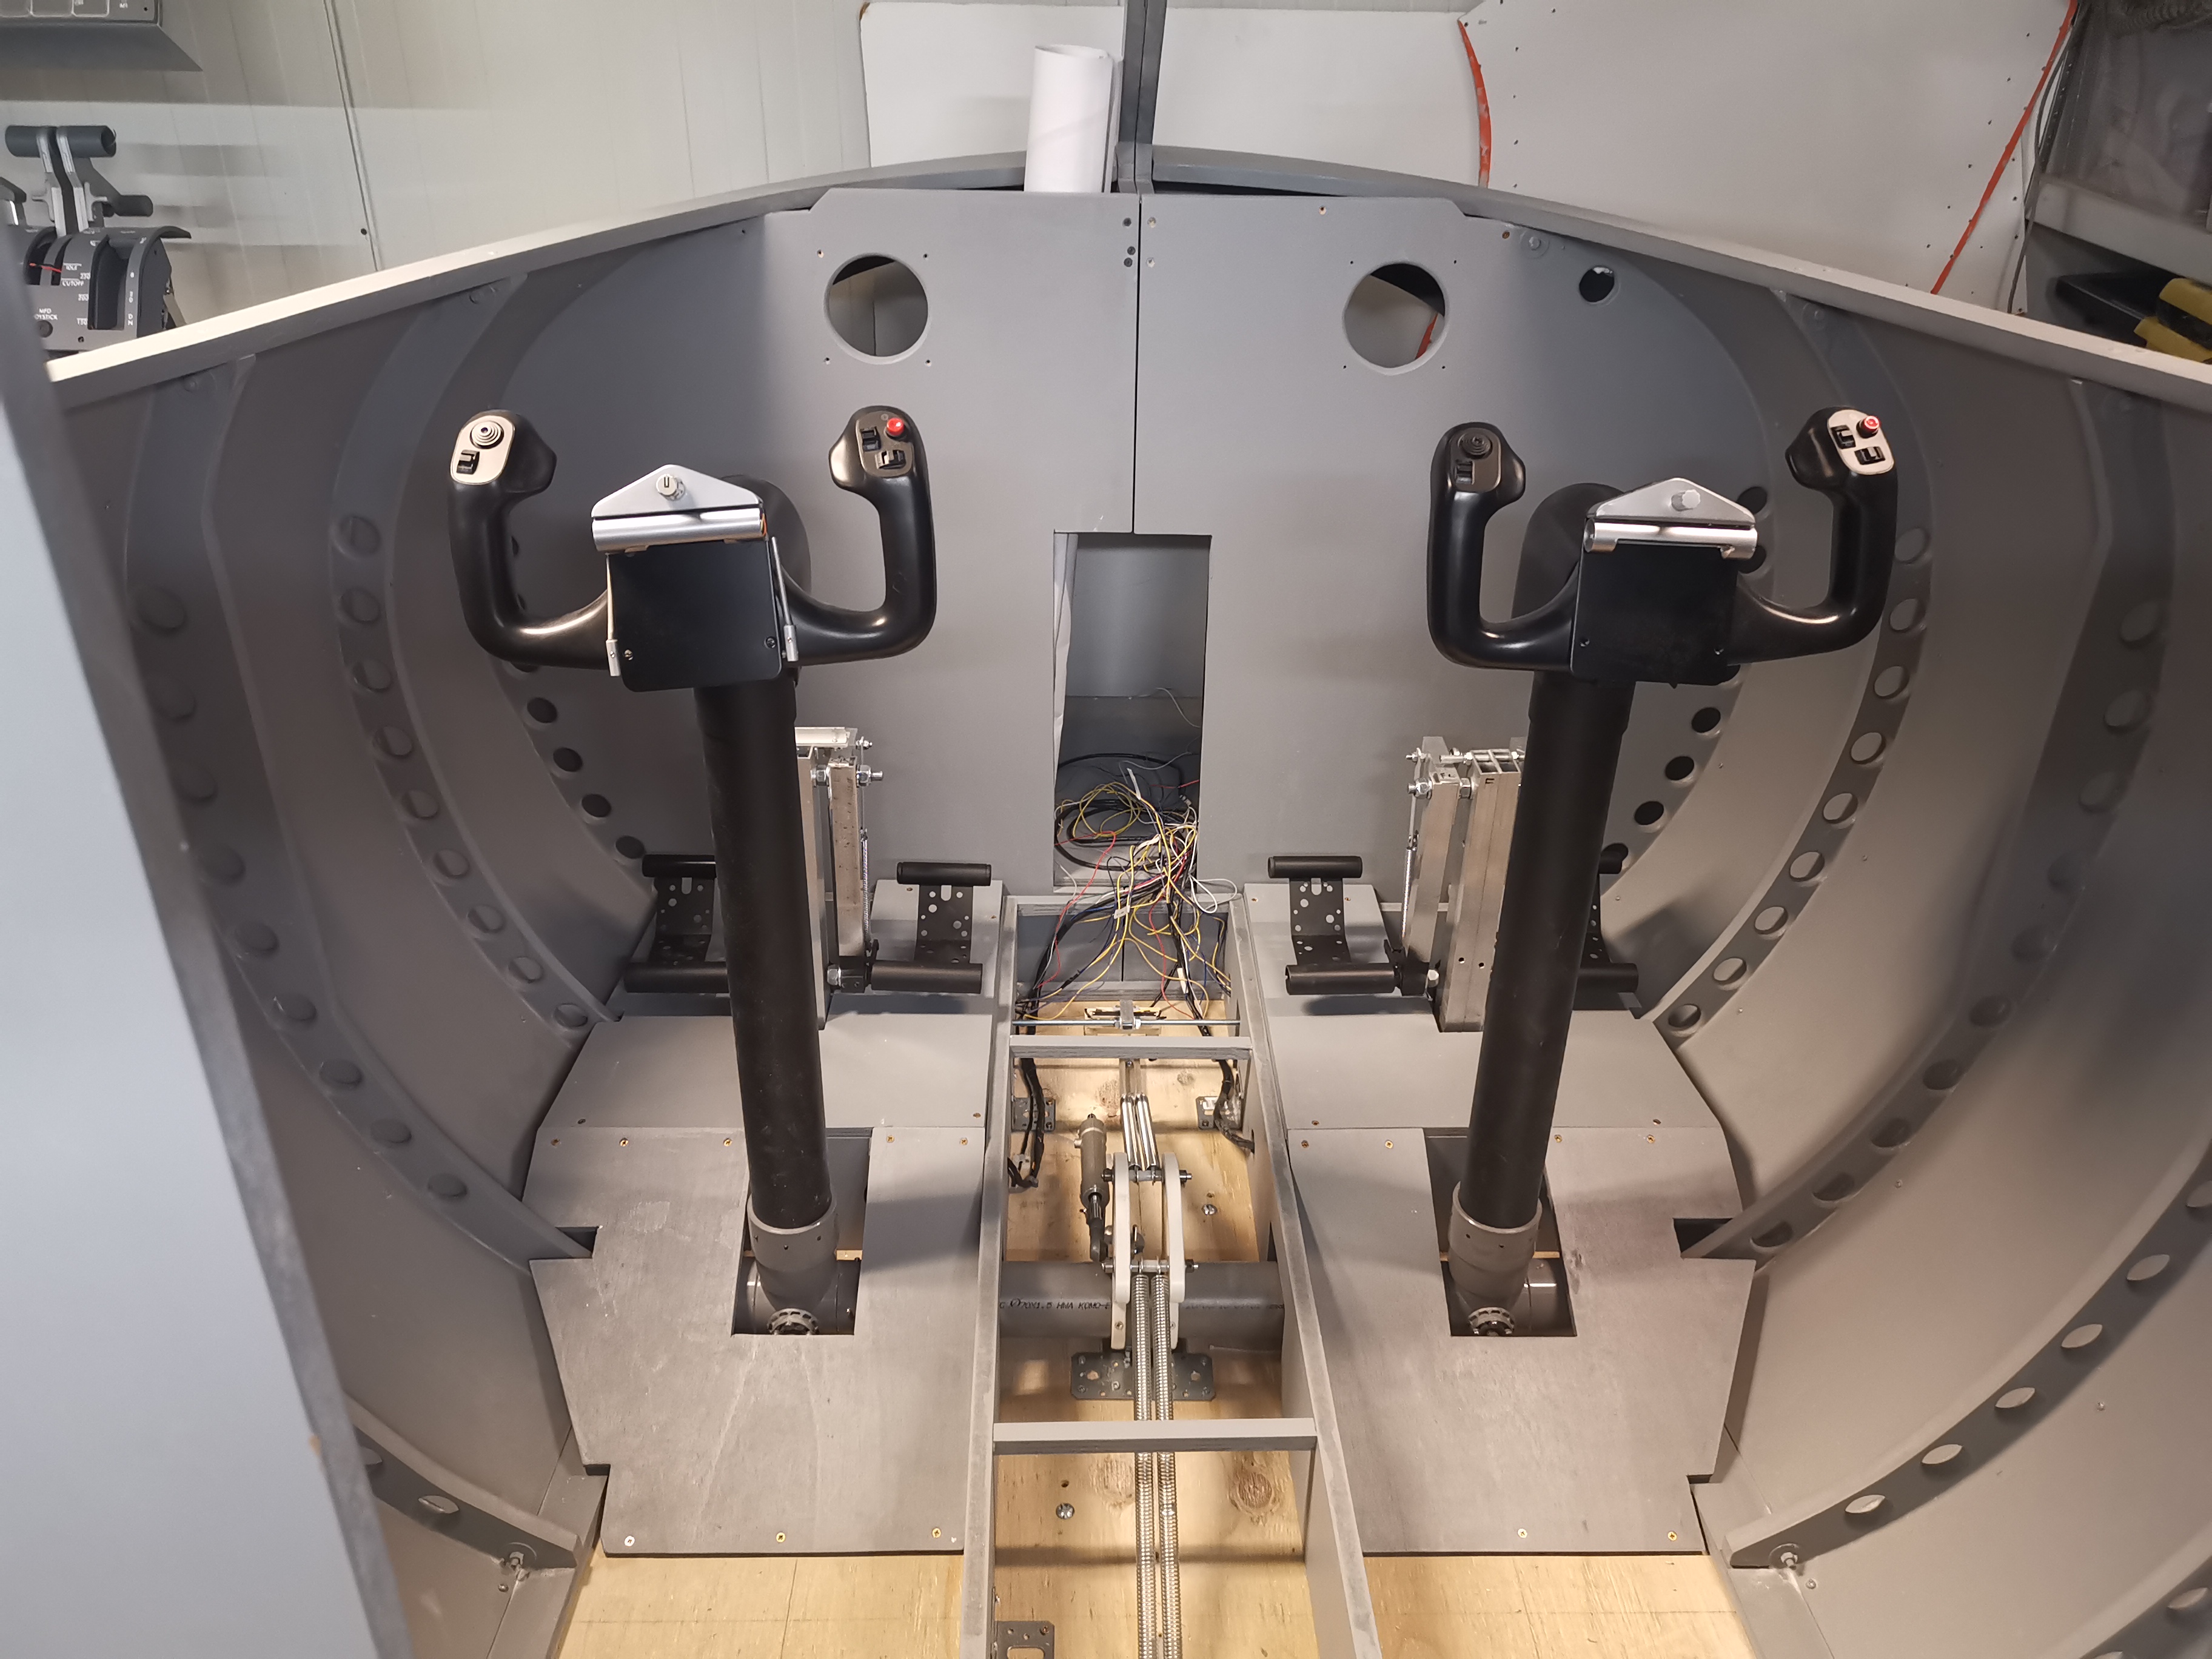 Roel,
Roel,
Roel,![]()
I searched the internet for the real thing, but i found they are still quite expensive.
The most are located in the US, and shipping costs are ridiculous.
I tried LCD's, 7 segments in different sizes.
The amber coloured 7 segment displays l0ok the most like the M877, so i use them.
I tried to interface with FSUIPC and Mobiflight, but no offsets available, except zulu time .
A chrono isn't that compicated, so i am going to write some arduino sketches.
Since i do not interface with Mobiflight and am not limited to the MAX7219 7segment displays.
I am still working on my Arduino code and waiting for a RTC (clock) module for the arduinoto arrive.
But i am allready happy with my result.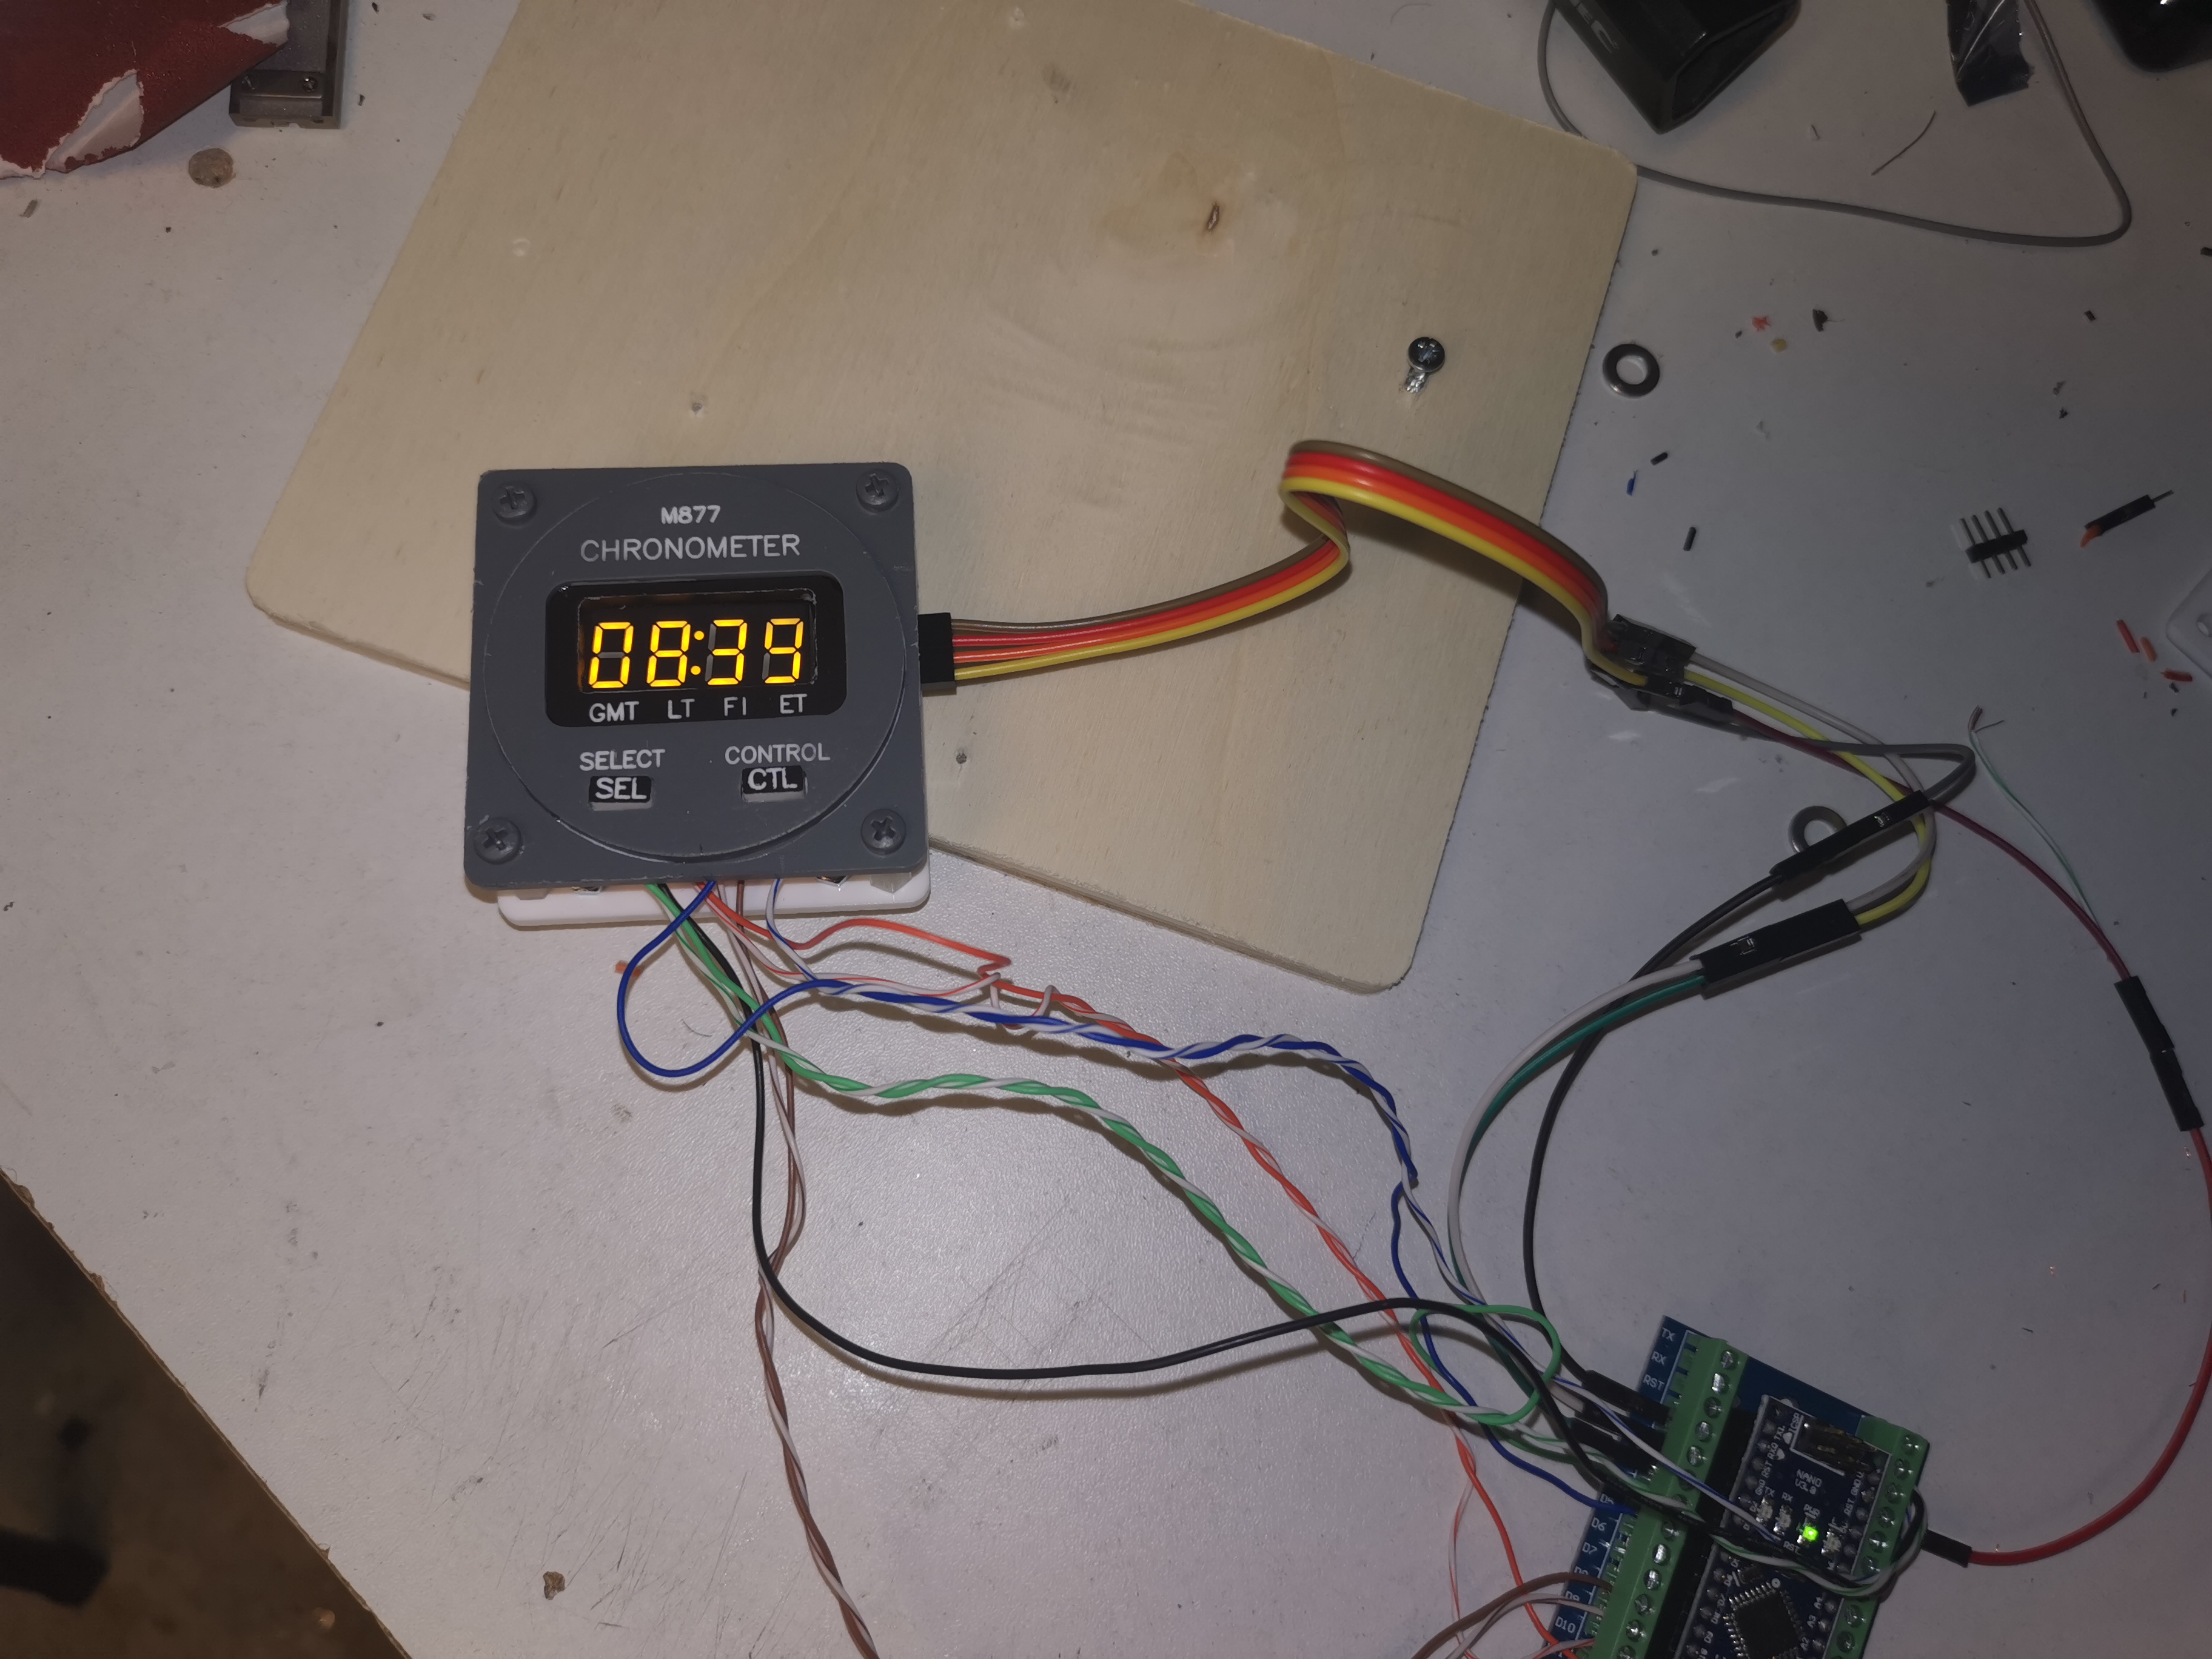
I searched the internet for the real thing, but i found they are still quite expensive.
The most are located in the US, and shipping costs are ridiculous.
I tried LCD's, 7 segments in different sizes.
The amber coloured 7 segment displays l0ok the most like the M877, so i use them.
I tried to interface with FSUIPC and Mobiflight, but no offsets available, except zulu time .
A chrono isn't that compicated, so i am going to write some arduino sketches.
Since i do not interface with Mobiflight and am not limited to the MAX7219 7segment displays.
I am still working on my Arduino code and waiting for a RTC (clock) module for the arduinoto arrive.
But i am allready happy with my result.![]()
![]()
![]()
i appriciate that!
i appriciate that!![]()
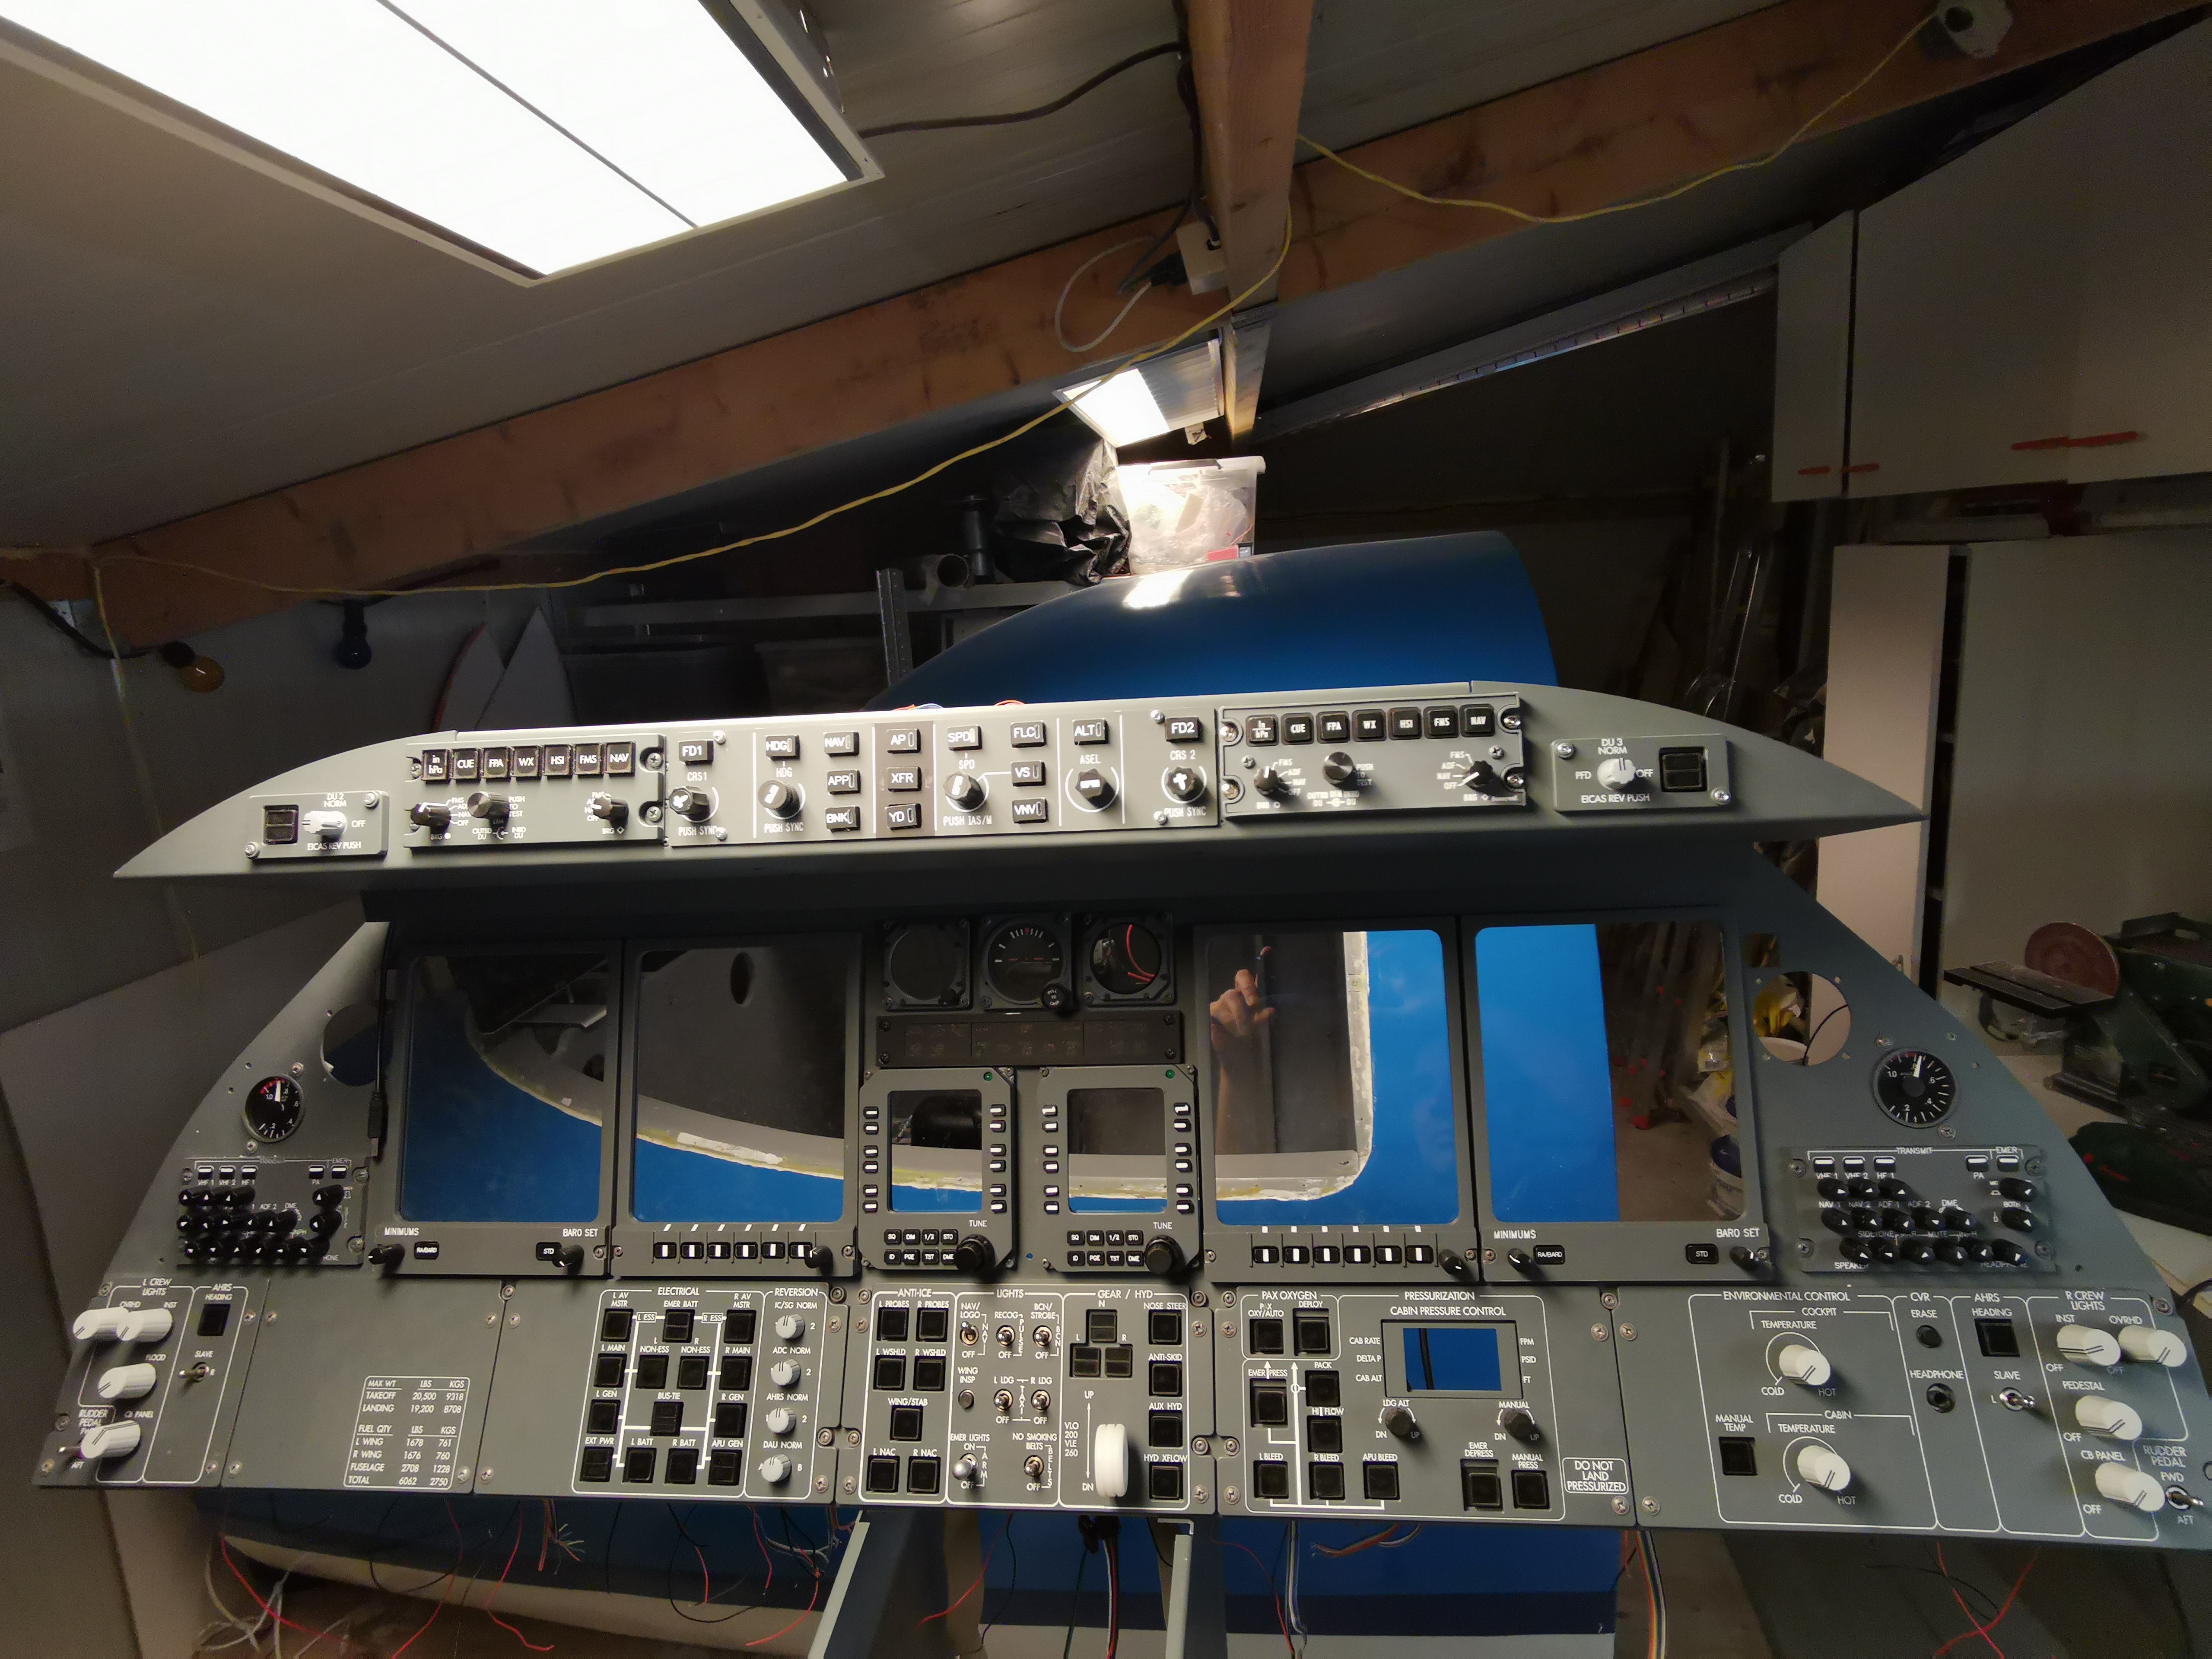
I have all components of the MIP ready.
I made a lot of modifications after thinking things over.
For instance my MIP panel was rivetted to the console, i replaced the rives with bolts which makes it easier to place the MIP in the shell.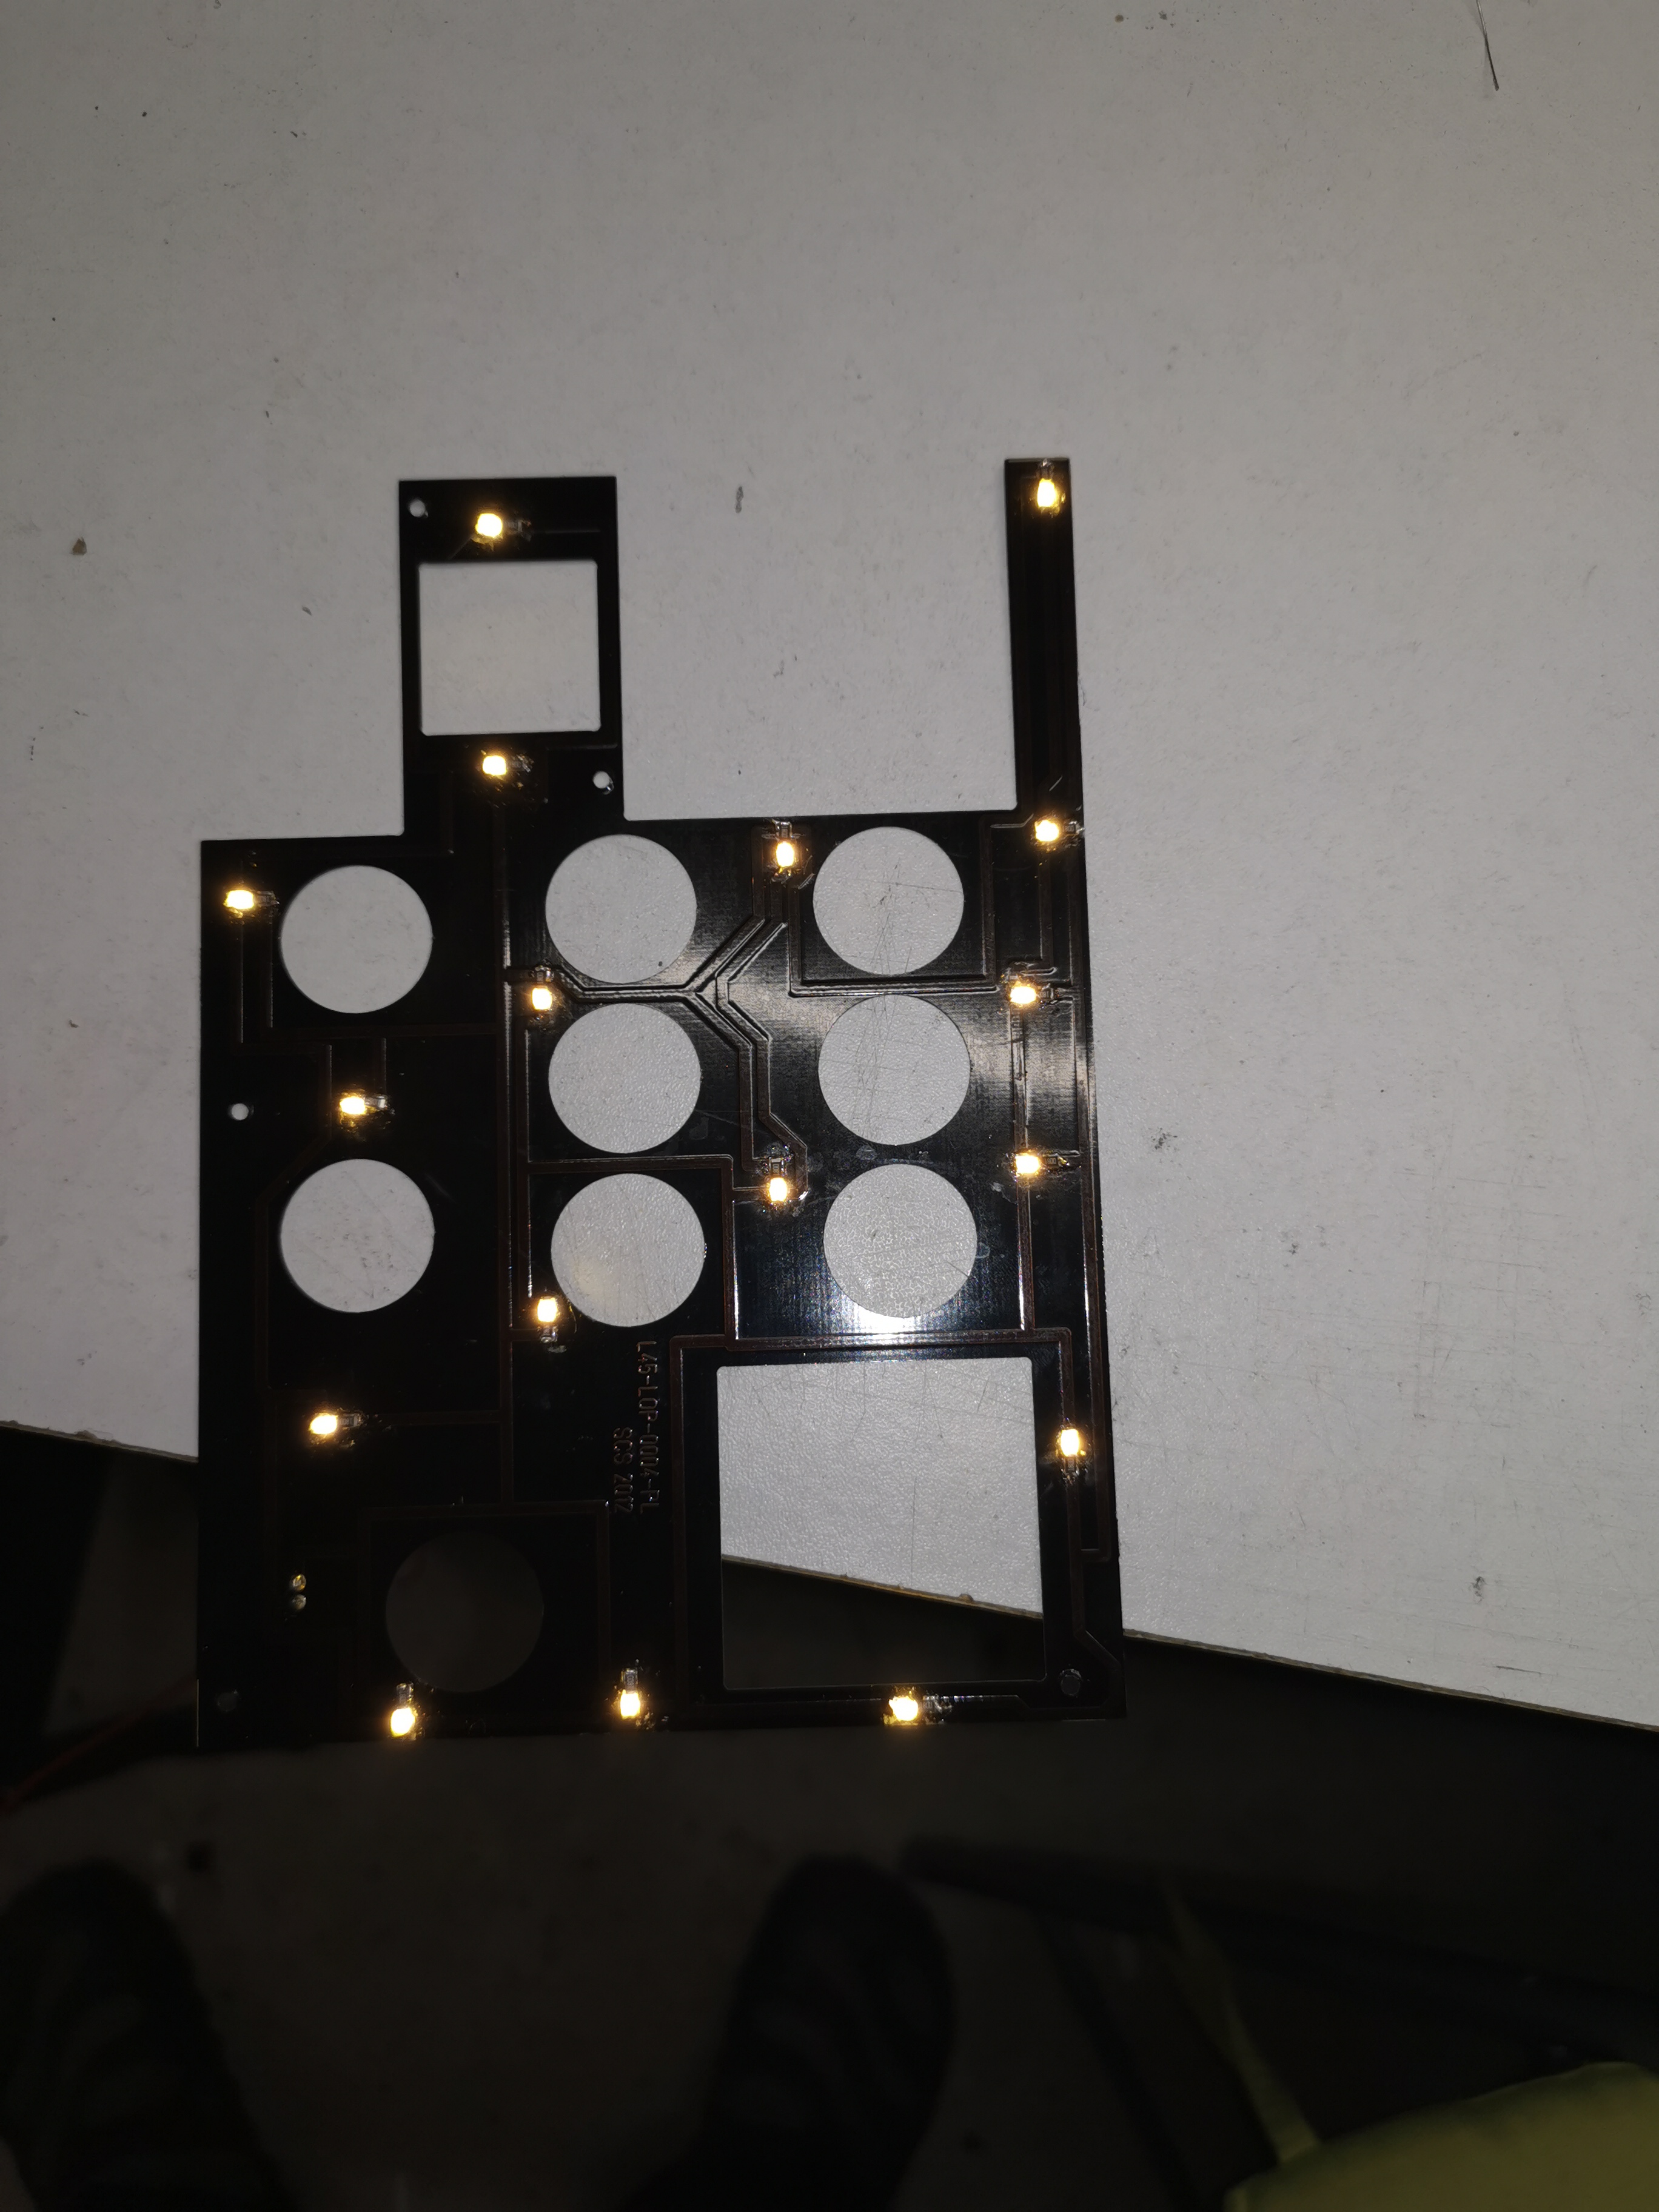
I was surprised about the support from those chinese guys.
It is possible to send the items back if not satisfied, but in my case i had to pay the return costs which are ridiculous high.
So after some contact and upload of a video the chinese have sent interface boards for free!!!
The screens function ok now, great service.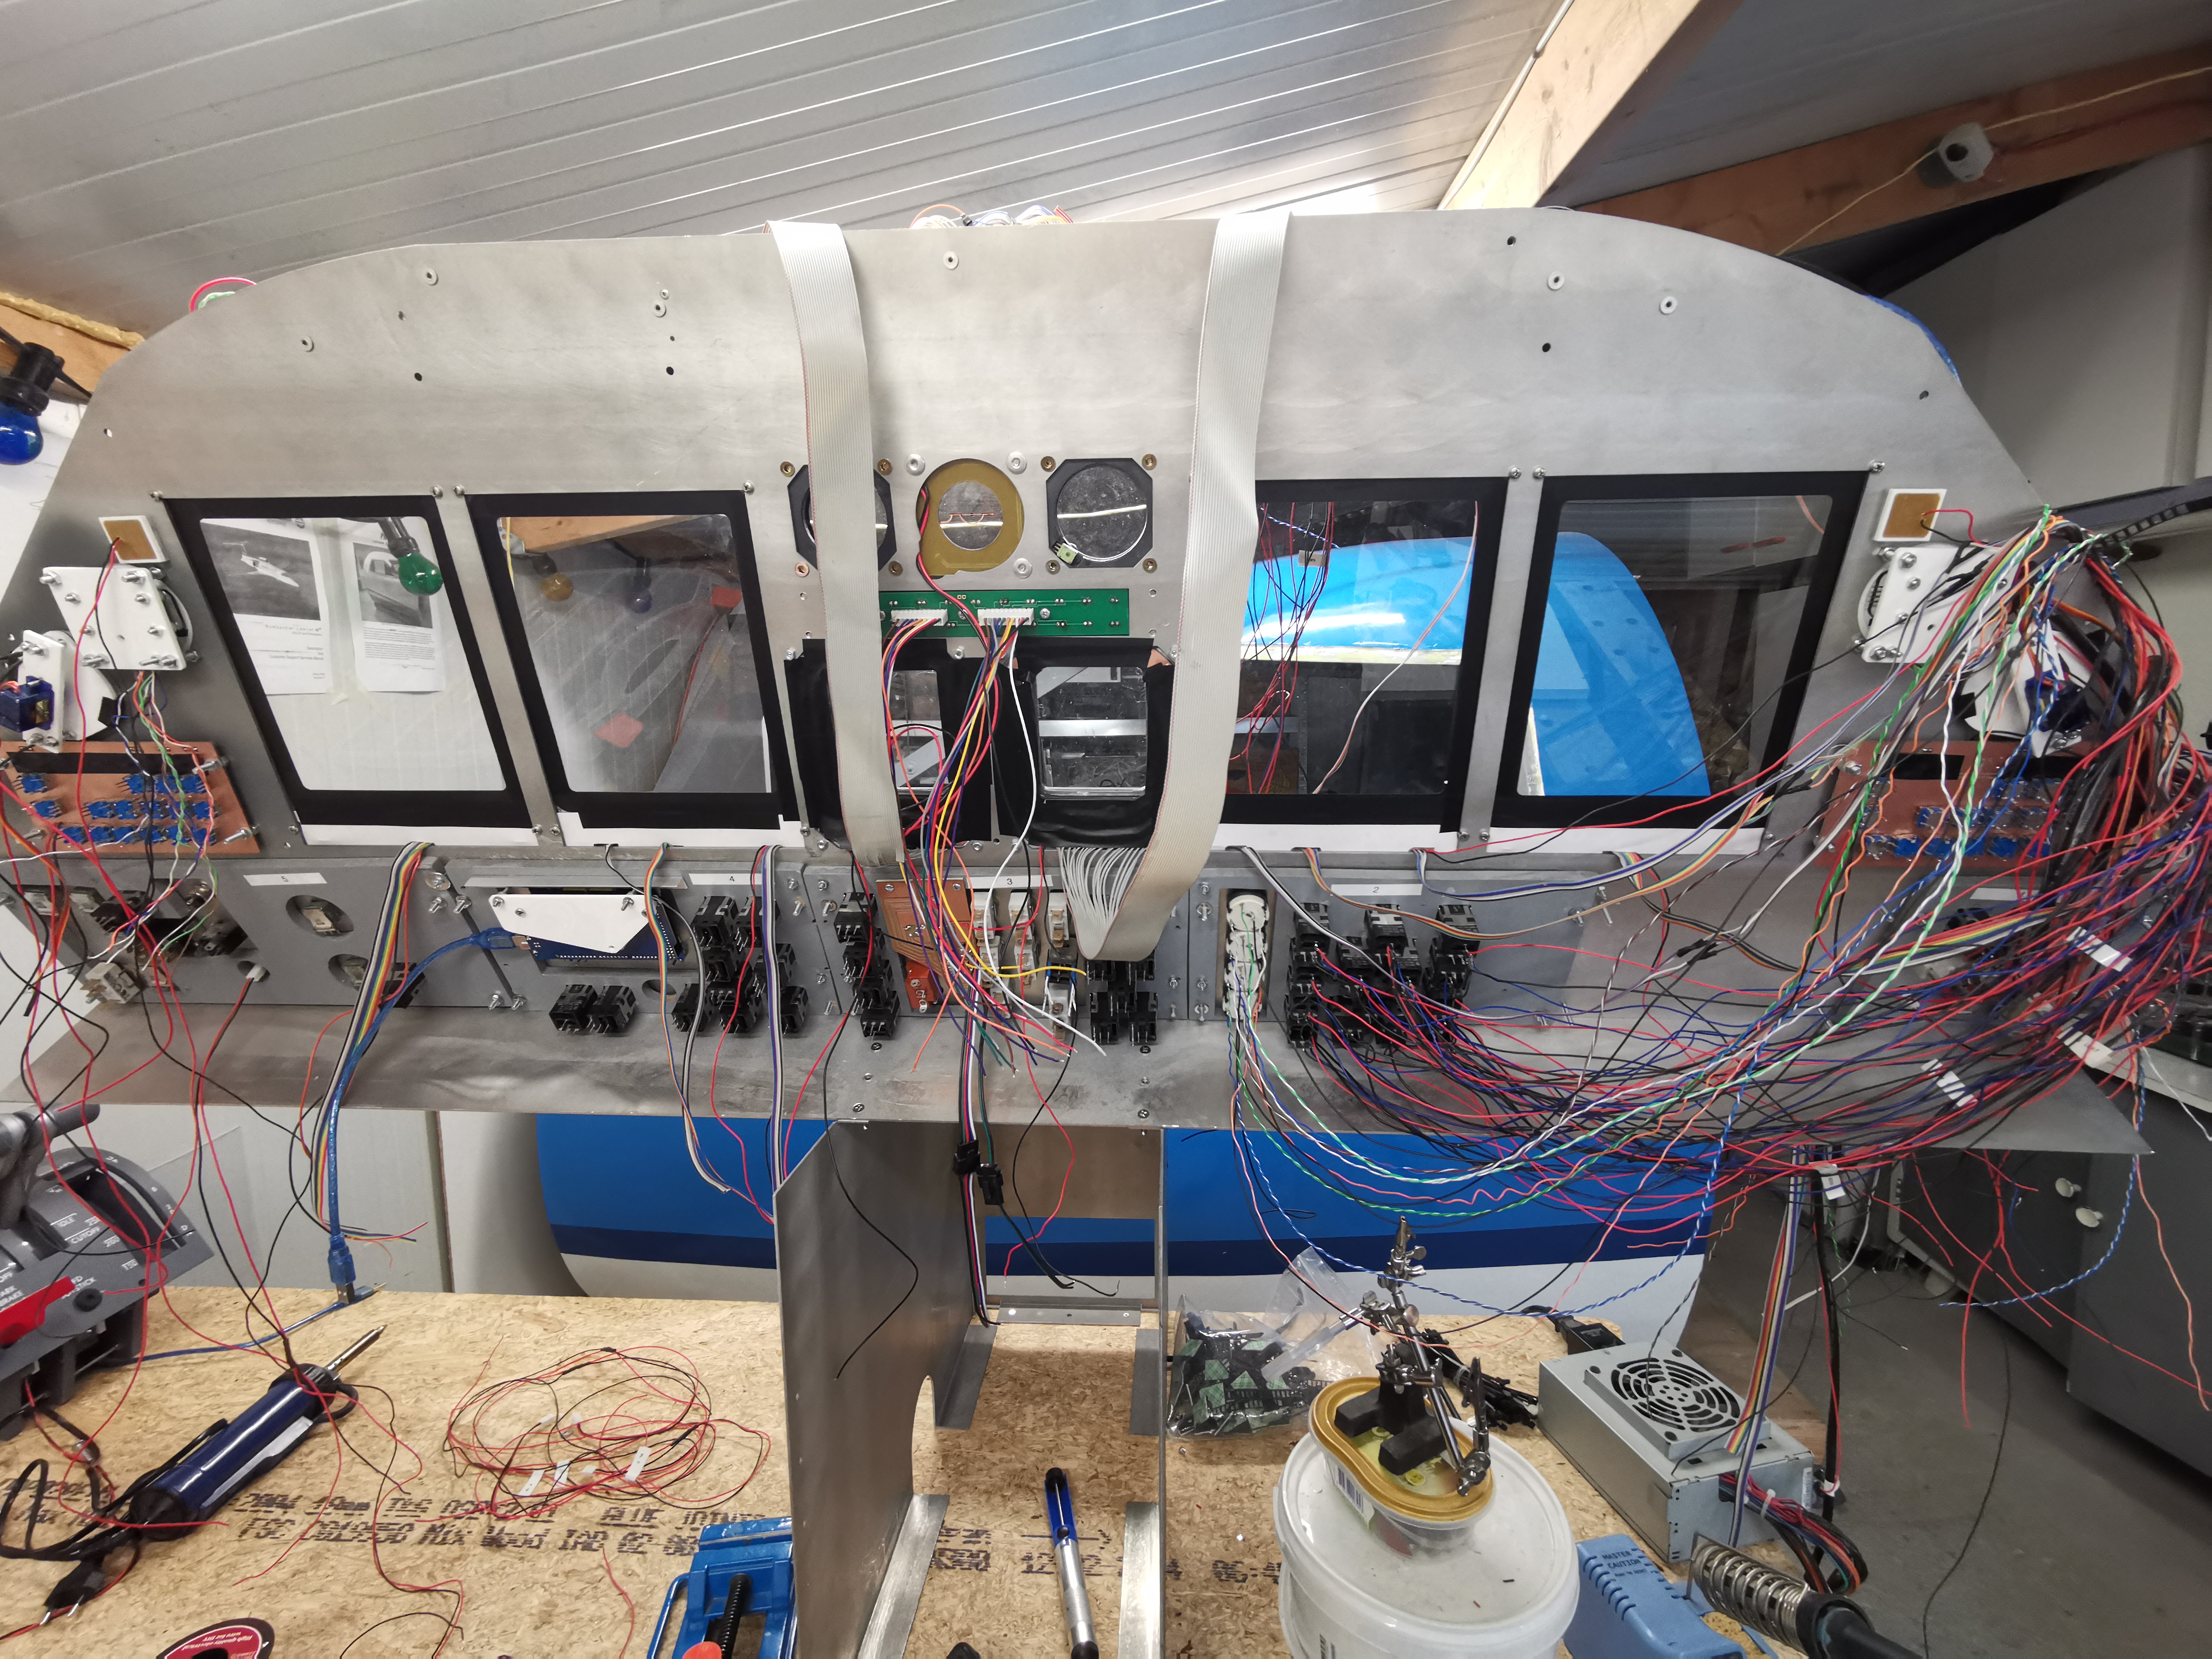
Forum NavigationRoel's Learjet 45 simulator
![]() #101 · September 28, 2020, 1:45 pm
#101 · September 28, 2020, 1:45 pm![]() #102 · September 29, 2020, 6:57 am
#102 · September 29, 2020, 6:57 am![]() #103 · October 27, 2020, 2:21 pm
#103 · October 27, 2020, 2:21 pm![]() #104 · October 28, 2020, 6:43 amRoel has reacted to this post.Roel
#104 · October 28, 2020, 6:43 amRoel has reacted to this post.Roel![]() #105 · November 3, 2020, 3:08 pmJason Hite
FlightDeckSoft
#105 · November 3, 2020, 3:08 pmJason Hite
FlightDeckSoft![]() #106 · November 12, 2020, 2:24 pm
#106 · November 12, 2020, 2:24 pm![]() #107 · November 12, 2020, 7:09 pm
#107 · November 12, 2020, 7:09 pm![]() #108 · November 12, 2020, 9:20 pm
#108 · November 12, 2020, 9:20 pm![]() #109 · November 13, 2020, 1:33 am
#109 · November 13, 2020, 1:33 am![]() #110 · December 31, 2020, 5:42 am
#110 · December 31, 2020, 5:42 am
2017-10-10