


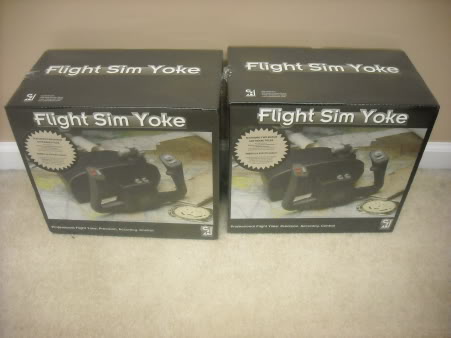
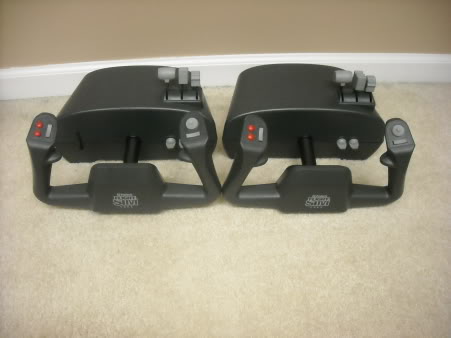
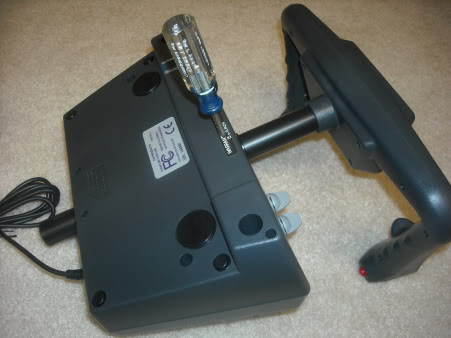
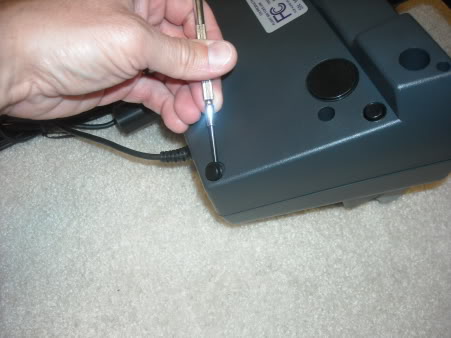
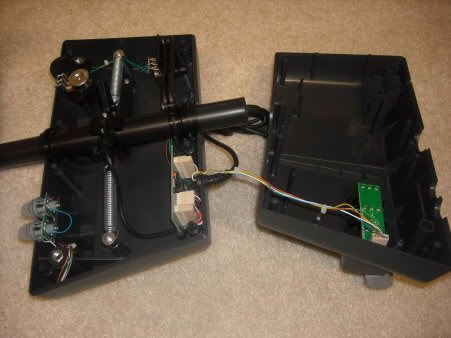
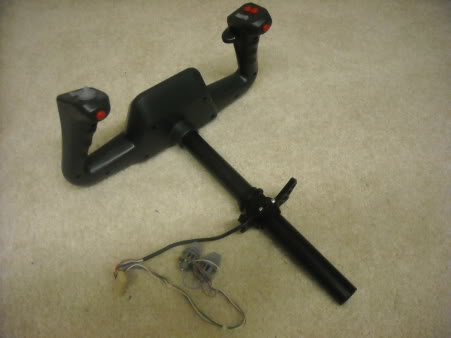
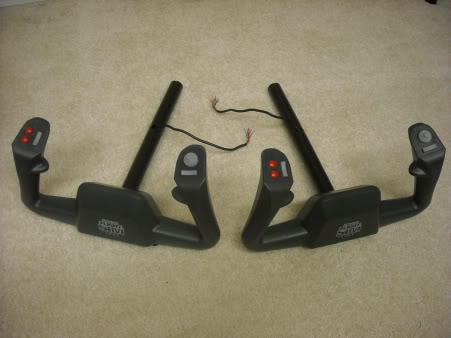
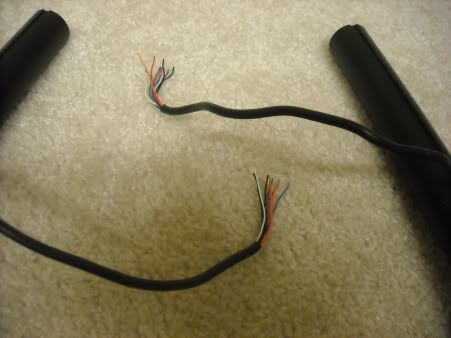
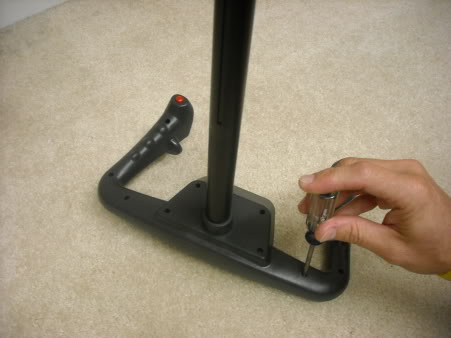
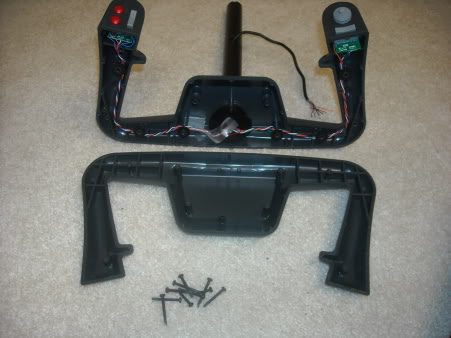
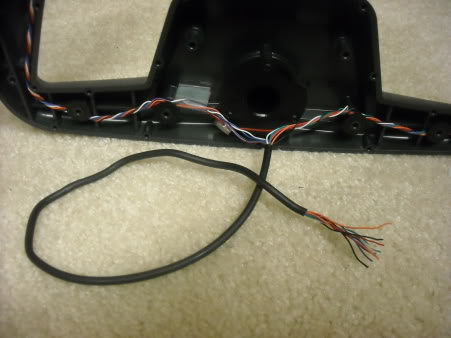
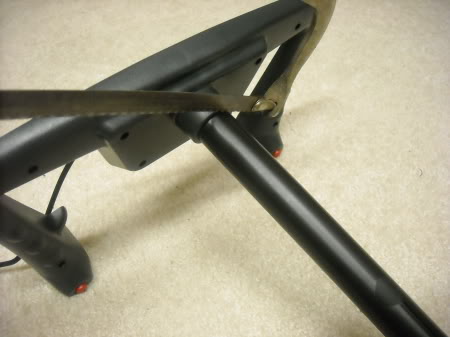
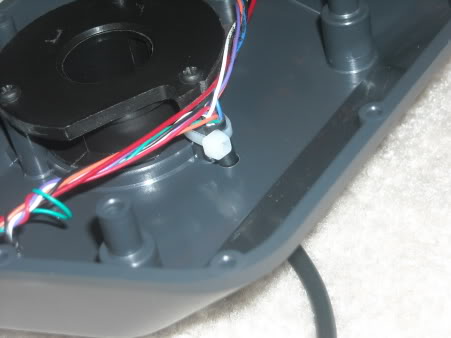
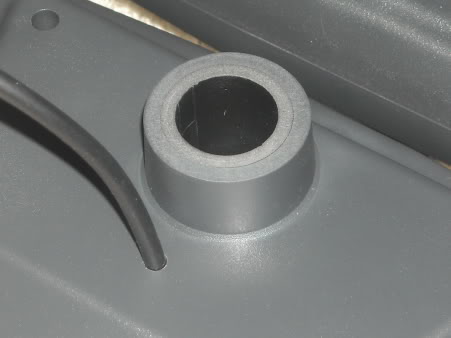
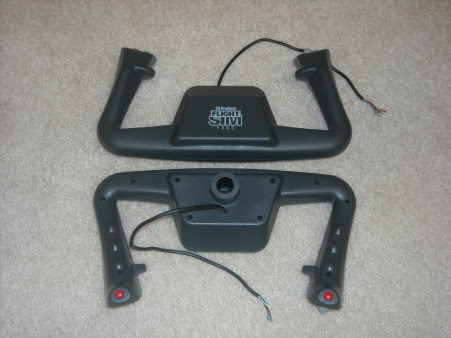
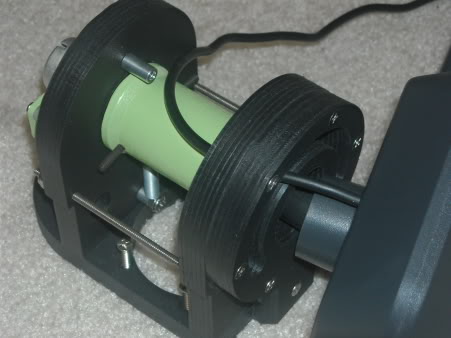
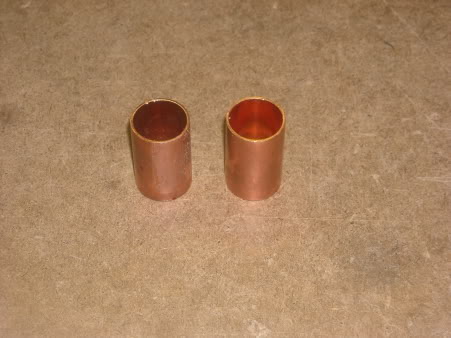
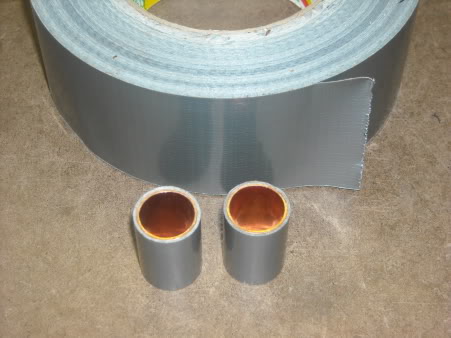
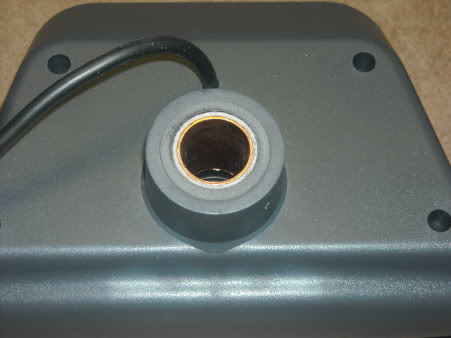
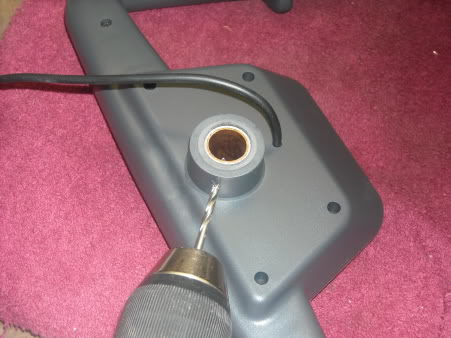
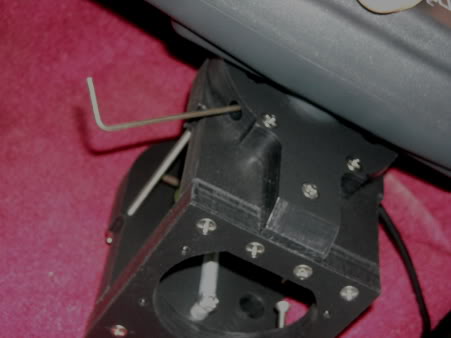
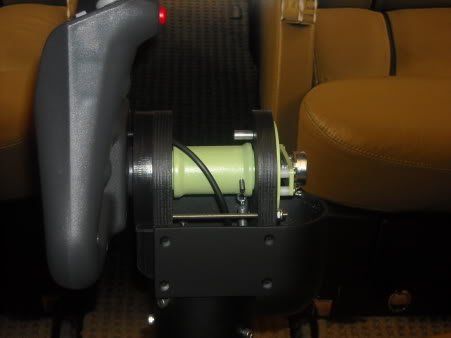
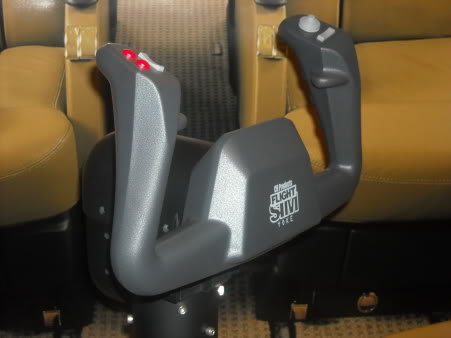
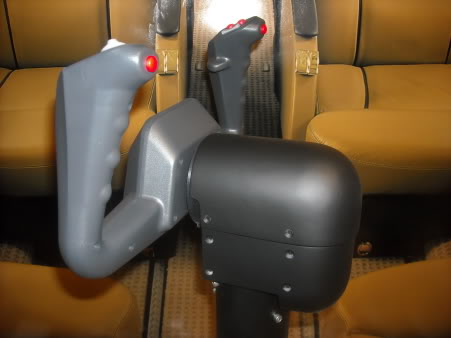
(Original thread started on 10-21-12 by Ron Rollo) This is a tutorial to show you guys how to convert your CH yokes to fit onto the Project45 column head sets. As you know, the real yokes are very hard to come by and even if you are lucky enough to get your hands on a set of real Lear yokes, they can cost you as much as $1,000 for a set. They are out there if you have your heart set on them but in the meantime, you can move forward with the CH yokes in their place. First off, I would like to thank Terry Collins for trusting me with his yokes and giving me the opportunity to do tutorial for everyone else to benefit from. So here we go. Here are two CH Flight Sim yokes sitting pretty, brand new in the box: And here they are out of the box: I would not spend the extra money on the higher quality CH yokes especially sense your going to be tearing them apart. There are about eight screws on the bottom case of the CH base. There is a hidden screw hole under the seal that says, "Warranty voided if seal is broken": (At this point don't bother calling the manufacture if you screw something up!) There are two more hidden screws behind these little rubber stops: If you have all of the screws removed that hold the two halves together, they should split with ease: You will unplug a few wire plugs and remove the springs that return the yokes to center. The yoke and the shaft should lift out without a hitch: Another "point of no return" moment is when I had to cut the wires away from the plug and the two little plastic switches. At this point I have a nice clean wiring harness and a clean shaft to work with: Now the thing is, the wires have to be rerouted from the shaft and the shaft must be shortened: In reference to the Saitek yokes? As long as it or any other yoke for that matter has a hallow shaft and the inside diameter is smaller than 5/8" (or .625"). Now it's time to break into the yoke itself: (I know this might seem a little ridiculous to show a photo of where these screw holes are and if you think so, this photo is not meant for you. This is more for the new and or young guys coming along.) The removal of ten screws later and the face of the yoke comes off with ease: This is very important, pull the wires out of the shaft because the next step we will be cutting the shaft: I used a simple hack saw and a bench clamp: (The photo looks like I cut it right there on the carpet) Also, cut the shaft off so that it is flush with the yoke housing. I was a little surprised to see that after measuring, there would be nothing left of the shaft except of what is still inside the the yoke housing. I used a 11/64th inch dril bit to place a hole directly above the screw in the photo below. Then I simply ran the yoke wiring harness through the hole: I also used a zip tie to secure the wiring harness to the screw so that the wires do not get pulled on from turning the yoke. Before putting the face of the yoke back on, insure that the wires are tucked away and especially not in the way of the screw holes and edges so that they do not get pinched. Screw the face back on and your pretty much done with the CH yoke conversion. Here is a photo of the back side of the yoke where the shaft has been cut and the wiring harness has been redirected: (You will notice that I used an orbital sander to clean up the saw marks.) The finished modified CH Yoke product: The next step will be to mount the CH yoke to the Project45 column head. Here I have it showing how the wiring harness will be routed through the wire slip hole: Before I can go any further with this conversion, I have to make a couple new column head face plates. This is the part of the column head that is closest to the yoke. I have to make the inside hole about a 1/16th inch wider so that the yoke body will fit into that hole. This is not a big deal. If you already have a set of column heads and plan to use CH yokes, please send me an email and I will make sure you get the updated parts. The only other thing that I still need to find is what I call a shaft shim. There is a good size space between the column head shaft and the CH yoke shaft that needs to be filled in. Again, not a problem. (Posted by Will Sasse on 10-23-12) Very useful info Ron, thank you indeed. I presume that it would be a simple matter to swap this installation over to real yokes should some become available, somewhere, sometime? (Posted by Ron Rollo on 10-26-12) Yes you can easily swap out the CH yoke with real ones in the future. AND, you should be able to do it without removing the column heads from the columns and everything else. This is the finishing touches on the conversion. I found these copper fittings that had the right size inside diameter: The outside diameter was very loose so I did what any one would have done. I used Duck tape to take up the slack. It acts as a nice shaft sleeve: Here is the copper fitting and the shaft sleeve in place: The trickiest part of this whole project is making sure that the yoke and the column head are lined up as close as possible. If your off a few degrees one way or another, that's okay. When your linking the two columns together for the roll axis, you can make your adjustments there: I marked and drilled the hole into the yoke first and then I marked the hole on the shaft. Here I am getting ready to tighten down the set screw: Here you can see how close the yoke is to the column head: Bam! Bam! Bam! (Original thread started on 10-21-12 by Ron Rollo) This is a tutorial to show you guys how to convert your CH yokes to fit onto the Project45 column head sets. As you know, the real yokes are very hard to come by and even if you are lucky enough to get your hands on a set of real Lear yokes, they can cost you as much as $1,000 for a set. They are out there if you have your heart set on them but in the meantime, you can move forward with the CH yokes in their place. First off, I would like to thank Terry Collins for trusting me with his yokes and giving me the opportunity to do tutorial for everyone else to benefit from. So here we go. Here are two CH Flight Sim yokes sitting pretty, brand new in the box: And here they are out of the box: I would not spend the extra money on the higher quality CH yokes especially sense your going to be tearing them apart. There are about eight screws on the bottom case of the CH base. There is a hidden screw hole under the seal that says, "Warranty voided if seal is broken": (At this point don't bother calling the manufacture if you screw something up!) There are two more hidden screws behind these little rubber stops: If you have all of the screws removed that hold the two halves together, they should split with ease: You will unplug a few wire plugs and remove the springs that return the yokes to center. The yoke and the shaft should lift out without a hitch: Another "point of no return" moment is when I had to cut the wires away from the plug and the two little plastic switches. At this point I have a nice clean wiring harness and a clean shaft to work with: Now the thing is, the wires have to be rerouted from the shaft and the shaft must be shortened: In reference to the Saitek yokes? As long as it or any other yoke for that matter has a hallow shaft and the inside diameter is smaller than 5/8" (or .625"). Now it's time to break into the yoke itself: (I know this might seem a little ridiculous to show a photo of where these screw holes are and if you think so, this photo is not meant for you. This is more for the new and or young guys coming along.) The removal of ten screws later and the face of the yoke comes off with ease: This is very important, pull the wires out of the shaft because the next step we will be cutting the shaft: I used a simple hack saw and a bench clamp: (The photo looks like I cut it right there on the carpet) Also, cut the shaft off so that it is flush with the yoke housing. I was a little surprised to see that after measuring, there would be nothing left of the shaft except of what is still inside the the yoke housing. I used a 11/64th inch dril bit to place a hole directly above the screw in the photo below. Then I simply ran the yoke wiring harness through the hole: I also used a zip tie to secure the wiring harness to the screw so that the wires do not get pulled on from turning the yoke. Before putting the face of the yoke back on, insure that the wires are tucked away and especially not in the way of the screw holes and edges so that they do not get pinched. Screw the face back on and your pretty much done with the CH yoke conversion. Here is a photo of the back side of the yoke where the shaft has been cut and the wiring harness has been redirected: (You will notice that I used an orbital sander to clean up the saw marks.) The finished modified CH Yoke product: The next step will be to mount the CH yoke to the Project45 column head. Here I have it showing how the wiring harness will be routed through the wire slip hole: Before I can go any further with this conversion, I have to make a couple new column head face plates. This is the part of the column head that is closest to the yoke. I have to make the inside hole about a 1/16th inch wider so that the yoke body will fit into that hole. This is not a big deal. If you already have a set of column heads and plan to use CH yokes, please send me an email and I will make sure you get the updated parts. The only other thing that I still need to find is what I call a shaft shim. There is a good size space between the column head shaft and the CH yoke shaft that needs to be filled in. Again, not a problem. (Posted by Will Sasse on 10-23-12) Very useful info Ron, thank you indeed. I presume that it would be a simple matter to swap this installation over to real yokes should some become available, somewhere, sometime? (Posted by Ron Rollo on 10-26-12) Yes you can easily swap out the CH yoke with real ones in the future. AND, you should be able to do it without removing the column heads from the columns and everything else. This is the finishing touches on the conversion. I found these copper fittings that had the right size inside diameter: The outside diameter was very loose so I did what any one would have done. I used Duck tape to take up the slack. It acts as a nice shaft sleeve: Here is the copper fitting and the shaft sleeve in place: The trickiest part of this whole project is making sure that the yoke and the column head are lined up as close as possible. If your off a few degrees one way or another, that's okay. When your linking the two columns together for the roll axis, you can make your adjustments there: I marked and drilled the hole into the yoke first and then I marked the hole on the shaft. Here I am getting ready to tighten down the set screw: Here you can see how close the yoke is to the column head: Bam! Bam! Bam! CH Yoke Conversion to Project45 Column Head
![]()

2017-10-10