


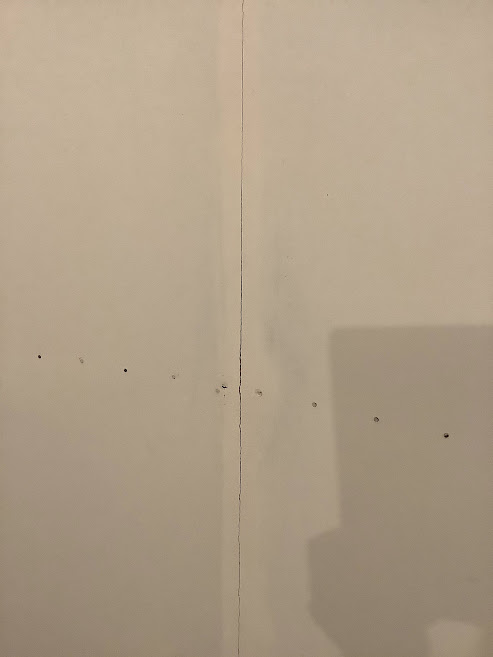
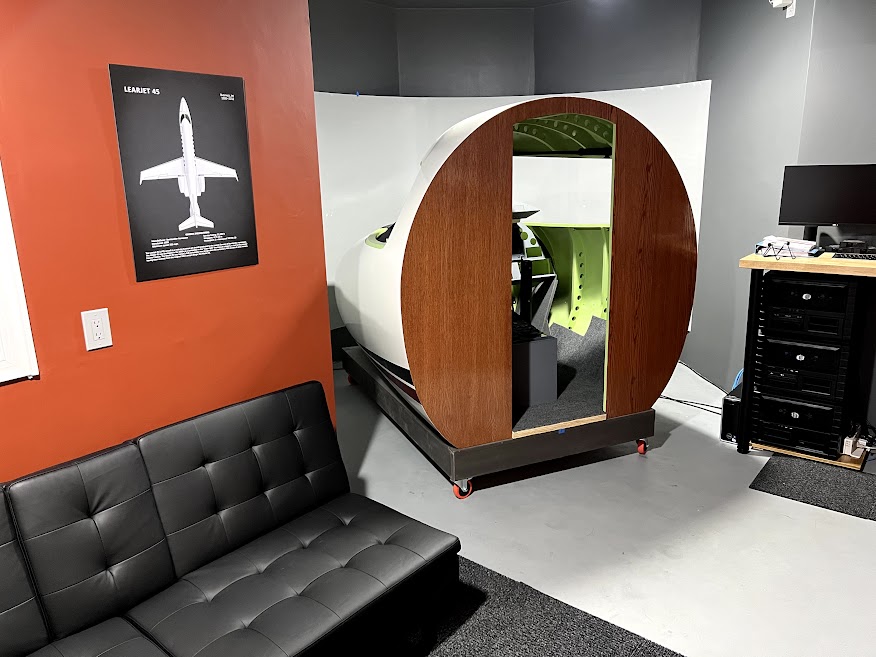
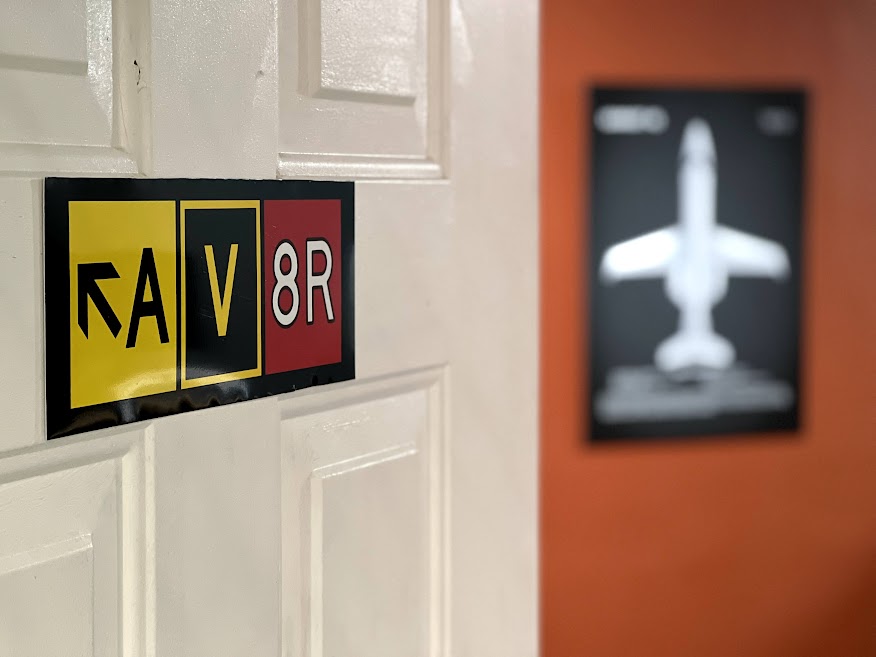
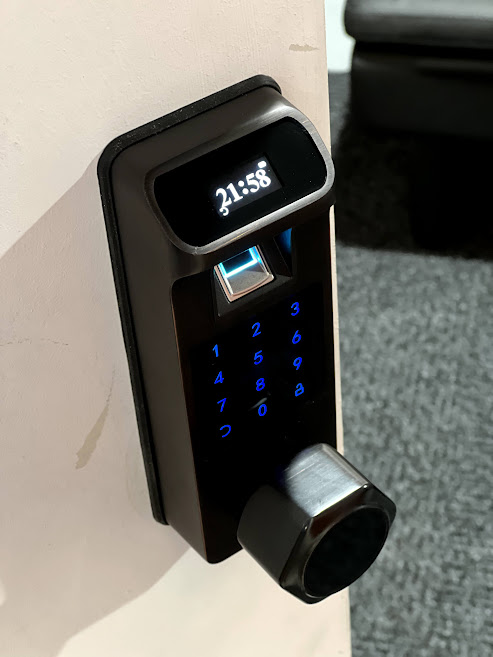
I made an error during screen installation. Did my research, tried few things and I think I have a solution. Since I was installing everything by myself, I run into the problem to have NOT enough hands to keep things in place. I clamped both top and bottom but was unable to do it for middle and when I worked on filling seams with compound, realized that curvature is not there, looked behind the screen and found that middle part of the screen not flushed with the structure. I didn't want to use screws (too big of the aftermath footprint on the screen) so I opted for tiny 1" nails that have perforations helping to hold them in place and run them through masonite into the structure behind making it flush. As a result, gaps in between screen sheets opened up and had to be filled back with compound. To cover up nails, I sunk them first into masonite and used same compound to fill it up, then sanded and primed it using acrylic high build primer (same one I used on fiberglass during earlier stage of the build). Since masonite paint is also acrylic based, it ended up looking like this which I believe is the solution for the damage to the screen I caused driving nails through the middle of the screen. High build primer in spray perfectly covers up all imperfections. This will be a base coat on the entire screen before final coat of the proper paint is applied. I made an error during screen installation. Did my research, tried few things and I think I have a solution. Since I was installing everything by myself, I run into the problem to have NOT enough hands to keep things in place. I clamped both top and bottom but was unable to do it for middle and when I worked on filling seams with compound, realized that curvature is not there, looked behind the screen and found that middle part of the screen not flushed with the structure. I didn't want to use screws (too big of the aftermath footprint on the screen) so I opted for tiny 1" nails that have perforations helping to hold them in place and run them through masonite into the structure behind making it flush. As a result, gaps in between screen sheets opened up and had to be filled back with compound. To cover up nails, I sunk them first into masonite and used same compound to fill it up, then sanded and primed it using acrylic high build primer (same one I used on fiberglass during earlier stage of the build). Since masonite paint is also acrylic based, it ended up looking like this which I believe is the solution for the damage to the screen I caused driving nails through the middle of the screen. High build primer in spray perfectly covers up all imperfections. This will be a base coat on the entire screen before final coat of the proper paint is applied. While I’m waiting for a tad warmer weather to paint the screen, I managed to fit throttle quadrant into the TQ pedestal. For some reason my TQ pedestal wasn’t wide enough on the inside for TQ to slide in and I had to remove approximately 1/8” from the left side. Now it fits like a glove. While I’m waiting for a tad warmer weather to paint the screen, I managed to fit throttle quadrant into the TQ pedestal. For some reason my TQ pedestal wasn’t wide enough on the inside for TQ to slide in and I had to remove approximately 1/8” from the left side. Now it fits like a glove. While Jason is working on Jet45 2.0 AAS, I'm finishing my Hangar room. Lately I manage to install WEN filtration system to assure dust free environment for 3 projectors. Also, since my Hangar is a side addition to the brick house, WI-Fi signal wasn't the greatest. Adding an extra satellite to my WI-Fi mesh network solved the problem. Current download speed using Ethernet cable connected to satellite that wirelessly connects to router is 178Mbps. Now I know Ron can always get a hold of me when I'm hiding in my Hangar. Wrap around screen is almost ready for final painting. I had little trouble with Masonite joints. I ended up using fiberglass joint tape along with thinned down joint mud. This gave me a solid crack resistant connection and completely concealed it. Also lights are installed. This took some thinking to get it done right. As you see on the picture below, lights are connected to electrical outlets. Challenge was to have electrical access for 3 projectors with constant power yet be able to turn on/off just lights without cutting power off completely. I use HomeKit outlet switches which can be controlled with portable electronic device, yet I can still switch it on/off with another wall switch that is grouped with 2 on the ceiling. Works like magic. Lights turn on/off when needed yet outlet on the ceiling has constant power. I opted for industrial style chicken broiler lamps with cord cut to the size. Found this piece of furniture yesterday. I believe if completes the room. While Jason is working on Jet45 2.0 AAS, I'm finishing my Hangar room. Lately I manage to install WEN filtration system to assure dust free environment for 3 projectors. Also, since my Hangar is a side addition to the brick house, WI-Fi signal wasn't the greatest. Adding an extra satellite to my WI-Fi mesh network solved the problem. Current download speed using Ethernet cable connected to satellite that wirelessly connects to router is 178Mbps. Now I know Ron can always get a hold of me when I'm hiding in my Hangar. Wrap around screen is almost ready for final painting. I had little trouble with Masonite joints. I ended up using fiberglass joint tape along with thinned down joint mud. This gave me a solid crack resistant connection and completely concealed it. Also lights are installed. This took some thinking to get it done right. As you see on the picture below, lights are connected to electrical outlets. Challenge was to have electrical access for 3 projectors with constant power yet be able to turn on/off just lights without cutting power off completely. I use HomeKit outlet switches which can be controlled with portable electronic device, yet I can still switch it on/off with another wall switch that is grouped with 2 on the ceiling. Works like magic. Lights turn on/off when needed yet outlet on the ceiling has constant power. I opted for industrial style chicken broiler lamps with cord cut to the size. Found this piece of furniture yesterday. I believe if completes the room. Hey Maciej, Looks very professional and clean! I would struggle to find a cleaner looking sim room than this. Sure is not mine right now! The signal booster is a neat little gizmo and will work perfectly in your setup. I had to do the same at the workshop to boost the signal from the house to the shop. Talk about magic! Hey Maciej, Looks very professional and clean! I would struggle to find a cleaner looking sim room than this. Sure is not mine right now! The signal booster is a neat little gizmo and will work perfectly in your setup. I had to do the same at the workshop to boost the signal from the house to the shop. Talk about magic! Maciej, What a beaut looking Hangar. I'm just so excited for everyone as I am 'flogging' Jet 45 v2 so that we can iron out any bugs for when it's your turn. I jumped in the Lear this afternoon for a quick 1 1/2 hr flight ! It performed flawlessly except for a loose usb connection in a hub, but once the fault was found all good. I'm just picturing kicking back in your sim flying to wherever, whenever. You are going to love it. Already, you have what most men on the planet, would love, just think about that and pat yourself on the back. How many guys can take their partner on a date night ......................to Paris ! Enjoy Mark S with Mark C and Peter N. Maciej, What a beaut looking Hangar. I'm just so excited for everyone as I am 'flogging' Jet 45 v2 so that we can iron out any bugs for when it's your turn. I jumped in the Lear this afternoon for a quick 1 1/2 hr flight ! It performed flawlessly except for a loose usb connection in a hub, but once the fault was found all good. I'm just picturing kicking back in your sim flying to wherever, whenever. You are going to love it. Already, you have what most men on the planet, would love, just think about that and pat yourself on the back. How many guys can take their partner on a date night ......................to Paris ! Enjoy Mark S with Mark C and Peter N. Couple more things showed at my door today to help spruce up my place. One of them was laser engraved poster. To my surprise it was made and sent from my home country of Poland in the matter of literally few days. Another one was a door emblem to emphasize importance of this room! Couple more things showed at my door today to help spruce up my place. One of them was laser engraved poster. To my surprise it was made and sent from my home country of Poland in the matter of literally few days. Another one was a door emblem to emphasize importance of this room! Maciej, I love the new place sprusers additions. Would you mind posting the links to those two items and I'll stick them on my christmas list. Thanks Mark S. Maciej, I love the new place sprusers additions. Would you mind posting the links to those two items and I'll stick them on my christmas list. Thanks Mark S. Laser engraved metal poster can be found HERE I opted for large size, matte finish and no frame. Door emblem you can find HERE I modified mine slightly by cutting top and bottom edge to get rid of mounting holes since original product was designed to fit as license plate and holes would serve no purpose on the door beside annoying me. Most airplane places have restricted acces so I found and installed biometric door lock. You can open the door using fingerprint, tiny TAG card or punching code on the touch screen. Laser engraved metal poster can be found HERE I opted for large size, matte finish and no frame. Door emblem you can find HERE I modified mine slightly by cutting top and bottom edge to get rid of mounting holes since original product was designed to fit as license plate and holes would serve no purpose on the door beside annoying me. Most airplane places have restricted acces so I found and installed biometric door lock. You can open the door using fingerprint, tiny TAG card or punching code on the touch screen. There it is, my Flight Simulator Room for Learjet45. Screen has been painted using special screen paint for projectors and tile carpet installed. I was excited that this room, which is an addition to the garage, had HVAC register in the ceiling hooked up to HVAC system. I noticed that it didn't have air return which, lack of it or with door to the garage closed, made HVAC register pretty much useless since air didn't have anywhere to go. I managed to install return to help with air circulation. Having 3 computers, 3 projectors and couple people in 2oo square feet room, I wanted to make sure we won't suffer from heat stroke half way through the flight! In case HVAC system won't be able to bring temp down efficiently, return air register has in-duct fan installed that is controlled automatically by thermostat, that based on temperature in the room, turns in-duct fan and helps rotate the air. If speed 1 won't lower temperature in the room then thermostat ups the speed (1 to 6). I like automation part of it, while inside the cockpit, I won't have to get out to adjust anything. Shell is in place and centered. Ready for interfacing! There it is, my Flight Simulator Room for Learjet45. Screen has been painted using special screen paint for projectors and tile carpet installed. I was excited that this room, which is an addition to the garage, had HVAC register in the ceiling hooked up to HVAC system. I noticed that it didn't have air return which, lack of it or with door to the garage closed, made HVAC register pretty much useless since air didn't have anywhere to go. I managed to install return to help with air circulation. Having 3 computers, 3 projectors and couple people in 2oo square feet room, I wanted to make sure we won't suffer from heat stroke half way through the flight! In case HVAC system won't be able to bring temp down efficiently, return air register has in-duct fan installed that is controlled automatically by thermostat, that based on temperature in the room, turns in-duct fan and helps rotate the air. If speed 1 won't lower temperature in the room then thermostat ups the speed (1 to 6). I like automation part of it, while inside the cockpit, I won't have to get out to adjust anything. Shell is in place and centered. Ready for interfacing! Maciej's L45-013 Project and Updates!
![]()

![]()

![]()


![]()
![]()
![]()

![]()
![]()
![]()
![]()


Forum NavigationMaciej's L45-013 Project and Updates!
![]() #51 · February 8, 2021, 11:50 am
#51 · February 8, 2021, 11:50 am![]() #52 · February 25, 2021, 9:25 pm
#52 · February 25, 2021, 9:25 pm![]() #53 · September 27, 2021, 8:52 am
#53 · September 27, 2021, 8:52 am![]() #54 · September 27, 2021, 3:12 pm
#54 · September 27, 2021, 3:12 pm![]() #55 · September 29, 2021, 6:26 am
#55 · September 29, 2021, 6:26 am![]() #56 · October 1, 2021, 10:08 pm
#56 · October 1, 2021, 10:08 pm![]() #57 · October 2, 2021, 8:31 pm
#57 · October 2, 2021, 8:31 pm![]() #58 · October 2, 2021, 9:32 pm
#58 · October 2, 2021, 9:32 pm![]() #59 · October 2, 2021, 10:32 pm
#59 · October 2, 2021, 10:32 pm![]() #60 · November 2, 2021, 4:32 pm
#60 · November 2, 2021, 4:32 pm
2017-10-10