


(Original thread started on 10-01-09 by Eric Tomlin) After being very busy with the testing and release of JET45, I have finally had a chance to start getting some major work done for my own LJ45 sim. This week I was able to get two sets of hands to help me move the new base and shell from the carport to my sim hangar and I am extremely happy to be moving forward again. The worst part was dismantling and moving the old sim components from the main base off to one side so that the new base could be positioned in place as well as the shell. This is the first of what I'm sure will be several photos as I progress: (Posted by Ron Rollo on 10-01-09) Nice job Eric! It looks at home up on the raised base platform. I am also happy that the other guys can finally get to see L45-003. She is a beauty! The first of many photos I am sure! (Posted by Shane Barnes on 10-01-09) Hey Eric, great to see 003 I like it sitting up on the base the way you have it. I wish my basement ceiling was much taller, I would love to have my sim sitting about 2 1/2 feet off the floor. To me it would add a little more to the experience, like you were climbing up into the cockpit, but I have short ceilings. One of these days maybe I will have a larger area to put 007 in. (Posted by Eric Tomlin on 10-01-09) Thanks for the well wishes and all. I'm sitting here in the 'nest' and contemplating on what to do. So often I have to work on everything late at night after my two girls (the baby and my wife) go to sleep. Trust me, there's no shortage of things to get done! To address a couple of things you guys mentioned or asked: I wont be fiberglassing the outside like Ron and Shane did. I don't have the time, money, or tools/skills to go that route although it looks fantastic on the two master shell builder's projects. Also, I'm taking a bit of a different approach in the build process too. Whereas Ron and Shane are building their sims more like a real airplane, I'm building a bit more like a simulator from Flight Safety, etc. However, that may not be entirely true since I do plan on adding a short cabin section one day after I get what is on my plate now completed to a level where it'd be prudent to begin the cabin section. As such, again I'm not fiberglassing but actually I am working on a method to cover the shell in a cloth material on the outside if for nothing more than to conceal the rib work. The inside will likely be identical to however Ron and Shane complete theirs, as we all three already have identical 'furniture' components. Back to the outside though, you really wont ever see it if you come to visit my sim because as you see in the photo the shell is on the same size base as Ron, Shane, Rick, and others have. However, that base is then sitting on my original 6x8 foot base with 6 heavy duty casters. The original base serves several purposes. First and foremost, I couldn't bare the thought of ditching a very wonderfully built base that was already carpeted, wheeled, and structurally sound. Second, I braced it so well that I had doubts of putting in the two Tylenol shaped holes that the bottom of the columns fall thru so I decided to build the 2nd base to spec and sit it on top of the original base because of reason #3- The old base gives me the perfect platform to build my full enclosure off of. That and it raised the sim almost 2 foot total off the floor for a slightly more realistic elevation and the 1 foot extra on both sides provides addition room for any wiring, speakers, duct work or any other unforeseen use. The enclosure is the main benefit of keeping the original base as it will allow the full enclosure plus my projector to move with the sim if I need to roll it around, so everything remains very componentized. The enclosure will have black sheeting on the inside to hide the frame and force the crew's visual focus back into the cockpit or forward and the outside of the sim will just be one huge white box with an entry way on the back. This serves to hide my lack of a proper outside shell covering plus provides a very professional appearance of a high level sim. Once the cabin extension is ready, I will remove the back portion of the enclosure and mate the cabin up to it and it will look pretty much like the photo on the front page here at Hangar 45, with a wood grain finish, a small galley, and then 2-4 seats plus the window on each side for the passenger(s). Currently as it's seen on the photo above, I have the raised floor sitting in temp for placement and as soon as I finish typing this I'm going to install a few components so that I can start mapping out all my electrical runs for the buttkicker, MIP monitors, etc. That's all for now! Here it is past 4am and I just got through shutting the sim down. Tonight I got the avionics machines up and running on the network again with new LCD monitors made specifically for the MIP and it was great seeing it run. I have to get the PC for the center LCD taken care of as it's on the fritz. Enjoy these system test photos: Needless to say, I'm super excited to be halfway up and running and now I can continue to test the JET45 software for all the neat enhancements we have coming up soon. (Posted by Ron Rollo on 10-02-09) This is the moment I have been waiting for! The shell, the Avionics and the furniture parts all coming together! I'll bet a lot of those guys sitting on the fence wondering whether or not they are going to jump in and build a L45 have just falling off the fence into our yard! (Posted by Eric Tomlin on 10-02-09) First, I have lots of work left to do on the sim in order for it to be what I would consider 'flyable' but getting the MIP, MIP Stand, TQ Pedestal installed and running was very cool and provided me for the first time a real appreciation for the Learjet that Ive never had. Some of you know that I have two Porsche seats that I used for the original sim. Well, currently the seat bases are a good bit too wide to fit in the shell so I aim to modify them this weekend so that they fit to mount to the floor. What I did last night was sit one in the sim without the center pedestal and just sat there on the seat in the most approximate location of where anyone with Ron's shell and components will be seated. This is when all the years of waiting to start my project started paying me back, as even with a few issues with the center monitor/PC and no outside visual running I finally started to get the sensation and taste of what's to come when it's all together. I can only imagine how much better when it's finally fully enclosed and has the windscreen installed. The view in the real LJ45 must be breathtaking with such a large uninterrupted window! Eventually once Ron gets the actual replica seats designed I will then move the Porsche seats to storage until I get to building the cabin extension. Anyhow, I needed to test some new enhancements to the JET45 suite and so I got the projector positioned well enough to see the world out front and got the sim up and running and flew with the mouse and keyboard just to test the software. #1 you guys are going to like the new fonts for JET45 and #2 the smile on my face didn't leave for quite a while. Anyhow, I have a large plate to eat now to get the sim to continue moving forward and I'm hoping it's sooner rather than later. One more thing- I now have an idea of what it's like to work in an airplane all cramped and twisted. All I can say is that this is one case that is really good for those that may not cover their shell with a permanent covering, as having more access was appreciated since it was hard enough running wires, cables, etc. I will post more photos as I make progress. I have already got the LCD fitted and installed and I even actually have Dave's software running last night before I made the last two photos. I don't have the newest version of software yet, so I wasn't taking advantage of the better performance so what I experienced was slower than fluid performance with the following: My usual Captain side PC running JET45 with the additional monitor in the middle running Dave's four center pieces of software. I know that having less PCs running is ideal but I like to shed the load and so I have to get a sick computer up and running to take on nothing but the three standby pieces/1 CWP plus the two RMUs from Jason. The other issue is that I had some weird things happening which I suspect are due to running the left monitor normal and the center one in portrait mode off the same video card. UPDATE: Here's two shots showing me doing some figuring on how I'm going to install the raised floor section: Last night after fooling around with this for just a very few minutes, I got the bright idea to take out my black material (king sized bed sheets!) and arrange it as it will be for the interior enclosure liner. I then added another sheet to the outside of the shell itself to cover the top where the roof/ceiling of the shell is and it gave me the fully enclosed effect; especially after covering the rear entry door with some of the same black material. Now granted, it was very crude since it was just a test and although the sim was flying on autopilot (the controls haven't been integrated back yet) I can say comfortably that this sim is going to be rocking out. It was incredible seeing the visual system through the narrow window area and I'm really looking forward to getting everything back up and running! (Posted by Douglas Dick on 10-16-09) Looking good Eric, I remember finding your website when you had just put together three gear lights, things have moved on a lot now. You have found the problem with building an enclosed cockpit in that it is difficult to work on in the small space. I am also finding it difficult, these aircraft mechanics must be be contortionists! (Posted by Eric Tomlin on 10-22-09) Okay, so a few days ago I was able to start modifying my current seat bases and test fitting the seats that I plan on using until Ron designs and builds scale LJ style seats. I'm using Porsche 928 seats which were the most narrow available, and for the price ($75 for the pair!), excellent. These are the seats Ive always used, but because I didn't have a shell, the seat bases were not ever an issue. Now that you are dealing with a near 100% scale shell, you have the curvature of the shell meeting down at the floor, making it more narrow than what my bases were built for. Sorry again about the poor quality of the photos (taken with my iPhone) but it's always handy to have it with me out in the hangar and so here's some info for you builders not quite 'here' yet. Here you can see with even the seat in the most aft position, there's not much room between the seat front and where the column comes up. Later I will take a photo showing the column in place maybe: These last two show the proximity of the seat to the Center Pedestal. Because I want to keep the seat back adjustment and fore/aft travel adjustment in easy reach, I have to build this seat base up another 1" or so. That's where I am in the modification process right now, just waiting to get time to go out and cut more materials to raise it up: The far left lower corner of the seat base has a 45 deg cut off the corner. This was required due to the fuselage line moving inwards to meet the floor. Here's where you can see that for me it's important to raise it up due to the seat back angle coming awfully close to the center pedestal's panels. Not only that, but at the current height it's too low for a proper eye point. I'm short, so this current setup has my eyes just over the top of the glareshield. Once the leather cover is installed, my eyes will be right there, so it's got to be raise a little for that too. Okay, now for the info for folks that haven't quite got all these parts stuffed in yet- It's a very tight fit! "Yes Eric, we know this...it's a Learjet, not a Boeing or Airbus" you may say. I guess since it's been almost 3 years since I was in a real LJ45 taking photos, I had forgotten just how tight of a fit it is! Very doable, of course, as many LJ45 pilots climb in and out day in and day out. I say all this to remind everyone how important it is to build your parts (raised floor sections, seats, center pedestal, glareshield), to a very high quality when it comes to strength and ruggedness, because you will wind up kicking, pulling, pushing, etc on your parts to get in and out of this thing until you find your groove. You definitely need to install an assist handle on the roof center line like the real one too. (Posted by Jason Hite on 10-22-09) It always amazes me how little structure there is separating you from 50,000 feet of subzero nearly sonic air! Looking great Eric! (Original thread started on 10-01-09 by Eric Tomlin) After being very busy with the testing and release of JET45, I have finally had a chance to start getting some major work done for my own LJ45 sim. This week I was able to get two sets of hands to help me move the new base and shell from the carport to my sim hangar and I am extremely happy to be moving forward again. The worst part was dismantling and moving the old sim components from the main base off to one side so that the new base could be positioned in place as well as the shell. This is the first of what I'm sure will be several photos as I progress: (Posted by Ron Rollo on 10-01-09) Nice job Eric! It looks at home up on the raised base platform. I am also happy that the other guys can finally get to see L45-003. She is a beauty! The first of many photos I am sure! (Posted by Shane Barnes on 10-01-09) Hey Eric, great to see 003 I like it sitting up on the base the way you have it. I wish my basement ceiling was much taller, I would love to have my sim sitting about 2 1/2 feet off the floor. To me it would add a little more to the experience, like you were climbing up into the cockpit, but I have short ceilings. One of these days maybe I will have a larger area to put 007 in. (Posted by Eric Tomlin on 10-01-09) Thanks for the well wishes and all. I'm sitting here in the 'nest' and contemplating on what to do. So often I have to work on everything late at night after my two girls (the baby and my wife) go to sleep. Trust me, there's no shortage of things to get done! To address a couple of things you guys mentioned or asked: I wont be fiberglassing the outside like Ron and Shane did. I don't have the time, money, or tools/skills to go that route although it looks fantastic on the two master shell builder's projects. Also, I'm taking a bit of a different approach in the build process too. Whereas Ron and Shane are building their sims more like a real airplane, I'm building a bit more like a simulator from Flight Safety, etc. However, that may not be entirely true since I do plan on adding a short cabin section one day after I get what is on my plate now completed to a level where it'd be prudent to begin the cabin section. As such, again I'm not fiberglassing but actually I am working on a method to cover the shell in a cloth material on the outside if for nothing more than to conceal the rib work. The inside will likely be identical to however Ron and Shane complete theirs, as we all three already have identical 'furniture' components. Back to the outside though, you really wont ever see it if you come to visit my sim because as you see in the photo the shell is on the same size base as Ron, Shane, Rick, and others have. However, that base is then sitting on my original 6x8 foot base with 6 heavy duty casters. The original base serves several purposes. First and foremost, I couldn't bare the thought of ditching a very wonderfully built base that was already carpeted, wheeled, and structurally sound. Second, I braced it so well that I had doubts of putting in the two Tylenol shaped holes that the bottom of the columns fall thru so I decided to build the 2nd base to spec and sit it on top of the original base because of reason #3- The old base gives me the perfect platform to build my full enclosure off of. That and it raised the sim almost 2 foot total off the floor for a slightly more realistic elevation and the 1 foot extra on both sides provides addition room for any wiring, speakers, duct work or any other unforeseen use. The enclosure is the main benefit of keeping the original base as it will allow the full enclosure plus my projector to move with the sim if I need to roll it around, so everything remains very componentized. The enclosure will have black sheeting on the inside to hide the frame and force the crew's visual focus back into the cockpit or forward and the outside of the sim will just be one huge white box with an entry way on the back. This serves to hide my lack of a proper outside shell covering plus provides a very professional appearance of a high level sim. Once the cabin extension is ready, I will remove the back portion of the enclosure and mate the cabin up to it and it will look pretty much like the photo on the front page here at Hangar 45, with a wood grain finish, a small galley, and then 2-4 seats plus the window on each side for the passenger(s). Currently as it's seen on the photo above, I have the raised floor sitting in temp for placement and as soon as I finish typing this I'm going to install a few components so that I can start mapping out all my electrical runs for the buttkicker, MIP monitors, etc. That's all for now! Here it is past 4am and I just got through shutting the sim down. Tonight I got the avionics machines up and running on the network again with new LCD monitors made specifically for the MIP and it was great seeing it run. I have to get the PC for the center LCD taken care of as it's on the fritz. Enjoy these system test photos: Needless to say, I'm super excited to be halfway up and running and now I can continue to test the JET45 software for all the neat enhancements we have coming up soon. (Posted by Ron Rollo on 10-02-09) This is the moment I have been waiting for! The shell, the Avionics and the furniture parts all coming together! I'll bet a lot of those guys sitting on the fence wondering whether or not they are going to jump in and build a L45 have just falling off the fence into our yard! (Posted by Eric Tomlin on 10-02-09) First, I have lots of work left to do on the sim in order for it to be what I would consider 'flyable' but getting the MIP, MIP Stand, TQ Pedestal installed and running was very cool and provided me for the first time a real appreciation for the Learjet that Ive never had. Some of you know that I have two Porsche seats that I used for the original sim. Well, currently the seat bases are a good bit too wide to fit in the shell so I aim to modify them this weekend so that they fit to mount to the floor. What I did last night was sit one in the sim without the center pedestal and just sat there on the seat in the most approximate location of where anyone with Ron's shell and components will be seated. This is when all the years of waiting to start my project started paying me back, as even with a few issues with the center monitor/PC and no outside visual running I finally started to get the sensation and taste of what's to come when it's all together. I can only imagine how much better when it's finally fully enclosed and has the windscreen installed. The view in the real LJ45 must be breathtaking with such a large uninterrupted window! Eventually once Ron gets the actual replica seats designed I will then move the Porsche seats to storage until I get to building the cabin extension. Anyhow, I needed to test some new enhancements to the JET45 suite and so I got the projector positioned well enough to see the world out front and got the sim up and running and flew with the mouse and keyboard just to test the software. #1 you guys are going to like the new fonts for JET45 and #2 the smile on my face didn't leave for quite a while. Anyhow, I have a large plate to eat now to get the sim to continue moving forward and I'm hoping it's sooner rather than later. One more thing- I now have an idea of what it's like to work in an airplane all cramped and twisted. All I can say is that this is one case that is really good for those that may not cover their shell with a permanent covering, as having more access was appreciated since it was hard enough running wires, cables, etc. I will post more photos as I make progress. I have already got the LCD fitted and installed and I even actually have Dave's software running last night before I made the last two photos. I don't have the newest version of software yet, so I wasn't taking advantage of the better performance so what I experienced was slower than fluid performance with the following: My usual Captain side PC running JET45 with the additional monitor in the middle running Dave's four center pieces of software. I know that having less PCs running is ideal but I like to shed the load and so I have to get a sick computer up and running to take on nothing but the three standby pieces/1 CWP plus the two RMUs from Jason. The other issue is that I had some weird things happening which I suspect are due to running the left monitor normal and the center one in portrait mode off the same video card. UPDATE: Here's two shots showing me doing some figuring on how I'm going to install the raised floor section: Last night after fooling around with this for just a very few minutes, I got the bright idea to take out my black material (king sized bed sheets!) and arrange it as it will be for the interior enclosure liner. I then added another sheet to the outside of the shell itself to cover the top where the roof/ceiling of the shell is and it gave me the fully enclosed effect; especially after covering the rear entry door with some of the same black material. Now granted, it was very crude since it was just a test and although the sim was flying on autopilot (the controls haven't been integrated back yet) I can say comfortably that this sim is going to be rocking out. It was incredible seeing the visual system through the narrow window area and I'm really looking forward to getting everything back up and running! (Posted by Douglas Dick on 10-16-09) Looking good Eric, I remember finding your website when you had just put together three gear lights, things have moved on a lot now. You have found the problem with building an enclosed cockpit in that it is difficult to work on in the small space. I am also finding it difficult, these aircraft mechanics must be be contortionists! (Posted by Eric Tomlin on 10-22-09) Okay, so a few days ago I was able to start modifying my current seat bases and test fitting the seats that I plan on using until Ron designs and builds scale LJ style seats. I'm using Porsche 928 seats which were the most narrow available, and for the price ($75 for the pair!), excellent. These are the seats Ive always used, but because I didn't have a shell, the seat bases were not ever an issue. Now that you are dealing with a near 100% scale shell, you have the curvature of the shell meeting down at the floor, making it more narrow than what my bases were built for. Sorry again about the poor quality of the photos (taken with my iPhone) but it's always handy to have it with me out in the hangar and so here's some info for you builders not quite 'here' yet. Here you can see with even the seat in the most aft position, there's not much room between the seat front and where the column comes up. Later I will take a photo showing the column in place maybe: These last two show the proximity of the seat to the Center Pedestal. Because I want to keep the seat back adjustment and fore/aft travel adjustment in easy reach, I have to build this seat base up another 1" or so. That's where I am in the modification process right now, just waiting to get time to go out and cut more materials to raise it up: The far left lower corner of the seat base has a 45 deg cut off the corner. This was required due to the fuselage line moving inwards to meet the floor. Here's where you can see that for me it's important to raise it up due to the seat back angle coming awfully close to the center pedestal's panels. Not only that, but at the current height it's too low for a proper eye point. I'm short, so this current setup has my eyes just over the top of the glareshield. Once the leather cover is installed, my eyes will be right there, so it's got to be raise a little for that too. Okay, now for the info for folks that haven't quite got all these parts stuffed in yet- It's a very tight fit! "Yes Eric, we know this...it's a Learjet, not a Boeing or Airbus" you may say. I guess since it's been almost 3 years since I was in a real LJ45 taking photos, I had forgotten just how tight of a fit it is! Very doable, of course, as many LJ45 pilots climb in and out day in and day out. I say all this to remind everyone how important it is to build your parts (raised floor sections, seats, center pedestal, glareshield), to a very high quality when it comes to strength and ruggedness, because you will wind up kicking, pulling, pushing, etc on your parts to get in and out of this thing until you find your groove. You definitely need to install an assist handle on the roof center line like the real one too. (Posted by Jason Hite on 10-22-09) It always amazes me how little structure there is separating you from 50,000 feet of subzero nearly sonic air! Looking great Eric! (Posted by Eric Tomlin on 01-3-10) Well now that I have Scott's FGC working as an outstanding temp unit, I am back to flying again! Here I am in my 2nd flight since the FGC is back online, positioning for finals into Augusta Regional: Short finals coming over the highway just before disengaging the AP: My flying has been forever enhanced by Real Environment Xtreme for FS9. The sky and cloud textures are incredible and have very much changed the way FS9 looks. As you can see, we had a 100 kt cross wind that was causing the aircraft to crab a bit to compensate. The weather was clear and cold with mild turbulence increasing as we descended from FL290 down through about 8000 or so. We cancelled our IFR clearance around 16k and continued under flight following all the way into FLL. The trip took just under an hour and was mainly a test of adding the Captain Side EFIS hardware online to the simulator. It works well and adds lots of fun to the flying. Nothing new here, just thought this was a really good screenshot, especially considering it's not FSX. Can you guess what scenery package and location? FS9, Flight Scenery's Portland package, GA ramp at Hillsboro Airport, KHIO. Of course, I'm running the ENB series bloom effect along with REX for FS9. It's such a shame that the developer went AWOL. His work is incredible. I have also his first package, Rhode Island. Both are worth every penny. What really makes me sad is that he was slated to do Jacksonville (KJAX), which is Ron and my local "big" airport. You can see the package details here: http://secure.simmarket.com/flight-scenery-flightzone-02-portland.phtml (Posted by Eric Tomlin on 09-03-11) Well, it's been forever and I finally have something worth showing, if only to encourage others out there. I finally got around to building a dual LED equipped AML21. I tell ya, Ron's tutorial is great. I strayed from it very slightly, and that's only in that I used some ribbon wire vs. 3 individual wires which gave me a little more room. As you can see, colors are rich and even for the most part (the LEDs aren't set in place yet) and I'm very pleased with the outcome. This unit has not had the proper light sanding on the front edge and also needs another coat of black sealant around the outsides of the AML51 cap plus some black sealant on the inside to aid in the edge leaks that you may see. All in all, this took probably no more than 20-30 minutes and I anticipate the rest of them to take no more than 15 minutes-25 minutes max each. I then interfaced it with JET45 and started testing it with the sim logic. Overall, this is going to be lots of fun. I will now look forward to making the other dozen or so split AMLs for the rest of the sim and not be scared! Today I was talking to Shane about making these and he brought up the fact that if you remove the third 2nd/middle tab on both sides of the switch body, you can remove the light/lamp socket. This makes the install a bit cleaner and gives a lot of room to run wires vs. just drilling a hole in the bottom. As you can see, I'm having fun! This also is a good comparison between Yellow and Warm White: UPDATE: Finally, some nice progress has been made on the sim. I've now got my personal Electrical Panel fully wired and ready for interfacing. Check it out: On top of this, I wanted to point out something. If you notice, the L and R NON-ESS switches appear a bit different than the rest. This is because of LED inconsistency from the typical eBay China suppliers. I absolutely love my "warm white" LEDs that are showing on the other switch legends, but these two are not the same LEDs/colors although they *did* come from the same bag and it seems that about 1 out of every 8-10 are this whiter/bluer color. It doesn't bother me since when you look at lots of photos of the real aircraft, the switches seem to indicate that the bulbs are mismatched color-wise (I'm thinking due to age and camera position, lighting, etc.). At any point, I'm super excited to finally be able to show progress on my sim. I have lots of other stuff just waiting to be installed, but like Ron says- it's hard to build your own sim when you're helping bring others' project up to speed building parts. It's a labor of love, and I enjoy building the parts too. I want to point out something here while I have a moment. The AML21 switches along with the 389 Replica Kit and Ron and I teamed up to develop are incredible parts for these sims. As I was putting together the 389 kits to complete this Electrical Panel, it just all came back to me all the time Ron and I spent figuring out the best way to get this part done. I really cannot see a better solution for switches! For my birthday, I got a day to work on my own project which meant getting the Electrical, Landing Gear, and Engine Start Panels ready to go into the sim. Here's the result of the Gear panel: UPDATE: I wasn't quite ready to make the video "known" about yet but since Eric G. has satellites monitoring all LJ45 sim progress, he ratted me out! If you've known me for a while, you know that I am a hard-core "systems" and "procedures" kind of guy. For quite some time now I've been working on developing a document that will help folks understand what each panel is, what it does, and even how some interfacing can be done for it. The beauty of the FDS SYS cards is that fairly complex systems can be emulated but the truth is, without a real systems software, you will simply not have it working the way that it really should be near 100%. You can be close, but you got to have a systems software in place to really "bring it home" and complete the package. A great example of this is when you get into abnormal situations, failures, and last but most important to me, the accompanying CAS messages that go up on the EICAS just like the basic ones we already have in place. Thankfully, Jason has done a small amount of work toward the Systems software, but since folks seem to want a CDU first, that's taken priority. My take on it is, "You should have the airplane itself done first" but I guess since the CDU is a fancy gizmo magic machine, a lot of folks always want that first. My theory is that people will get tired of kicking the tires and lighting the fires and will eventually want to go deeper and REALLY simulate what's going on in the aircraft itself. With all of this said, I wanted to show what could be done with the SYS cards and some ingenuity if you knew how the aircraft operated on a systems level. It's not perfect (and in fact purposely shows a problem with this approach toward the end), but it's really good for now and I'm super happy to know that flying will be all the more realistic for those that visit my sim until we finally one day develop a true systems software for JET45. Enjoy! https://youtu.be/p66PLn0g52Y Each time that bus tie closes automatically I YEARN for there to be an accompanying CAS message stating "BUS TIE CLOSED" and I would so love it that we have a real working APU, GPU, and "WSHLD HEAT FAIL" when you've pressed the FIRE PUSH button and you starting shutting down things due to an Engine Fire. (Posted by Eric Williams on 01-12-12) I get all revved-up when I see hardware functioning. I am much like you, I have a love for the interaction between systems and truly enjoy using them (even if it is just simulated) I (also like you) have advocated for the FDS interfacing. I knew right away that it would be possible to simulate virtually all interactions/operations completely outside FSX when required- with no coding experience. Just basic logic and maybe a simple relay etc. This is another reason I used all momentary action switches in my Lear- I knew that with Interface-IT I could make it perform no different than latching... I don't mean to downplay the coding/logic used in your setup either- I have used it, and I know there is quite a lot of co-dependent actions etc but I have no doubt this method is easier than writing full on code/script. The minute mine became semi functional I began playing with checklist items and abnormal situations (hence my thread on CAS messages) Sorry to let the cat out of the bag, but I just had to comment. Things are so close to getting VERY functional, it's exciting. Plus us other fellas can scam some XML's and see how to do it very VERY quickly! VERY nicely done. (Posted by Alan Norris on 01-12-12) Can you explain how the relay card works to replicate what happens in the real Lear? Do you need to use the FDS relay card or can it be done in logic? I ask this because I've started to wire some panels and if I elect to use a relay card I need to be concerned about how my panels are wired -- right? Super video by the way, nice to see things happening. (Posted by Eric Tomlin on 01-12-12) 1) The relay card simply cuts off power to the 12v wall wart power supply going to your SYS card(s) which only power the LEDs, and has no effect on the actual input/output section. This means that you don't have to worry about your wiring. Wire your panels like you've been told to/are supposed to do and then on your interface card's 12v power supply you will cut 1 of the 2 wires and plug them into either the FDS relay card (highly suggested because it works from OFFSETS too!) or by putting in a double pole on your L BATT AML21 switch, and that could trip a normal relay to cause this to happen, but then it'd need to be a latching switch whereas the real L/R BATT is momentary. This is why I suggest paying the money for the FDS Relay card- it will cost you a little bit but in the end its super simple and just plain works great and with any offset or Internal Variable. 2) You can force some of this in logic, but not all of it. A great example on not being able to force it is the Landing Gear indicators- they will ALWAYS show DOWN even if the Batteries are off and you're using the Actual Gear Position offsets. There's no way around it. However, a SYSTEMS software would use a proprietary offset that would make it conditional (like, if power = FALSE, Gear indicators= OFF). (Posted by Alan Norris on 01-13-12) Eric, following up on your reply about the FDS relay card, does this mean I have to have two FDS SYS3 cards to simulate the LH and RH bus functions or is this done in the FDS logic? I see in your demo video that you pushed both LH and RH battery switches at the same time. Does this mean that [b]either[/b] of those two switches actuated the FDS relay card? In terms of wiring then, those two switches need to be wired to the relay card direct and obviously not to the FDS card. Is it possible to completely split the buses by having two FDS cards and one relay card (I see that the relay card can switch up to 8 circuits). I would really need to decide which direction I will be going with this as it affects the wiring of the electrical panel immensely. If splitting the buses is the direction then I need to figure out what cards I need. I don't know if it is possible but could you post a simple (and looking at your wiring I don't think it'll be simple) wiring schematic. (Posted by Shane Barnes on 01-13-12) Hey Alan, I think this is one of those areas where we need the systems completed in JET45. You can simulate quite a bit with FDS logic but FS only modeled one bus and to be accurate to the aircraft we need the electrical system modeled. I am sure Eric will elaborate more on this as he has his head buried in the manuals right now! He will be able to give you the best scenario with what we have right now. I want my build modeled as close as I can get to the real aircraft and I'm thinking you are starting to head in that direction too. Once you start diving deeper into the aircraft you begin to see all that is capable. The default Lear45 leaves a lot to be desired. This is why we need systems completed in JET45. Yeah, the logic that we can create with the FDS boards is good but cannot do all that we need. I've put a lot of work into my build and I don't want to short change myself with it's kinda close . . I want really close to the real thing. This is why I stated in another post how valuable Jason is to the Hangar. He can do the programming and Eric does the testing/consulting. I think something to keep in mind is that our projects need to remain somewhat "fluid", meaning we need to expect that we will have to make some changes as new areas are developed and new information becomes available in the future. (Posted by Eric Tomlin on 01-13-12) Shane couldn't have said it any better. What I've done with the interface card is Wonderful, but as Shane said we need a Systems simulator for JET45. To elaborate on what Shane said, YES- you could split your system the way you are proposing but it still would be off in several regards. Trying to find the best way to respond here...thinking.... Okay, so you noticed that I pressed the L/R BATT on at the same time. That's actually a check list item. Can you press them individually? Yes. Does it hurt? No. But, proper procedure is simultaneously for some reason. That said, if you notice I have modeled very slightly a R bus by having it on it's own logic using Internal Variables (henceforth referred to as "IV"). I have an IV called R BATT and R MAIN and when you press R BATT, it signals R MAIN to be on or off, just like for real. However, you can independently turn on or off R MAIN too. Regarding the relay- no- it's only assigned to the L BATT switch. It could be assigned to both, but it would likely get to where if you pressed out of sync you might turn it right back off again when pressing the opposite switch. It's simpler to have the L BATT signal the relay to close (along with a few other items) and all the LEDs come alive except those that I assign to the R BATT switch. BTW, you or anyone else is always welcome to drive down here and see it all in person. It'd be much easier if you could see it that way. There's no need for a wire scheme. It's wired just like you've already wired your panel, no different. What makes it look like it does is all in the logic from InterfaceIT and knowing how the airplane works! That's why the manuals and the upcoming Panel Guide from Flight Level Simulations is so important- it tells you how it works and what to expect. As you mentioned, the airplane is split into two halves at the most basic explanation, but in reality it goes much deeper when you consider the Emergency Bus, Rear hot bus, etc. The only thing IMHO that we be deeply concerned with is the L/R Bus and the Emergency Bus and the systems software will model that nicely once completed. Essentially the idea is that when you turn on L BATT, DU2 comes alive and when you turn on L AVIONCS the PFD comes alive, and of course you've got the L MAIN, L NON ESS, and all that for the right side and then the Bus Tie, and all this is great stuff to have working properly, especially when you start an engine and the Bus Tie closes to provide power to non-Gen side but then remember, when you shut down, the Bus Tie shouldn't close,etc, etc. etc. Lots of logic rules here and some just cannot be done properly without the complete software. You could go the Don Jones route and have it all done in its entirety with hardware logic, but again IMHO by having the Relay card for a few items on the hardware side and a complete systems software, it will work just as needed and much easier for the customer in the end. In fact, the reason I have the relay card right now is to get rid of lights (LEDs) when cold and dark. However, once the Systems software is done we wont need the relay card for any light purposes on the instrument panel, but we will for the overhead lights, etc. How so? Imagine coming in and turning on the overhead map light, but the airplane is not on. Using the relay, we can create a bus that has a terminal strip connected to the 12v power and it's not closed until the L/R BATT switch is ON. That's essentially what I'm doing now for cold and dark, but it wont be needed for panels after systems software is created but it will be needed for the overhead light example, or for stick shakers, Hobbs meter, and the Davtrons, etc. (Posted by Alan Norris on 01-13-12) WOW Eric, that's a lot to consider, thanks for taking the time to explain it. So what you are saying is, we won't need a relay card once the logic is programed into the JET45. So the best solution right now is to adopt a wait and see attitude but proceed with wiring our panels to the FDS boards. (Posted by Eric Tomlin on 01-13-12) You're welcome. However, if you want the functionality of having a 'real' electrical system then YES, you want to use a relay but you wont (likely) have to use it for the SWITCH light logic. All the overhead lights, map lights, panel backlighting, etc. can be put on their respective L/R bus and not be power-ready until the actual L/R BATTs are on. Wait and see only applies to switch light/functionality logic. UPDATE: Got the MIP cut and repainted for my 2 Davtron Chronos- I've got 2 877's for a good price thanks to eBay and Alan and will use these guys until I can find some 850's. HOWEVER, it should be noted that Davtron actually makes an 850 model that is a round face like the 877's. You can see them here: http://www.davtron.com/product-detail.php?M850-16 The MIP cut and clock in place. Shown lit up with 12v. These clocks can accept 12-28v: For the very few of us that have/had a Gen 1 MIP from Tom Goldberg, you have to use a jig to cut the round hole for these Chronos. I found using a 2" hole saw contained by the .25" jig did a pretty good job. Then I used a Dremel tool and round file to clean it all up. It's not as perfect as the later generation MIPs where we had the round hole designed into the file but it works. If I ever get an 850 with the beveled square front plate, any imperfections will be hidden completely. At this stage, I'm thankful to have working Chronos and for some strange reason, I kind of like the black face 877 even though I've only saw it in one very old photo of what I think was an LJ45 mock up or demonstrator aircraft. (Posted by Eric Tomlin on 01-3-10) Well now that I have Scott's FGC working as an outstanding temp unit, I am back to flying again! Here I am in my 2nd flight since the FGC is back online, positioning for finals into Augusta Regional: Short finals coming over the highway just before disengaging the AP: My flying has been forever enhanced by Real Environment Xtreme for FS9. The sky and cloud textures are incredible and have very much changed the way FS9 looks. As you can see, we had a 100 kt cross wind that was causing the aircraft to crab a bit to compensate. The weather was clear and cold with mild turbulence increasing as we descended from FL290 down through about 8000 or so. We cancelled our IFR clearance around 16k and continued under flight following all the way into FLL. The trip took just under an hour and was mainly a test of adding the Captain Side EFIS hardware online to the simulator. It works well and adds lots of fun to the flying. Nothing new here, just thought this was a really good screenshot, especially considering it's not FSX. Can you guess what scenery package and location? FS9, Flight Scenery's Portland package, GA ramp at Hillsboro Airport, KHIO. Of course, I'm running the ENB series bloom effect along with REX for FS9. It's such a shame that the developer went AWOL. His work is incredible. I have also his first package, Rhode Island. Both are worth every penny. What really makes me sad is that he was slated to do Jacksonville (KJAX), which is Ron and my local "big" airport. You can see the package details here: http://secure.simmarket.com/flight-scenery-flightzone-02-portland.phtml (Posted by Eric Tomlin on 09-03-11) Well, it's been forever and I finally have something worth showing, if only to encourage others out there. I finally got around to building a dual LED equipped AML21. I tell ya, Ron's tutorial is great. I strayed from it very slightly, and that's only in that I used some ribbon wire vs. 3 individual wires which gave me a little more room. As you can see, colors are rich and even for the most part (the LEDs aren't set in place yet) and I'm very pleased with the outcome. This unit has not had the proper light sanding on the front edge and also needs another coat of black sealant around the outsides of the AML51 cap plus some black sealant on the inside to aid in the edge leaks that you may see. All in all, this took probably no more than 20-30 minutes and I anticipate the rest of them to take no more than 15 minutes-25 minutes max each. I then interfaced it with JET45 and started testing it with the sim logic. Overall, this is going to be lots of fun. I will now look forward to making the other dozen or so split AMLs for the rest of the sim and not be scared! Today I was talking to Shane about making these and he brought up the fact that if you remove the third 2nd/middle tab on both sides of the switch body, you can remove the light/lamp socket. This makes the install a bit cleaner and gives a lot of room to run wires vs. just drilling a hole in the bottom. As you can see, I'm having fun! This also is a good comparison between Yellow and Warm White: UPDATE: Finally, some nice progress has been made on the sim. I've now got my personal Electrical Panel fully wired and ready for interfacing. Check it out: On top of this, I wanted to point out something. If you notice, the L and R NON-ESS switches appear a bit different than the rest. This is because of LED inconsistency from the typical eBay China suppliers. I absolutely love my "warm white" LEDs that are showing on the other switch legends, but these two are not the same LEDs/colors although they *did* come from the same bag and it seems that about 1 out of every 8-10 are this whiter/bluer color. It doesn't bother me since when you look at lots of photos of the real aircraft, the switches seem to indicate that the bulbs are mismatched color-wise (I'm thinking due to age and camera position, lighting, etc.). At any point, I'm super excited to finally be able to show progress on my sim. I have lots of other stuff just waiting to be installed, but like Ron says- it's hard to build your own sim when you're helping bring others' project up to speed building parts. It's a labor of love, and I enjoy building the parts too. I want to point out something here while I have a moment. The AML21 switches along with the 389 Replica Kit and Ron and I teamed up to develop are incredible parts for these sims. As I was putting together the 389 kits to complete this Electrical Panel, it just all came back to me all the time Ron and I spent figuring out the best way to get this part done. I really cannot see a better solution for switches! For my birthday, I got a day to work on my own project which meant getting the Electrical, Landing Gear, and Engine Start Panels ready to go into the sim. Here's the result of the Gear panel: UPDATE: I wasn't quite ready to make the video "known" about yet but since Eric G. has satellites monitoring all LJ45 sim progress, he ratted me out! If you've known me for a while, you know that I am a hard-core "systems" and "procedures" kind of guy. For quite some time now I've been working on developing a document that will help folks understand what each panel is, what it does, and even how some interfacing can be done for it. The beauty of the FDS SYS cards is that fairly complex systems can be emulated but the truth is, without a real systems software, you will simply not have it working the way that it really should be near 100%. You can be close, but you got to have a systems software in place to really "bring it home" and complete the package. A great example of this is when you get into abnormal situations, failures, and last but most important to me, the accompanying CAS messages that go up on the EICAS just like the basic ones we already have in place. Thankfully, Jason has done a small amount of work toward the Systems software, but since folks seem to want a CDU first, that's taken priority. My take on it is, "You should have the airplane itself done first" but I guess since the CDU is a fancy gizmo magic machine, a lot of folks always want that first. My theory is that people will get tired of kicking the tires and lighting the fires and will eventually want to go deeper and REALLY simulate what's going on in the aircraft itself. With all of this said, I wanted to show what could be done with the SYS cards and some ingenuity if you knew how the aircraft operated on a systems level. It's not perfect (and in fact purposely shows a problem with this approach toward the end), but it's really good for now and I'm super happy to know that flying will be all the more realistic for those that visit my sim until we finally one day develop a true systems software for JET45. Enjoy! Each time that bus tie closes automatically I YEARN for there to be an accompanying CAS message stating "BUS TIE CLOSED" and I would so love it that we have a real working APU, GPU, and "WSHLD HEAT FAIL" when you've pressed the FIRE PUSH button and you starting shutting down things due to an Engine Fire. (Posted by Eric Williams on 01-12-12) I get all revved-up when I see hardware functioning. I am much like you, I have a love for the interaction between systems and truly enjoy using them (even if it is just simulated) I (also like you) have advocated for the FDS interfacing. I knew right away that it would be possible to simulate virtually all interactions/operations completely outside FSX when required- with no coding experience. Just basic logic and maybe a simple relay etc. This is another reason I used all momentary action switches in my Lear- I knew that with Interface-IT I could make it perform no different than latching... I don't mean to downplay the coding/logic used in your setup either- I have used it, and I know there is quite a lot of co-dependent actions etc but I have no doubt this method is easier than writing full on code/script. The minute mine became semi functional I began playing with checklist items and abnormal situations (hence my thread on CAS messages) Sorry to let the cat out of the bag, but I just had to comment. Things are so close to getting VERY functional, it's exciting. Plus us other fellas can scam some XML's and see how to do it very VERY quickly! VERY nicely done. (Posted by Alan Norris on 01-12-12) Can you explain how the relay card works to replicate what happens in the real Lear? Do you need to use the FDS relay card or can it be done in logic? I ask this because I've started to wire some panels and if I elect to use a relay card I need to be concerned about how my panels are wired -- right? Super video by the way, nice to see things happening. (Posted by Eric Tomlin on 01-12-12) 1) The relay card simply cuts off power to the 12v wall wart power supply going to your SYS card(s) which only power the LEDs, and has no effect on the actual input/output section. This means that you don't have to worry about your wiring. Wire your panels like you've been told to/are supposed to do and then on your interface card's 12v power supply you will cut 1 of the 2 wires and plug them into either the FDS relay card (highly suggested because it works from OFFSETS too!) or by putting in a double pole on your L BATT AML21 switch, and that could trip a normal relay to cause this to happen, but then it'd need to be a latching switch whereas the real L/R BATT is momentary. This is why I suggest paying the money for the FDS Relay card- it will cost you a little bit but in the end its super simple and just plain works great and with any offset or Internal Variable. 2) You can force some of this in logic, but not all of it. A great example on not being able to force it is the Landing Gear indicators- they will ALWAYS show DOWN even if the Batteries are off and you're using the Actual Gear Position offsets. There's no way around it. However, a SYSTEMS software would use a proprietary offset that would make it conditional (like, if power = FALSE, Gear indicators= OFF). (Posted by Alan Norris on 01-13-12) Eric, following up on your reply about the FDS relay card, does this mean I have to have two FDS SYS3 cards to simulate the LH and RH bus functions or is this done in the FDS logic? I see in your demo video that you pushed both LH and RH battery switches at the same time. Does this mean that [b]either[/b] of those two switches actuated the FDS relay card? In terms of wiring then, those two switches need to be wired to the relay card direct and obviously not to the FDS card. Is it possible to completely split the buses by having two FDS cards and one relay card (I see that the relay card can switch up to 8 circuits). I would really need to decide which direction I will be going with this as it affects the wiring of the electrical panel immensely. If splitting the buses is the direction then I need to figure out what cards I need. I don't know if it is possible but could you post a simple (and looking at your wiring I don't think it'll be simple) wiring schematic. (Posted by Shane Barnes on 01-13-12) Hey Alan, I think this is one of those areas where we need the systems completed in JET45. You can simulate quite a bit with FDS logic but FS only modeled one bus and to be accurate to the aircraft we need the electrical system modeled. I am sure Eric will elaborate more on this as he has his head buried in the manuals right now! He will be able to give you the best scenario with what we have right now. I want my build modeled as close as I can get to the real aircraft and I'm thinking you are starting to head in that direction too. Once you start diving deeper into the aircraft you begin to see all that is capable. The default Lear45 leaves a lot to be desired. This is why we need systems completed in JET45. Yeah, the logic that we can create with the FDS boards is good but cannot do all that we need. I've put a lot of work into my build and I don't want to short change myself with it's kinda close . . I want really close to the real thing. This is why I stated in another post how valuable Jason is to the Hangar. He can do the programming and Eric does the testing/consulting. I think something to keep in mind is that our projects need to remain somewhat "fluid", meaning we need to expect that we will have to make some changes as new areas are developed and new information becomes available in the future. (Posted by Eric Tomlin on 01-13-12) Shane couldn't have said it any better. What I've done with the interface card is Wonderful, but as Shane said we need a Systems simulator for JET45. To elaborate on what Shane said, YES- you could split your system the way you are proposing but it still would be off in several regards. Trying to find the best way to respond here...thinking.... Okay, so you noticed that I pressed the L/R BATT on at the same time. That's actually a check list item. Can you press them individually? Yes. Does it hurt? No. But, proper procedure is simultaneously for some reason. That said, if you notice I have modeled very slightly a R bus by having it on it's own logic using Internal Variables (henceforth referred to as "IV"). I have an IV called R BATT and R MAIN and when you press R BATT, it signals R MAIN to be on or off, just like for real. However, you can independently turn on or off R MAIN too. Regarding the relay- no- it's only assigned to the L BATT switch. It could be assigned to both, but it would likely get to where if you pressed out of sync you might turn it right back off again when pressing the opposite switch. It's simpler to have the L BATT signal the relay to close (along with a few other items) and all the LEDs come alive except those that I assign to the R BATT switch. BTW, you or anyone else is always welcome to drive down here and see it all in person. It'd be much easier if you could see it that way. There's no need for a wire scheme. It's wired just like you've already wired your panel, no different. What makes it look like it does is all in the logic from InterfaceIT and knowing how the airplane works! That's why the manuals and the upcoming Panel Guide from Flight Level Simulations is so important- it tells you how it works and what to expect. As you mentioned, the airplane is split into two halves at the most basic explanation, but in reality it goes much deeper when you consider the Emergency Bus, Rear hot bus, etc. The only thing IMHO that we be deeply concerned with is the L/R Bus and the Emergency Bus and the systems software will model that nicely once completed. Essentially the idea is that when you turn on L BATT, DU2 comes alive and when you turn on L AVIONCS the PFD comes alive, and of course you've got the L MAIN, L NON ESS, and all that for the right side and then the Bus Tie, and all this is great stuff to have working properly, especially when you start an engine and the Bus Tie closes to provide power to non-Gen side but then remember, when you shut down, the Bus Tie shouldn't close,etc, etc. etc. Lots of logic rules here and some just cannot be done properly without the complete software. You could go the Don Jones route and have it all done in its entirety with hardware logic, but again IMHO by having the Relay card for a few items on the hardware side and a complete systems software, it will work just as needed and much easier for the customer in the end. In fact, the reason I have the relay card right now is to get rid of lights (LEDs) when cold and dark. However, once the Systems software is done we wont need the relay card for any light purposes on the instrument panel, but we will for the overhead lights, etc. How so? Imagine coming in and turning on the overhead map light, but the airplane is not on. Using the relay, we can create a bus that has a terminal strip connected to the 12v power and it's not closed until the L/R BATT switch is ON. That's essentially what I'm doing now for cold and dark, but it wont be needed for panels after systems software is created but it will be needed for the overhead light example, or for stick shakers, Hobbs meter, and the Davtrons, etc. (Posted by Alan Norris on 01-13-12) WOW Eric, that's a lot to consider, thanks for taking the time to explain it. So what you are saying is, we won't need a relay card once the logic is programed into the JET45. So the best solution right now is to adopt a wait and see attitude but proceed with wiring our panels to the FDS boards. (Posted by Eric Tomlin on 01-13-12) You're welcome. However, if you want the functionality of having a 'real' electrical system then YES, you want to use a relay but you wont (likely) have to use it for the SWITCH light logic. All the overhead lights, map lights, panel backlighting, etc. can be put on their respective L/R bus and not be power-ready until the actual L/R BATTs are on. Wait and see only applies to switch light/functionality logic. UPDATE: Got the MIP cut and repainted for my 2 Davtron Chronos- I've got 2 877's for a good price thanks to eBay and Alan and will use these guys until I can find some 850's. HOWEVER, it should be noted that Davtron actually makes an 850 model that is a round face like the 877's. You can see them here: http://www.davtron.com/product-detail.php?M850-16 The MIP cut and clock in place. Shown lit up with 12v. These clocks can accept 12-28v: For the very few of us that have/had a Gen 1 MIP from Tom Goldberg, you have to use a jig to cut the round hole for these Chronos. I found using a 2" hole saw contained by the .25" jig did a pretty good job. Then I used a Dremel tool and round file to clean it all up. It's not as perfect as the later generation MIPs where we had the round hole designed into the file but it works. If I ever get an 850 with the beveled square front plate, any imperfections will be hidden completely. At this stage, I'm thankful to have working Chronos and for some strange reason, I kind of like the black face 877 even though I've only saw it in one very old photo of what I think was an LJ45 mock up or demonstrator aircraft. (Posted by Eric Tomlin on 10-08-12) Many of you know that I had to take the sim down completely back in late summer 2011 to get some new things tested out for all the new panels, etc. that has been under development and slowly getting sent out. Eventually the sim had to come back together for hardware/software integration testing. Here's a photo after the first flight with it all slowly coming back together: UPDATE: Found some time between making panels- Got the electrical bus installed on Friday night in record time. The sim as lit up with both overhead lights, the flood light and back lit instrument panels: Gear panel up close. Still have to get the RMUs' backlighting wired in: Cant believe I've went this long without back lighting. I want to point out too that as a panel supplier, it has proven immensely helpful to have my own sim for making sure that everything fits and works as expected, before being sent out to customers. Therefore, the sim itself provides an even greater resource than just being fun for my self, but to help prove items before problems reveal themselves in the field. Once such lesson occurred Saturday evening while enjoying the new lighting bus for the sim. I would highly suggest that anytime you are working on the sim, take the precaution to shut the electrical system down so that if you accidentally move or cut something that is "live", you wont lose an item due to an electrical short. I learned the hard way that the PWM dimmers that we all use for our lighting are extremely sensitive to being 'touched' by an adjacent dimmer and I believe that I lost a relay on the FDS relay card due to one dimmer not being fully locked down and twisting in the backer, coming into contact with its neighbor. The lights went out instantly and I had to chase the problem down. Word of the day: Be Cautious at all times. It's all fun and games until someone loses an eye! (Posted by Eric Tomlin on 12-18-12) While searching for new LJ40/45 photos I ran across the aircraft that I actually got to visit a few years ago. After doing a search, I found a nice collection of pictures of the aircraft at various places across the US. http://www.airliners.net/search/photo.search?regsearch=N430FX And, here's some photos of it that I took myself while visiting: Posted by Eric Tomlin on 12-26-12) For me, life is good. No, GRAND. I have two beautiful daughters (one 7 months old and the other 4 years old) and a beautiful wife of nearly 10 years. Her family have taken me in like their own. I have my own side of family consisting of a divorced set of parents, which presents us with additional Christmas visits. At age 37, I decided yesterday that it might be good to slow down next Christmas and not try to force so many different visits into one day. The 4 year old had fun going everywhere, but I think she would have enjoyed staying at home a bit longer too. I know that my wife and I would have too. But then you have the question of missing out on being with the entire family (even if it entails multiple stops all day long). I've never spent Christmas alone, and if I can avoid it I surely will. But I have to say that sometimes we are just entirely too busy. In this age of mobile-everything (PCs, phones, games, etc.) it's like we are super-connected to the world, but rarely to the person sitting next to us on the couch sometimes. I miss the days when I was a kid that we would just randomly stop by a friend's house to say hello and that person would be totally okay with having us visit for a while and might even fix a meal while there. Now, you must call and make arrangements before hand because it's almost considered rude to just drop in. In fact, it's highly likely that no one will even be home because we will as a society have filled almost every waking hour with some sort of "must-do" activity. For us with two kids, our house is almost always a wreck. Stopping by unannounced will yield a very embarrassed response from myself and I might not even invite you in. If we are at home, we are either trying to catch up on missed sleep from the baby's seemingly never-ending ear ache, or we are trying to clean up some mess the 4 year old has made, or maybe I'm out in the shop trying to catch up on orders for folks that have been waiting for quite some time. Maybe we are at church, or out to eat because we are just too tired to cook and then clean up. I go to the scales every few weeks and realize I've not lost any weight- I eat too much and exercise too little because I don't have time. Siting at one of our extended family's homes yesterday (and throughout the year) I feel like we as a society have become so engrossed by self and stuff that we miss out on some of the best parts of life. Christmas is about the only time of the year that I feel connected to those outside of my immediate circle, but as I age I find it growing harder to relax and enjoy the day(s) and not be thinking about what *I* normally am consumed with. What would that be? Building a flight simulator. Have you ever been addicted to any thing? Maybe it was the thought of something you were addicted to, like being in love with a person. I'm pretty sure it's not the thought of building the sim, but of actually finishing it and flying it too. I've not flown the sim in weeks. Been too caught up with sick children and the growing list of holiday "must-do"s. I love Christmas because I can find an escape from the hobby-turned-business but sometimes I wish I could turn it off. I don't want to wait until I experience losing a loved one to turn off my never ending quest that is "flight simulator". I will never forget the day I was standing in Ron's kitchen talking to him about our projects and Shane called. What are the chances? I talk to these guys more than my parents each week and sometimes more than I do my own wife during a week day! Crazy isn't it? What's more is that I constantly get emails from folks asking when a new panel or part is going to be made or available. All I can say is that when you cross over to the "supplier" side (or at the very least straddle the fence like Ron and myself), you really see what it takes to sit down for hours upon hours to DESIGN something before you can even fathom running the CNC. Then folks insinuate that the price is too high. Let me say, building a simulator is not cheap at all. Neither is bringing parts to builders. It cuts into family time one way or another. Ask Ron how much he thought about sim building while on his last cruise in early December. He knows better than to reply to this here because it would upset his wife. But honestly, she knows how much it's on his mind too. It's hard to put all this stuff away and focus on family- or at least it is for me. Christmas day was about the only time in recent memory that I can say I didn't worry about sim parts or building or flying. By the time I thought how neat it'd be to actually fly the sim for a few minutes, I was too tired and would rather be with the kids. I guess there is some escape, however rare it might be! Moral of my story- spend time with family and friends often and try to keep a healthy balance between your obsession and your loved ones. I'm a work in progress. Sometimes you just need to sit down and put your thoughts and feelings into words. Merry Christmas and Happy New Year everyone! (Posted by Eric Tomlin on 08-19-13) The sim has been down since January of this year and has been moved to a new building. All the time between then and now has been to get orders out and for new products. Thanks! Looking forward to getting it back up and running again late Fall/Early Winter hopefully. (Posted by Eric Tomlin on 09-03-14) Wow! I just realized that with all the changes and things I've been going through that I have not posted an update in just over one year. Here's the latest- nearly my entire LJ45 has been sold or traded away. I am very, VERY thankful to everyone who bought a piece of it. Many thanks goes to Randy, Will, Justin, Mike Todd, Mike Badger, Mark Speechley, and DonnyRay. You guys will continue to fly my old sim and it's great knowing it will give each of you lots of great fun like it did for me. Where am I now? Well, I'm all over the place. I have taken on the creation of a worship team extension at church. This has been wonderful, as I had neglected playing guitar in almost any capacity for over ten years. I've been quite busy recruiting team members, rehearsals, and getting all the new equipment that is needed. Here's my first ever Gretsch. It is incredible: Also I've spent more time with family- this has been great as you only have so many years to play with your children- this is my number one priority. I also continue to make parts for everyone and we have a handful of new builders to list of "to-dos". Along will selling the sim, I've been making parts to help everyone continue to push forward and working with Ron has been a great help to he and I both as it takes a load off of each of us when we find areas we complement each other. Finally, I'm very slowly working on my LJ45 replacement project- an Aero Vodochody L39 Albatross simulator: I'm super excited about this project for many reasons. I would invite you to take a look at a page that I've dedicated to this new project's parts and here I will share why I'm so excited with the project. First off, it's much smaller + simpler + affordable + flexible. All around, it gives me what I want in a sim for the foreseeable future. This airplane has some incredible features that were really before its time. Things like flaps that automatically raise when you exceed a scheduled speed that are button-activated. How cool is that? Super simple to interface. Also, the aircraft in use (Lotus Simulations) is bar-none absolutely fantastic. It's so good in performance compared to the real plane that it's actually recommended to be used by Gauntlet Aviation prior to taking their L39 course. That's a great endorsement and testament to the fidelity of the air model. Thankfully, it works great in Prepar3d V2 also. Flexibility- this aircraft is owned by hundreds of private individuals across the USA and world. Yes, it's a military trainer, but due to many different reasons these aircraft have found their way into private hands for years now. As a result, (and due to being listed as an EXPERIMENTAL aircraft) the instrument panels are widely varied. This gives me, as both a builder and panel maker, lots of freedom to customize the layout without sacrificing realism: Flight Controls- This is an area that I am delighted with also. Being a tandem seat arrangement and free to model only the front seat and still be realistic looking, I will be using the incredible off-the-shelf Thrustmaster flight stick. Although built after the A-10 Warthog, this stick actually looks very similar to the real L39 stick. It is plug and play USB, and was designed with sim builders in mind. The stick can be extended to any height requirement. Also, the rudder pedals will be the Saitek Combat Pedals- which are highly rated and made of metal. Lastly, the throttle is super simple and will be made in-house. Flying- I honestly do not have time to fly for hours any more. What I really like about the L39 is that the avionics can be very simple to very in-depth, so I can fly for longer periods or I can realistically do touch and goes for hours at my favorite airports just like many real-world L39 operators do. Not to mention, now I can finally tell my sim visitors "Sure, go ahead and do some barrel rolls. It's made for that kind of stuff!". Second Sim or Rear Seat- The network/shared-cockpit functionality of the Lotus L39 is very in-depth. This will allow me to have a virtual rear seat that can be used to put a new person up front in the hardware sim or I can always run the "rear seat/instructor station" as a second sim to do some online formation flying. Two sims in one- that's a great value for me right now. Check out some Great flying in P3D v2: https://youtu.be/JA21I_5ox9A NOTE: This simulator build thread has been retired! (Posted by Eric Tomlin on 10-08-12) Many of you know that I had to take the sim down completely back in late summer 2011 to get some new things tested out for all the new panels, etc. that has been under development and slowly getting sent out. Eventually the sim had to come back together for hardware/software integration testing. Here's a photo after the first flight with it all slowly coming back together: UPDATE: Found some time between making panels- Got the electrical bus installed on Friday night in record time. The sim as lit up with both overhead lights, the flood light and back lit instrument panels: Gear panel up close. Still have to get the RMUs' backlighting wired in: Cant believe I've went this long without back lighting. I want to point out too that as a panel supplier, it has proven immensely helpful to have my own sim for making sure that everything fits and works as expected, before being sent out to customers. Therefore, the sim itself provides an even greater resource than just being fun for my self, but to help prove items before problems reveal themselves in the field. Once such lesson occurred Saturday evening while enjoying the new lighting bus for the sim. I would highly suggest that anytime you are working on the sim, take the precaution to shut the electrical system down so that if you accidentally move or cut something that is "live", you wont lose an item due to an electrical short. I learned the hard way that the PWM dimmers that we all use for our lighting are extremely sensitive to being 'touched' by an adjacent dimmer and I believe that I lost a relay on the FDS relay card due to one dimmer not being fully locked down and twisting in the backer, coming into contact with its neighbor. The lights went out instantly and I had to chase the problem down. Word of the day: Be Cautious at all times. It's all fun and games until someone loses an eye! (Posted by Eric Tomlin on 12-18-12) While searching for new LJ40/45 photos I ran across the aircraft that I actually got to visit a few years ago. After doing a search, I found a nice collection of pictures of the aircraft at various places across the US. http://www.airliners.net/search/photo.search?regsearch=N430FX And, here's some photos of it that I took myself while visiting: Posted by Eric Tomlin on 12-26-12) For me, life is good. No, GRAND. I have two beautiful daughters (one 7 months old and the other 4 years old) and a beautiful wife of nearly 10 years. Her family have taken me in like their own. I have my own side of family consisting of a divorced set of parents, which presents us with additional Christmas visits. At age 37, I decided yesterday that it might be good to slow down next Christmas and not try to force so many different visits into one day. The 4 year old had fun going everywhere, but I think she would have enjoyed staying at home a bit longer too. I know that my wife and I would have too. But then you have the question of missing out on being with the entire family (even if it entails multiple stops all day long). I've never spent Christmas alone, and if I can avoid it I surely will. But I have to say that sometimes we are just entirely too busy. In this age of mobile-everything (PCs, phones, games, etc.) it's like we are super-connected to the world, but rarely to the person sitting next to us on the couch sometimes. I miss the days when I was a kid that we would just randomly stop by a friend's house to say hello and that person would be totally okay with having us visit for a while and might even fix a meal while there. Now, you must call and make arrangements before hand because it's almost considered rude to just drop in. In fact, it's highly likely that no one will even be home because we will as a society have filled almost every waking hour with some sort of "must-do" activity. For us with two kids, our house is almost always a wreck. Stopping by unannounced will yield a very embarrassed response from myself and I might not even invite you in. If we are at home, we are either trying to catch up on missed sleep from the baby's seemingly never-ending ear ache, or we are trying to clean up some mess the 4 year old has made, or maybe I'm out in the shop trying to catch up on orders for folks that have been waiting for quite some time. Maybe we are at church, or out to eat because we are just too tired to cook and then clean up. I go to the scales every few weeks and realize I've not lost any weight- I eat too much and exercise too little because I don't have time. Siting at one of our extended family's homes yesterday (and throughout the year) I feel like we as a society have become so engrossed by self and stuff that we miss out on some of the best parts of life. Christmas is about the only time of the year that I feel connected to those outside of my immediate circle, but as I age I find it growing harder to relax and enjoy the day(s) and not be thinking about what *I* normally am consumed with. What would that be? Building a flight simulator. Have you ever been addicted to any thing? Maybe it was the thought of something you were addicted to, like being in love with a person. I'm pretty sure it's not the thought of building the sim, but of actually finishing it and flying it too. I've not flown the sim in weeks. Been too caught up with sick children and the growing list of holiday "must-do"s. I love Christmas because I can find an escape from the hobby-turned-business but sometimes I wish I could turn it off. I don't want to wait until I experience losing a loved one to turn off my never ending quest that is "flight simulator". I will never forget the day I was standing in Ron's kitchen talking to him about our projects and Shane called. What are the chances? I talk to these guys more than my parents each week and sometimes more than I do my own wife during a week day! Crazy isn't it? What's more is that I constantly get emails from folks asking when a new panel or part is going to be made or available. All I can say is that when you cross over to the "supplier" side (or at the very least straddle the fence like Ron and myself), you really see what it takes to sit down for hours upon hours to DESIGN something before you can even fathom running the CNC. Then folks insinuate that the price is too high. Let me say, building a simulator is not cheap at all. Neither is bringing parts to builders. It cuts into family time one way or another. Ask Ron how much he thought about sim building while on his last cruise in early December. He knows better than to reply to this here because it would upset his wife. But honestly, she knows how much it's on his mind too. It's hard to put all this stuff away and focus on family- or at least it is for me. Christmas day was about the only time in recent memory that I can say I didn't worry about sim parts or building or flying. By the time I thought how neat it'd be to actually fly the sim for a few minutes, I was too tired and would rather be with the kids. I guess there is some escape, however rare it might be! Moral of my story- spend time with family and friends often and try to keep a healthy balance between your obsession and your loved ones. I'm a work in progress. Sometimes you just need to sit down and put your thoughts and feelings into words. Merry Christmas and Happy New Year everyone! (Posted by Eric Tomlin on 08-19-13) The sim has been down since January of this year and has been moved to a new building. All the time between then and now has been to get orders out and for new products. Thanks! Looking forward to getting it back up and running again late Fall/Early Winter hopefully. (Posted by Eric Tomlin on 09-03-14) Wow! I just realized that with all the changes and things I've been going through that I have not posted an update in just over one year. Here's the latest- nearly my entire LJ45 has been sold or traded away. I am very, VERY thankful to everyone who bought a piece of it. Many thanks goes to Randy, Will, Justin, Mike Todd, Mike Badger, Mark Speechley, and DonnyRay. You guys will continue to fly my old sim and it's great knowing it will give each of you lots of great fun like it did for me. Where am I now? Well, I'm all over the place. I have taken on the creation of a worship team extension at church. This has been wonderful, as I had neglected playing guitar in almost any capacity for over ten years. I've been quite busy recruiting team members, rehearsals, and getting all the new equipment that is needed. Here's my first ever Gretsch. It is incredible: Also I've spent more time with family- this has been great as you only have so many years to play with your children- this is my number one priority. I also continue to make parts for everyone and we have a handful of new builders to list of "to-dos". Along will selling the sim, I've been making parts to help everyone continue to push forward and working with Ron has been a great help to he and I both as it takes a load off of each of us when we find areas we complement each other. Finally, I'm very slowly working on my LJ45 replacement project- an Aero Vodochody L39 Albatross simulator: I'm super excited about this project for many reasons. I would invite you to take a look at a page that I've dedicated to this new project's parts and here I will share why I'm so excited with the project. First off, it's much smaller + simpler + affordable + flexible. All around, it gives me what I want in a sim for the foreseeable future. This airplane has some incredible features that were really before its time. Things like flaps that automatically raise when you exceed a scheduled speed that are button-activated. How cool is that? Super simple to interface. Also, the aircraft in use (Lotus Simulations) is bar-none absolutely fantastic. It's so good in performance compared to the real plane that it's actually recommended to be used by Gauntlet Aviation prior to taking their L39 course. That's a great endorsement and testament to the fidelity of the air model. Thankfully, it works great in Prepar3d V2 also. Flexibility- this aircraft is owned by hundreds of private individuals across the USA and world. Yes, it's a military trainer, but due to many different reasons these aircraft have found their way into private hands for years now. As a result, (and due to being listed as an EXPERIMENTAL aircraft) the instrument panels are widely varied. This gives me, as both a builder and panel maker, lots of freedom to customize the layout without sacrificing realism: Flight Controls- This is an area that I am delighted with also. Being a tandem seat arrangement and free to model only the front seat and still be realistic looking, I will be using the incredible off-the-shelf Thrustmaster flight stick. Although built after the A-10 Warthog, this stick actually looks very similar to the real L39 stick. It is plug and play USB, and was designed with sim builders in mind. The stick can be extended to any height requirement. Also, the rudder pedals will be the Saitek Combat Pedals- which are highly rated and made of metal. Lastly, the throttle is super simple and will be made in-house. Flying- I honestly do not have time to fly for hours any more. What I really like about the L39 is that the avionics can be very simple to very in-depth, so I can fly for longer periods or I can realistically do touch and goes for hours at my favorite airports just like many real-world L39 operators do. Not to mention, now I can finally tell my sim visitors "Sure, go ahead and do some barrel rolls. It's made for that kind of stuff!". Second Sim or Rear Seat- The network/shared-cockpit functionality of the Lotus L39 is very in-depth. This will allow me to have a virtual rear seat that can be used to put a new person up front in the hardware sim or I can always run the "rear seat/instructor station" as a second sim to do some online formation flying. Two sims in one- that's a great value for me right now. Check out some Great flying in P3D v2: NOTE: This simulator build thread has been retired!Flight Level 180 Build Project (Retired)
![]()
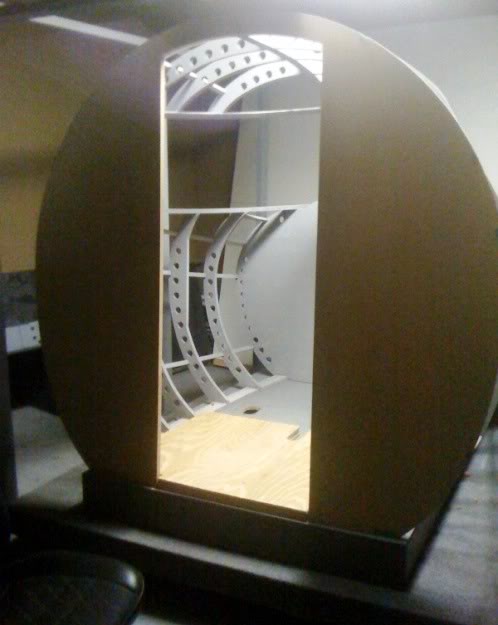
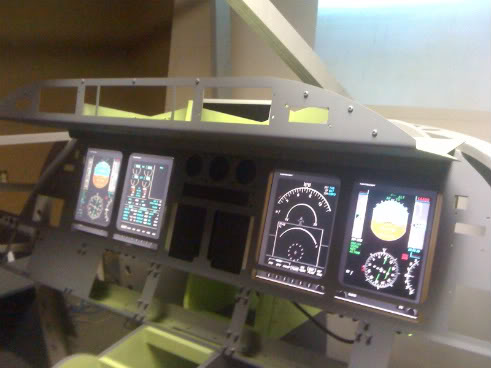
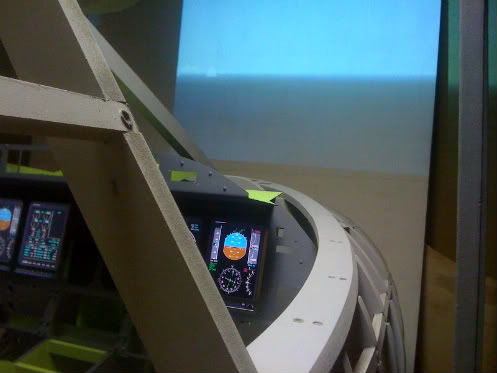
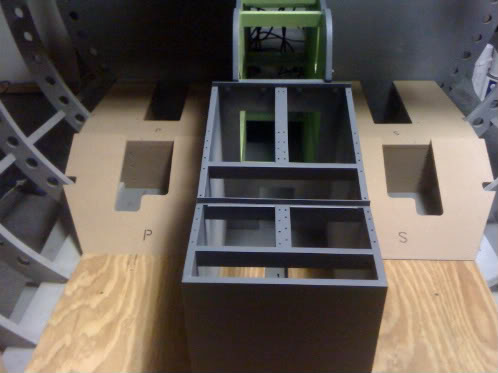
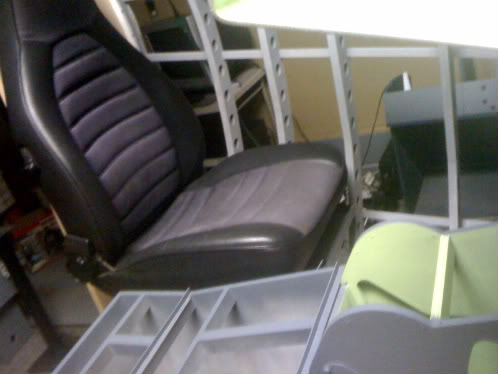
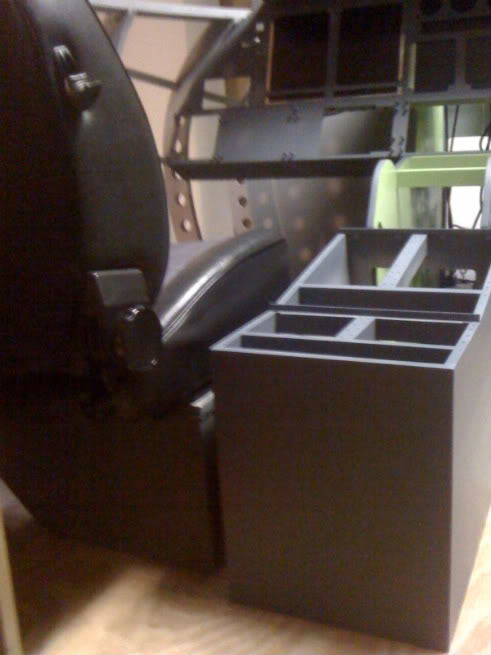
![]()
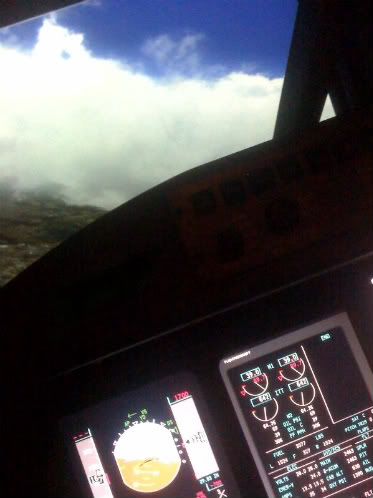
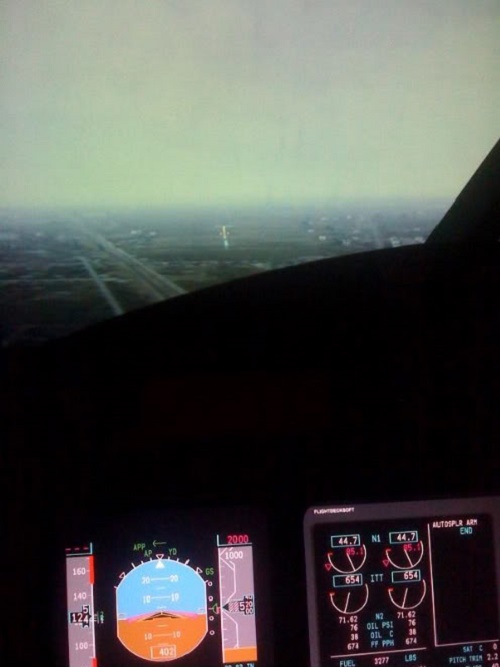
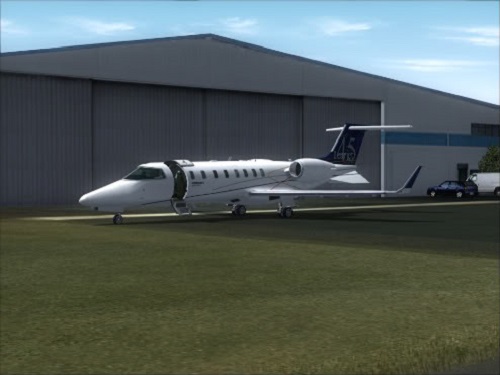
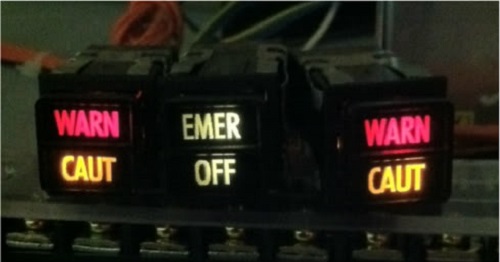
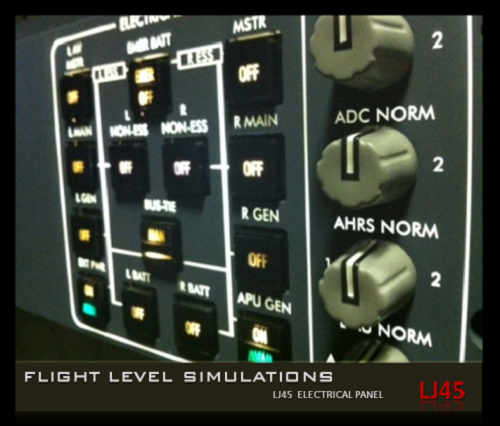

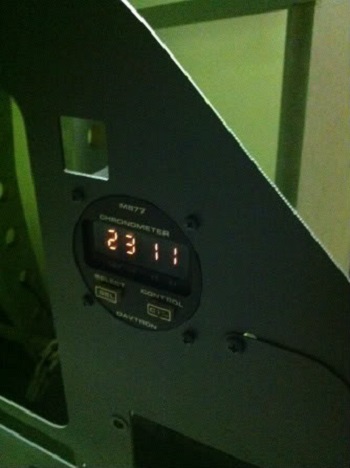
![]()
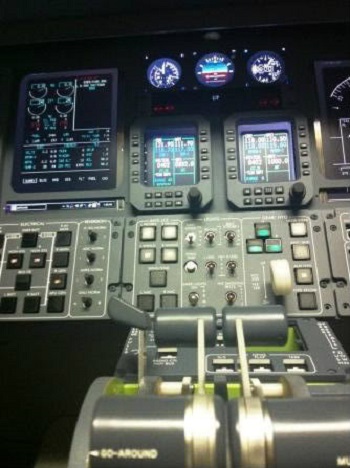
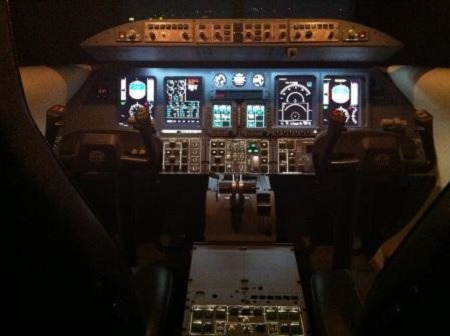
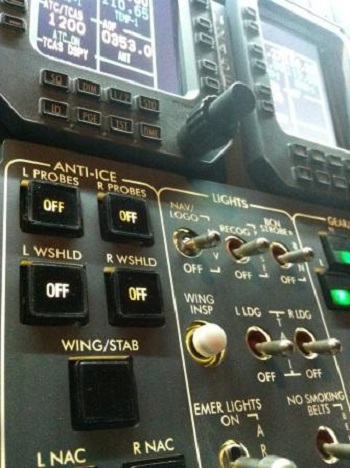
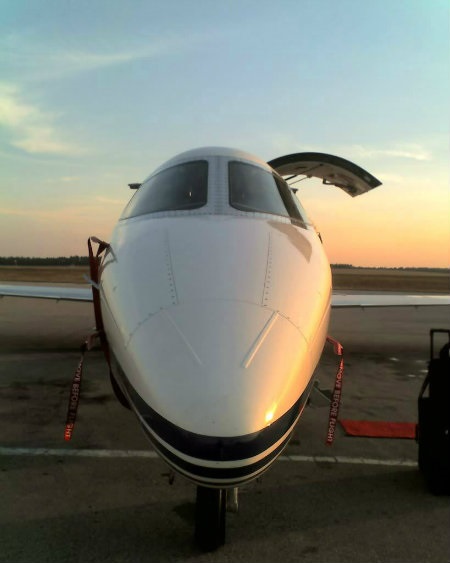
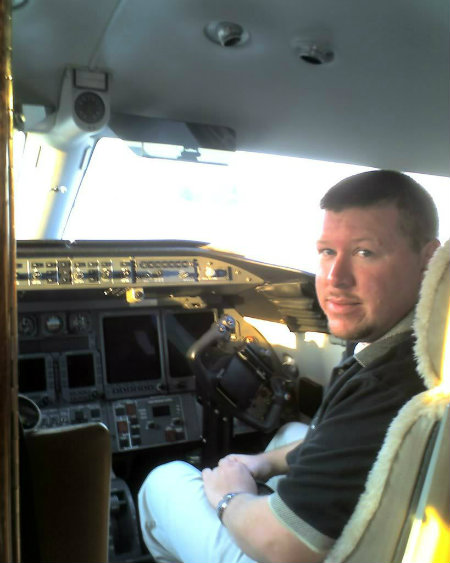
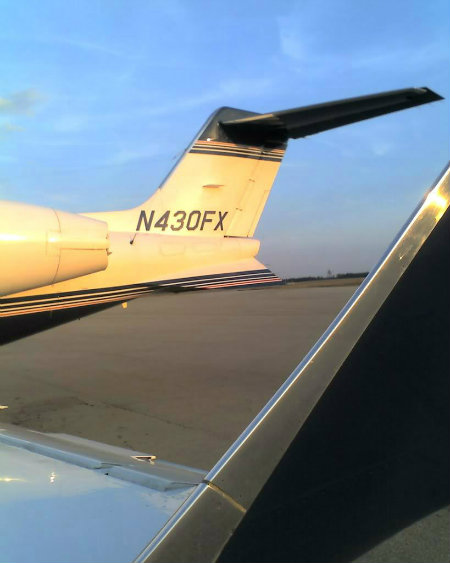
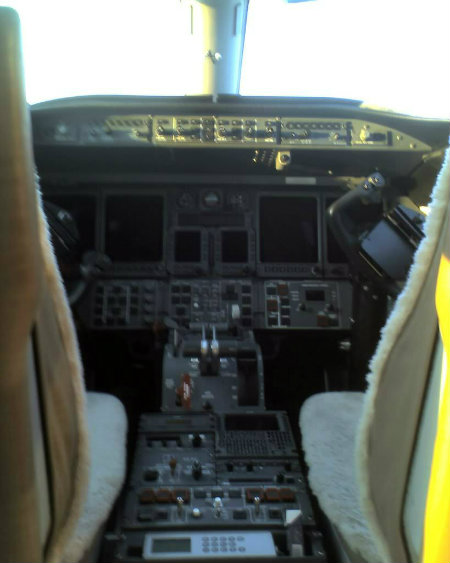


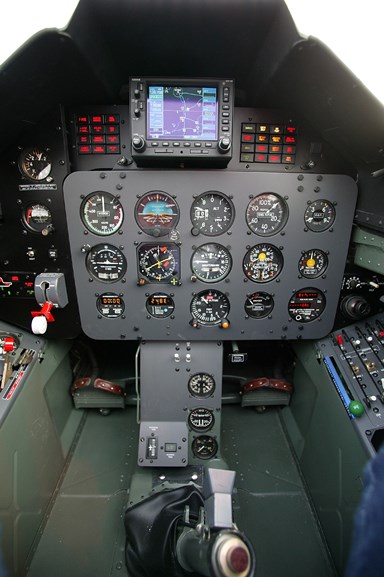
2017-10-10