(Original thread started on 03-03-11 by Ron Rollo) I am proud to announce that I am throwing my hat into the ring of "IBL" panel making! This is one of those things that I saw myself doing years down the road but what better time than the present to get the ball rolling. I would like to thank Kris Stow and my wife, Michelle for putting a boot in my @$$. I also need to thank Kris again for his help with the artwork. Kris has incredible CAD and drawing skills as we have all seen in other nearby post! My goal: I want to make a panel that looks and works as close to the real thing as possible without getting too crazy. I believe I have come up with a very simple yet effective method for the back lighting that will be easy to construct and easy on the pocket book. As an example, the panel above will only require 24 LED's to back light effectively! All of my panels will be laser engraved from a shop a few miles down the road. (Who can afford a $8,000 Laser engraver?) They will also include lightable knobs and top lit Chromolux holes where applicable. All of the LED's will be equipped with it's own resistors. With the right potentiometer, all these panels can be dimmed to very low or very bright light. As far as compatibility issues go with other suppliers, all panels will fit directly onto Tom's aluminum MIP and Glare Shield as you would expect. As for the paint, I will be using Model Master's "Gunship Gray". The artwork will be spot on as well: I will more than likely offer three different levels of each panel to suite everyone's needs and abilities. There will be three different packages. The Reversion panel below will illustrate these three packages. Package #1: This package will include the Front, Light and Backer panels painted and engraved. It will also include any misc. custom made parts including the LED's needed to back light the panel. This package will be in kit form and assembly will be completed by the user: Package #2: This package includes everything from Package #1 plus a few key switches, the rotary switches and the push buttons behind the rotary. The panel will be assembled and ready to install into your L45 simulator: Package #3: This package is BUY, PLUG and PLAY and will include everything from package #2 and the AMLs, caps and lens kits. The FDS knobs will be included and installed. All of the switches will be wired and ready to plug into your L45 simulator: I would also like to say that I do not expect to be the answer to every single panel in the L45. We have other guys here that are creating incredible panels and there would be no need to duplicate efforts there. However, I will at the very least be yet another option for you guys and future builders. I will have more updates and news early next week for you! (Posted by Kris Stow on 03-04-11) Ron, looks perfect and I like the idea of different levels, gives guys a choice on how in depth they would like to be in making their own works of art using your design. Thanks for the props on the artwork, it’s not hard just time consuming as I’m sure you are aware! I have more on the way to you though. I like the fact that the new builders, including myself, have a choice now. I have said it from the beginning of time that to make this project work for me the backlit panels are the key. Yes, I understand that there only the "icing on the cake" as you say, but are a definite need for the completion to the project and knowing that there at least being worked on by multiple people makes me feel all warm and fuzzy inside. Plus they just look badass, IMHO… (Posted by Ron Rollo on 03-08-11) "Proof of light" Hey guys, thank for you comments and thoughts. Today I finalized the Reversion panels and I am very happy with the results of the back lighting! A little trial an error and I was able to get the reversion panels to light up with only 3 LED's each! As I mentioned in my opening post in this thread, I want to release up to three different packages of every panel I come up with in an attempt to meet everyone's needs and abilities. Some of the features include a custom made push button function for the rotary. Light chamber above Chromolux cut outs and laser engraved artwork. Each panel only requires three LED's to back light. In this picture I have the voltage turned down to about 4 volts so that I could show you the laser engraving art work. The knob indicator line should be visible but it is not: This pictures sucks! I had to turn the heat up on the LED's to a whopping 9 volts so you could see that the knob's indicator line is also back lit. It looks much better in real life. More work needs to be done here: (Posted by Mark L. on 03-08-11) If the LEDs operate at say 3.2v, how are you getting away with cranking the voltages up and down? More voltage, more current. Higher current, more smoke, I may be drawing a blank here tonight, but curious how you are doing that. My TQ cover will require a PWM circuit to dim the LED's. (Posted by Ron Rollo on 03-09-11) Hey Mark, I am using 3.2volt LEDs with resistors built into the leads. This is how I am able to use 12 volt power and 3.2 volt LEDs without smoke checking them. I am also using a PWM dimmer switch designed to specifically dim LEDs. MAX power is 12 volts: Thanks to Shane for pointing me to this several months ago. It works like a champ! I can dim the LEDs down to nearly nothing and up to the point that they are uncomfortable to look at. Just some information on PWM technology for those who need to know: Pulse-width modulation (PWM), or pulse-duration modulation (PDM), is a commonly used technique for controlling power to inertial electrical devices, made practical by modern electronic power switches. The average value of voltage (and current) fed to the load is controlled by turning the switch between supply and load on and off at a fast pace. The longer the switch is on compared to the off periods, the higher the power supplied to the load is. The PWM switching frequency has to be much faster than what would affect the load, which is to say the device that uses the power. Typically switchings have to be done several times a minute in an electric stove, 120 Hz in a lamp dimmer, from few kilohertz (kHz) to tens of kHz for a motor drive and well into the tens or hundreds of kHz in audio amplifiers and computer power supplies. The term duty cycle describes the proportion of 'ON' time to the regular interval or 'period' of time; a low duty cycle corresponds to low power, because the power is off for most of the time. Duty cycle is expressed in percent, 100% being fully on. The main advantage of PWM is that power loss in the switching devices is very low. When a switch is off there is practically no current, and when it is on, there is almost no voltage drop across the switch. Power loss, being the product of voltage and current, is thus in both cases close to zero. PWM also works well with digital controls, which, because of their on/off nature, can easily set the needed duty cycle. (Posted by Shane Barnes on 03-09-11) The PWM switch can also be used to turn on and dim incandescent lights as well. I am currently using the PWM switch to control my 12v overhead lights and map lights. Also doing some testing with the switch to control the blowers that will move air thru the overhead and side panel vents. This will allow you to adjust the amount of airflow moving thru the vents. Nice looking panel Ron, I really like that switch solution that you and Eric came up with. That is far better than trying to modify some of the avionics switches out there and will allow for easy replacement of either component of the switch if either should fail at some point. (Posted by Ron Rollo on 03-11-11) Hey Guys, check this out. Today, I came up with a solution to put two 3mm LEDs in a AML switch. In order to release a completed plug and play version of this panel, I HAD to get this figured out! It was very cool to see this thing light up like this and the really cool thing is that there is little to no light bleed from one LED chamber to the next. The only thing separating the two LED's is the light divider between the two. For those guys who have my lens kit, you know the little piece that I am talking about. I will be writing up a build tutorial on this in the next 24 hours so everyone can get to work on their own! (Original thread started on 03-03-11 by Ron Rollo) I am proud to announce that I am throwing my hat into the ring of "IBL" panel making! This is one of those things that I saw myself doing years down the road but what better time than the present to get the ball rolling. I would like to thank Kris Stow and my wife, Michelle for putting a boot in my @$$. I also need to thank Kris again for his help with the artwork. Kris has incredible CAD and drawing skills as we have all seen in other nearby post! My goal: I want to make a panel that looks and works as close to the real thing as possible without getting too crazy. I believe I have come up with a very simple yet effective method for the back lighting that will be easy to construct and easy on the pocket book. As an example, the panel above will only require 24 LED's to back light effectively! All of my panels will be laser engraved from a shop a few miles down the road. (Who can afford a $8,000 Laser engraver?) They will also include lightable knobs and top lit Chromolux holes where applicable. All of the LED's will be equipped with it's own resistors. With the right potentiometer, all these panels can be dimmed to very low or very bright light. As far as compatibility issues go with other suppliers, all panels will fit directly onto Tom's aluminum MIP and Glare Shield as you would expect. As for the paint, I will be using Model Master's "Gunship Gray". The artwork will be spot on as well: I will more than likely offer three different levels of each panel to suite everyone's needs and abilities. There will be three different packages. The Reversion panel below will illustrate these three packages. Package #1: This package will include the Front, Light and Backer panels painted and engraved. It will also include any misc. custom made parts including the LED's needed to back light the panel. This package will be in kit form and assembly will be completed by the user: Package #2: This package includes everything from Package #1 plus a few key switches, the rotary switches and the push buttons behind the rotary. The panel will be assembled and ready to install into your L45 simulator: Package #3: This package is BUY, PLUG and PLAY and will include everything from package #2 and the AMLs, caps and lens kits. The FDS knobs will be included and installed. All of the switches will be wired and ready to plug into your L45 simulator: I would also like to say that I do not expect to be the answer to every single panel in the L45. We have other guys here that are creating incredible panels and there would be no need to duplicate efforts there. However, I will at the very least be yet another option for you guys and future builders. I will have more updates and news early next week for you! (Posted by Kris Stow on 03-04-11) Ron, looks perfect and I like the idea of different levels, gives guys a choice on how in depth they would like to be in making their own works of art using your design. Thanks for the props on the artwork, it’s not hard just time consuming as I’m sure you are aware! I have more on the way to you though. I like the fact that the new builders, including myself, have a choice now. I have said it from the beginning of time that to make this project work for me the backlit panels are the key. Yes, I understand that there only the "icing on the cake" as you say, but are a definite need for the completion to the project and knowing that there at least being worked on by multiple people makes me feel all warm and fuzzy inside. Plus they just look badass, IMHO… (Posted by Ron Rollo on 03-08-11) "Proof of light" Hey guys, thank for you comments and thoughts. Today I finalized the Reversion panels and I am very happy with the results of the back lighting! A little trial an error and I was able to get the reversion panels to light up with only 3 LED's each! As I mentioned in my opening post in this thread, I want to release up to three different packages of every panel I come up with in an attempt to meet everyone's needs and abilities. Some of the features include a custom made push button function for the rotary. Light chamber above Chromolux cut outs and laser engraved artwork. Each panel only requires three LED's to back light. In this picture I have the voltage turned down to about 4 volts so that I could show you the laser engraving art work. The knob indicator line should be visible but it is not: This pictures sucks! I had to turn the heat up on the LED's to a whopping 9 volts so you could see that the knob's indicator line is also back lit. It looks much better in real life. More work needs to be done here: (Posted by Mark L. on 03-08-11) If the LEDs operate at say 3.2v, how are you getting away with cranking the voltages up and down? More voltage, more current. Higher current, more smoke, I may be drawing a blank here tonight, but curious how you are doing that. My TQ cover will require a PWM circuit to dim the LED's. (Posted by Ron Rollo on 03-09-11) Hey Mark, I am using 3.2volt LEDs with resistors built into the leads. This is how I am able to use 12 volt power and 3.2 volt LEDs without smoke checking them. I am also using a PWM dimmer switch designed to specifically dim LEDs. MAX power is 12 volts: Thanks to Shane for pointing me to this several months ago. It works like a champ! I can dim the LEDs down to nearly nothing and up to the point that they are uncomfortable to look at. Just some information on PWM technology for those who need to know: Pulse-width modulation (PWM), or pulse-duration modulation (PDM), is a commonly used technique for controlling power to inertial electrical devices, made practical by modern electronic power switches. The average value of voltage (and current) fed to the load is controlled by turning the switch between supply and load on and off at a fast pace. The longer the switch is on compared to the off periods, the higher the power supplied to the load is. The PWM switching frequency has to be much faster than what would affect the load, which is to say the device that uses the power. Typically switchings have to be done several times a minute in an electric stove, 120 Hz in a lamp dimmer, from few kilohertz (kHz) to tens of kHz for a motor drive and well into the tens or hundreds of kHz in audio amplifiers and computer power supplies. The term duty cycle describes the proportion of 'ON' time to the regular interval or 'period' of time; a low duty cycle corresponds to low power, because the power is off for most of the time. Duty cycle is expressed in percent, 100% being fully on. The main advantage of PWM is that power loss in the switching devices is very low. When a switch is off there is practically no current, and when it is on, there is almost no voltage drop across the switch. Power loss, being the product of voltage and current, is thus in both cases close to zero. PWM also works well with digital controls, which, because of their on/off nature, can easily set the needed duty cycle. (Posted by Shane Barnes on 03-09-11) The PWM switch can also be used to turn on and dim incandescent lights as well. I am currently using the PWM switch to control my 12v overhead lights and map lights. Also doing some testing with the switch to control the blowers that will move air thru the overhead and side panel vents. This will allow you to adjust the amount of airflow moving thru the vents. Nice looking panel Ron, I really like that switch solution that you and Eric came up with. That is far better than trying to modify some of the avionics switches out there and will allow for easy replacement of either component of the switch if either should fail at some point. (Posted by Ron Rollo on 03-11-11) Hey Guys, check this out. Today, I came up with a solution to put two 3mm LEDs in a AML switch. In order to release a completed plug and play version of this panel, I HAD to get this figured out! It was very cool to see this thing light up like this and the really cool thing is that there is little to no light bleed from one LED chamber to the next. The only thing separating the two LED's is the light divider between the two. For those guys who have my lens kit, you know the little piece that I am talking about. I will be writing up a build tutorial on this in the next 24 hours so everyone can get to work on their own! UPDATE: I finalized the back lighting placement and locations of all the LEDs for the Center Lower Panel. It only took 30 LEDs to achieve this. Originally more than I wanted to use but I was probably being unrealistic: Kris is helping considerably with the panel drawings. As a matter of fact, Kris is like a Texas size cattle prod pushing me along to get these panels out! I could not do this without Kris' help. We have several sets of the Reversion panels available for release: I am still working on the integrated back lighting for all my panels. As it turns out the wired LEDs were key in the development of the back lighting because I could easily move the LEDs around to find their perfect placement. Here is a photo of the Gear/hydraulics Center Lower Panel: We have several other panels in the works in various stages of development. Next in line are the Electrical Panel, Weight Chart Panel and the Left Crew Lights Panel. Currently, I am working on finalizing the back lighting for the Electrical Panel and the Left Crew Panel: (Posted by Kris Stow on 03-18-11) I'm just doing all the artwork and PCB design. Ron deserves all the credit here with the build and where to set the LEDs to make the best light distribution on the panels. I believe that if everyone was and is willing to share all information then we could all benefit from it. I am going to release all the drawing and info I have on my site once we get all the panels perfected. This way people can experiment and use it with their own information. I just want to point out in know way is this a disrespect to other panel builders as I know all of them have worked hard on there own to create such awesome works of art and has inspired me to do the same, but I do want everyone to get the best out of what is discovered during R&D and I feel the information on the panels is a huge help to those wanting to build there own items. (Posted by Ron Rollo on 03-19-11) I was actually in the sim tonight doing some test fitting of the recent prototype panels I have been working on. Once I had them mounted in there, I could hardly believe what I was seeing. I have waited a long time for this: I also confirmed the back lighting on the Electric panel and the Left Crew Panel. All is a go! Now to move on to some PCB and CLAD R&D. UPDATE: In reference to the Reversion Panels: Any of you guys who have a set or are thinking about getting a set, keep in mind that there is a slight modification that we need to do to the aluminum glare shield. The version that all of us have as of this date has holes just big enough to slide a AML and a smaller rotary though. But because we had to resort to a custom made push button/rotary setup, the hole in the glare shield needs to be opened up slightly: The CAD and CAM has been updated for the Glare Shield file for future builders. As for us currently, get out your Dremel tools! UPDATE: I finalized the back lighting placement and locations of all the LEDs for the Center Lower Panel. It only took 30 LEDs to achieve this. Originally more than I wanted to use but I was probably being unrealistic: Kris is helping considerably with the panel drawings. As a matter of fact, Kris is like a Texas size cattle prod pushing me along to get these panels out! I could not do this without Kris' help. We have several sets of the Reversion panels available for release: I am still working on the integrated back lighting for all my panels. As it turns out the wired LEDs were key in the development of the back lighting because I could easily move the LEDs around to find their perfect placement. Here is a photo of the Gear/hydraulics Center Lower Panel: We have several other panels in the works in various stages of development. Next in line are the Electrical Panel, Weight Chart Panel and the Left Crew Lights Panel. Currently, I am working on finalizing the back lighting for the Electrical Panel and the Left Crew Panel: (Posted by Kris Stow on 03-18-11) I'm just doing all the artwork and PCB design. Ron deserves all the credit here with the build and where to set the LEDs to make the best light distribution on the panels. I believe that if everyone was and is willing to share all information then we could all benefit from it. I am going to release all the drawing and info I have on my site once we get all the panels perfected. This way people can experiment and use it with their own information. I just want to point out in know way is this a disrespect to other panel builders as I know all of them have worked hard on there own to create such awesome works of art and has inspired me to do the same, but I do want everyone to get the best out of what is discovered during R&D and I feel the information on the panels is a huge help to those wanting to build there own items. (Posted by Ron Rollo on 03-19-11) I was actually in the sim tonight doing some test fitting of the recent prototype panels I have been working on. Once I had them mounted in there, I could hardly believe what I was seeing. I have waited a long time for this: I also confirmed the back lighting on the Electric panel and the Left Crew Panel. All is a go! Now to move on to some PCB and CLAD R&D. UPDATE: In reference to the Reversion Panels: Any of you guys who have a set or are thinking about getting a set, keep in mind that there is a slight modification that we need to do to the aluminum glare shield. The version that all of us have as of this date has holes just big enough to slide a AML and a smaller rotary though. But because we had to resort to a custom made push button/rotary setup, the hole in the glare shield needs to be opened up slightly: The CAD and CAM has been updated for the Glare Shield file for future builders. As for us currently, get out your Dremel tools! (Posted by Ron Rollo on 03-24-11) Today Eric and I talked for several hours and we came to agree on several issues and agreed to disagree on just a few. I think that over all, we will all benefit from the discussions that we had and as friends and fellow builders we will all be able to move forward and have fun! I want to take this opportunity to apologize to Eric for the perception of stepping on his lime light and to any of the members here who I either upset or at the least confused by posting this thread so close in time to Eric's panel thread. This was certainly not my intention. So let's get to business! It has always been my intention to share as much information as I can with the other builders. After all, that's what the site was created for. Showing off a pretty panels really does no one any good. You can go to Airliners .net to see that. It's what's behind the panels that we would like to see more of. The other day, Vince shared with us in this thread his discoveries of what he has learned during his panel building. I appreciate that and now I would like to do the same. First off, I want to say that I did not have a real panel to study to see how the real thing works. It's not that I could not get my hands on one. I just wanted to go into the problem "cold" to see what I would come up with on my own, maybe something new or maybe reinventing the wheel. I will admit though that I recall seeing Vince's early work on his ACP panel and some of Eric's work. My first attempt at the back lighting was a complete flop. But after letting the issue resolve on my brain, I came up with a few things that you guys might find interesting. If nothing else, some of you guys could see if these techniques help improve your back lighting or not. I discovered that putting an aluminum tape covering over the back of the clear light insert helped to reflect the light back into the "Light Chamber" area. But this was not enough: Then I used the aluminum tape around the AML and toggle pockets to help reflect the light even more within the light chamber. Better, but still not enough. After sleeping on the problem, and dreaming about "Liquid sunshine" it finally came to me. The light chamber needs to be filled with light from top to bottom and right to left, every corner! Sanding the clear plastic would make small scratches in the plastic causing the light to bounce, reflect ,refract whatever you want to call it. And sure enough it worked! The final touches on the light inserts are the small round aluminum LED covers. Basically I cut them out with a hole punch from the aluminum tape. They are placed directly over the LED holes and have two jobs: They reflect the LED light back into the chamber, AND block the light from passing through the front panel causing a hot spot in the paint. Now this picture is terrible, and it does not look like it is going to solve any panel lighting problem, but trust me, it looks great when the front panel is on top of it: As it turns out, Eric says that the real panels are scuff sanded also! However, the aluminum tape is not part of the real panel lighting solution. ATM, I am waiting for some single sided .032" copper clad, bits and LEDs to arrive to move forward to the next phase. Once I finalize this, I will share my findings. Kris and I have been working on PCB trace design and we are excited to see how that is going to turn out. Fun stuff I tell you! (Posted by Eric Tomlin on 03-25-11) Ron, this looks great. I need to provide one little correction- the real panels DO have the "tin foil" [b]in[/b] the HOLES, instead of in front of them. One reason for this is that the real panels are a solid blank of CLEAR acrylic, and if you put the foil on the outside of the hole, it'd be sitting on top of your panel face and would not look quite right. I was using this method in the holes, but not the same material. When Ron reminded me of it, it meant I had one less step to do...no more dropping a spit of glue into the hole. Thanks for the idea of the HVAC tape Ron, excellent suggestion! (Posted by Ron Rollo on 03-27-11) Today I had a chance to cut out five sets of clad for the REV panels. I also cut out two new backers that are specially slotted to except the clad. This way, the overall thickness of the panels is not changing. There are only three LEDs in each of the REV panels so the extra wires that this clad board is cutting back on is not that big of a deal. But obviously the other panels it will make a huge difference. As far as the clad goes, last week I was fooling around with the clad with a 75 degree bit. I knew it was not the bit that I needed to be using and the results were sorry. A few days ago, I received my 30 degree bits and they make all the difference in the world! The depth of my cuts are only .012". But keep in mind that the overall thickness of the clad is only .032". (Posted by Shane Barnes on 03-27-11) Hey Ron, the clad looks good! As you stated, it's not that big a deal on this panel but on the other panels, it will clean up the wiring and that will be a benefit when you start wiring all the switches. The switches will provide enough wire to make a spaghetti factory! (Posted by Ron Rollo on 03-30-11) "Resisting the Resistor" After doing some research and talking with Eric and DonnyRay, I have come to the realization that there is no way around the use of resistors with LEDs. However, there are ways to reduce the use of resistors. (I am sure most of you know some of this basic electrical info below) Parallel method: As an example, the Electrical Panel will use 25 LEDs, 3mm flat top 3.5volt 14000MCD with up to 180 degree viewing angle. It would use 25 resistors, one for each LED. A 5volt power supply would supply the voltage. Pros: 1. Lower safe voltage. 2. If one goes bad it is isolated. 3. Only requires one resistor value for every LED. Cons: 1. Every LED gets a resistor meaning double the soldering! Series method: Using the same Electrical Panel as the example and using the same type of LEDs mentioned above. Wiring in Series, (Christmas lights) would only require 4 resistors for the Electrical Panel. We would have to run strings of seven and one string of four. Each string would use it's own resistor. A 28volt power supply would be used. Pros: 1. Only four resistors needed in this example. Cons: 1. The use of a 28volt power supply. Higher risk of shock and or damage. 2. If one LED goes out in the series, they all go out. 3. Several different resistor values, depending on how many LED's per string. So here is where I am at with the whole panel building process. I need to pick a path and commit to it. At this point I could go either way. I would like to get some of your thoughts and why you think I should pick one method over the other. Oh yeah, there is one other option: The 12volt wired version with the resistors built into the line. That is what I have been doing up until this point. Pros: 1. It works! 2. It's easy! Cons: 1. Wires everywhere! (Posted by Shane Barnes on 03-30-11) Hey Ron, I like the parallel method. It is a bit more soldering but I like the idea of lower voltage, LED's are isolated. You have the same resistors. I am looking at later on down the road if an LED goes out or resistor goes bad it would be easier in my opinion to service. You would know the resistor value if by chance it needed replacing vs. different resistor values. All of the LED's should be very near the same light output so no chance of different levels of light output. (Posted by Ron Rollo on 03-30-11) Thanks Shane, I share all your thoughts and concerns. I like the parallel method to the point that I ordered up 1,000 resistors to move forward. UPDATE: This week, I received the 3mm warm white LEDs and the resistors...finally! I have built up a 5 volt bench test that Eric T. recommended and now I am anxious to start soldering to do further testing. On paper, these LEDs should work better with a wider viewing angle (180 degrees) and a warmer white light versus the 12 volt LEDs you have seen in the earlier post in this thread. But I have ran out of time for at least this week so we will have to wait at least a few more days for that. I am working on 10 sets of REV panels in total. That may or may not sound like a lot of panels to you, but let me tell you the rest of the numbers. Each set of course has 2 panels in it which makes 20. Each panel has 6 CNC cut parts which makes a total of 120 pieces. This number does not include the screw ups, remakes or updates! I estimate I have cut around 150 pieces related to the REV panels from the CNC: The good news is I have all the parts cut out, sanded, painted, engraved, taped, tapped and fitted. All the switches and hardware is in hand. Now it is just a matter of putting the different packages together for the guys who have placed orders after testing of course. Reference to resistor, voltage, paint and light color, I have been working closely with Eric T. on this issue. We want to create some solid uniformity with key issues such as the color of the LED lighting, paint, etc.... It does no one any good if we have two or three different colors of LED lighting in our sims in at least similar type panels. We agree that the panels should be in the warm light spectrum rather than the cool white bluish light spectrum. Hopefully we will be able to put this issue to rest within the week. (Posted by Shane Barnes on 04-12-11) Looking forward to seeing the progress in this area. For the newer members here at the Hangar, Ron and Eric have put a lot of work into the research and development of the panels along with several members here who have provided support behind the scenes with information, drawings and access to a real panel from a Lear45 to try and match the actual light color from the panels. I think all of the hard work, research and development (better known as trial and error, scrapping parts, and money down the drain) will pay off in the end with a really nice product for the Lear builders. Thanks guys for all the hard work in this area! (Posted by Eric Tomlin on 04-13-11) Yes, Ron has really stepped away from the traditional panel building method and he's done some very unique things that I suspect will work very well. While I have stayed a bit closer to the "norm", we have both shared some things that have recently come to light for the both of us and it's making life easier for the two of us. I'd like to encourage everyone to take part in the poll that I just put up please. I think this will help Ron and I both to manage expectations and I'm sure the info there will be very helpful for you all too as we've discovered that there are quite a few misconceptions that have been formed over the years. (Posted by Mark L. on 04-13-11) I agree with getting the same or close to the same lighting specs to make the different makers of panels blend together. One question already would be for those that have Vince's RMU's or other panels of his, are you going to switch out the LED's if something different is found? For that matter, my TQ covers are running the same LED's as well. (Posted by Shane Barnes on 04-13-11) Hey Mark, I don't think there will be a big difference in the RMU/DU lighting versus whatever Ron and Eric come up with as long as its on the warm white side. I hooked them up (RMU/DU) for the first time a couple nights ago and I would say by the time you dim the RMU's down it will blend right in. The RMU's were much brighter than the DU lighting, of course more backlit buttons on the RMU's is most likely why it makes it appear this way. Vince, the RMU's / DU's look awesome lit up. I had waited a long time before lighting them up but the other night got the best of me. Can't wait till they are put to use! (Posted by Ron Rollo on 05-10-11) As you know, we have been all over the board attempting to find our way with LED color etc.... So here is where I am at: First off, I am holding off on building anything for anyone until I build it for myself first. My goal was to build it for myself and then offer what I come up with for others later. This way I can come up with the best solution for myself and others. I kinda got away from that. With that said, I have decided to go with white LEDs powered by a 12 volt power supply. Over the past two weeks, I have put a lot of thought into the "Whole Picture". DonnyRay brought this up to me and pointed me into this thought process. The point is, we can easily get a single panel or even a group of panels to light up off of any voltage with the proper resistors in place. The problem is getting panels to light up, dim and work in unison with other components in the flight deck. The bottom line is there is nothing in our flight deck that will require more than 12 volts of power. If there is something, as an example, all of the LEDs used to light up our panels that only need 3,2 volts, we would use resistors. Another example would be the lighting in the Davtron clocks that require 5 volts. A resistor here will bring down the power as well. 12 volts is the power cap! On the other hand, if we use a 5 volt power supply to power the panels, they will work fine by themselves. But then we run into issues trying to get Vince's RMUs and DUs which use 12 volt power onto the same dimming channel. Some say it can be done but even if it could, your still gonna need to buy a 12 volt power supply for the DU's, RMU's, clock, chart holders, fans, blowers, etc... As for the panels that use 5 volt power, it is just a matter of using a higher value resistor so that they will work on 12 volt power. The LEDs will not change. Most all LEDs operate between 1.7 and 3.5 volts depending on the color they put out. So any LED that we use will require a resistor anyway. Another side note: I am going to be using two 12 volt power supplies. This way, I can replicate the left and right power buses and add more realism to the hardware logic. (Posted by Shane Barnes on 05-10-11) I spent some time last night after you and I and Eric talked about this and I am going the 12v route. I have 12v overhead lights, chart lights and map lights. The Davtrons that I have run off 12v and 5v. The hours meter runs on 12v, and I plan on switching the under glare lighting to 12v. Additionally the blowers that I will be using for the vents uses 12v and as a side note the PWM switch/dimmer will also control the speed of the fan in the blowers. Eric and I discussed the panel aspect and this will not be an issue with 5v panels as there is a cheap solution so they will work with 12v as you mentioned, actually a couple of different routes can be taken with the panels. I decided to go this route because I wanted the dimming capability but more importantly I wanted everything controlled by the pilot side instrument knob and co-pilot side instrument knob to function with the respective knob on each side and I wanted to be able to do this with a low cost. At least in my case I have found the solution that will work and should be a very clean install. I do not have anything over 12v in my build so this should allow me to move forward with the build as I get a few parts in. For any of the new guys that are just starting your build, Ron, Eric and I talked about the need for thinking ahead in your build. I know that I have been guilty a few times in my build of not thinking ahead and going back to correct/fix a few items. None of us have a completed sim at this point and we have a few variations on the build. Some have opted for the shell kit route, others are not using a shell at this point, just the interior components. The point being we have an idea as to how everything will fit and function but I am sure some changes will come along that will need to be addressed. Working out your power supply is one of those areas that you need to consider in the early stages of your build to determine what will work best for you and this will allow you to consider what route you want to go with parts that you will add into your build such as clocks, AOA gauges, panels, fan motors,etc. I think the 12v is a good solution as it allows the use of real world parts converted to 12v as will allow the different lines of panels we have from builders such as Eric, Ron, Vince, and Mark to work together. (Posted by Ron Rollo on 05-25-11) A little progress and something neat to share with you guys. I made a backer backer panel for the four dummy rotaries on the Electrical Panel. I wanted them to stand off of the main backer so that the nut does not interfere with the lighting to the knobs: If you look closely, you can see that I have the front side of the backer panel milled out for the copper clad to embed into it. (Still waiting on the right resistors to show up!) Additionally, I cut out some parts and painted them using Gunship gray Model Master paint but they are still tacky even after several hours. The humidity was low and the temperature was around 75 degrees. As a matter of fact, I painted them inside the AC room because they were so small. I talked to Eric about this problem about the same thing happening a few days prior and I made sure I was painting in perfect conditions. My thinking at this point is that sometimes a bad can of paint is produced if that is possible. I painted some parts a few days ago with the same can and the same thing happened. The day before that, I did a test with Krylon primer gray and then put the gunship gray (from a different can) on top of that. After about 30 minutes, the paint and finish was dry and perfect! It seems that only recently I have been having issues with the paint being tacky. By the way, it's not like all I have to do is let it dry after a few days or even a week, that's the problem, it never does dry!!!! As you may or may not know, this happened to me when I painted the MIP last month. I emptied a whole can on it and it turned out to be tacky as well. (Although that day it was raining.) Bad can of paint or rain? So the bottom line, is it possible that from time to time, the paint in the can is bad which is causing the tacky issue? Tomorrow I am going to conduct a test and see if this is what in fact is happening. I am going to paint something with the can that has produced two tacky finishes and then something else with a new can, side by side in the same environment. (Posted by Mark L. on 06-14-11) Ron, I think I posted about that same thing about a year ago. Most of the time I have no problems, but I had some that never dried, always stayed a little tacky. Like too much of some chemical that reacts with the plastic so it stays in that condition or something. (Posted by Ron Rollo on 06-14-11) I conducted a paint test today and I could not believe the results! I painted two pieces of test plastic, one with the can that produced two tacky finishes and the other using a different can that was half used. I painted them inside the garage, temperature was 78 degrees and the humidity 72 percent. After an hour of "dry time" (I use that term loosely) the first test piece was still so tacky that it stuck to my finger. The second test piece was perfectly dry like it should be. This tells me that something important was left out of the production process at the manufacturing plant with this can and possibly a string of them in a batch! I plan to write them and see if they have any explanation for this. These Model Master cans are relatively expensive for the quantity and not to mention the lost time and frustration of stripping and repainting. In any case, we learned something and I will no longer go nuts with this issue if it happens again. (Posted by Geneb on 06-30-11) This thread has been a fun read! I notice that you've discovered the "warm white" LEDs. Did you know that you can get them in a 180 degree version? This means that you can vastly decrease your part count and still get the correct amount of lighting that you're after. You can also get 125 degree, SMD LEDs that would make your circuit boards easier to make. You could cut a single .0625" wide path through the clad side and "span" the gap with your LEDs. If you get a good white primer for plastics, you can use a normal Latex paint for your panels. You can get an inexpensive HVLP spray gun (2.0mm needle!) and by mixing a bit of Floetrol with it, can spray those panels. The result is very good! (I've done it with flat black, but the process should hold for lighter colors) (Posted by Ron Rollo on 03-24-11) Today Eric and I talked for several hours and we came to agree on several issues and agreed to disagree on just a few. I think that over all, we will all benefit from the discussions that we had and as friends and fellow builders we will all be able to move forward and have fun! I want to take this opportunity to apologize to Eric for the perception of stepping on his lime light and to any of the members here who I either upset or at the least confused by posting this thread so close in time to Eric's panel thread. This was certainly not my intention. So let's get to business! It has always been my intention to share as much information as I can with the other builders. After all, that's what the site was created for. Showing off a pretty panels really does no one any good. You can go to Airliners .net to see that. It's what's behind the panels that we would like to see more of. The other day, Vince shared with us in this thread his discoveries of what he has learned during his panel building. I appreciate that and now I would like to do the same. First off, I want to say that I did not have a real panel to study to see how the real thing works. It's not that I could not get my hands on one. I just wanted to go into the problem "cold" to see what I would come up with on my own, maybe something new or maybe reinventing the wheel. I will admit though that I recall seeing Vince's early work on his ACP panel and some of Eric's work. My first attempt at the back lighting was a complete flop. But after letting the issue resolve on my brain, I came up with a few things that you guys might find interesting. If nothing else, some of you guys could see if these techniques help improve your back lighting or not. I discovered that putting an aluminum tape covering over the back of the clear light insert helped to reflect the light back into the "Light Chamber" area. But this was not enough: Then I used the aluminum tape around the AML and toggle pockets to help reflect the light even more within the light chamber. Better, but still not enough. After sleeping on the problem, and dreaming about "Liquid sunshine" it finally came to me. The light chamber needs to be filled with light from top to bottom and right to left, every corner! Sanding the clear plastic would make small scratches in the plastic causing the light to bounce, reflect ,refract whatever you want to call it. And sure enough it worked! The final touches on the light inserts are the small round aluminum LED covers. Basically I cut them out with a hole punch from the aluminum tape. They are placed directly over the LED holes and have two jobs: They reflect the LED light back into the chamber, AND block the light from passing through the front panel causing a hot spot in the paint. Now this picture is terrible, and it does not look like it is going to solve any panel lighting problem, but trust me, it looks great when the front panel is on top of it: As it turns out, Eric says that the real panels are scuff sanded also! However, the aluminum tape is not part of the real panel lighting solution. ATM, I am waiting for some single sided .032" copper clad, bits and LEDs to arrive to move forward to the next phase. Once I finalize this, I will share my findings. Kris and I have been working on PCB trace design and we are excited to see how that is going to turn out. Fun stuff I tell you! (Posted by Eric Tomlin on 03-25-11) Ron, this looks great. I need to provide one little correction- the real panels DO have the "tin foil" [b]in[/b] the HOLES, instead of in front of them. One reason for this is that the real panels are a solid blank of CLEAR acrylic, and if you put the foil on the outside of the hole, it'd be sitting on top of your panel face and would not look quite right. I was using this method in the holes, but not the same material. When Ron reminded me of it, it meant I had one less step to do...no more dropping a spit of glue into the hole. Thanks for the idea of the HVAC tape Ron, excellent suggestion! (Posted by Ron Rollo on 03-27-11) Today I had a chance to cut out five sets of clad for the REV panels. I also cut out two new backers that are specially slotted to except the clad. This way, the overall thickness of the panels is not changing. There are only three LEDs in each of the REV panels so the extra wires that this clad board is cutting back on is not that big of a deal. But obviously the other panels it will make a huge difference. As far as the clad goes, last week I was fooling around with the clad with a 75 degree bit. I knew it was not the bit that I needed to be using and the results were sorry. A few days ago, I received my 30 degree bits and they make all the difference in the world! The depth of my cuts are only .012". But keep in mind that the overall thickness of the clad is only .032". (Posted by Shane Barnes on 03-27-11) Hey Ron, the clad looks good! As you stated, it's not that big a deal on this panel but on the other panels, it will clean up the wiring and that will be a benefit when you start wiring all the switches. The switches will provide enough wire to make a spaghetti factory! (Posted by Ron Rollo on 03-30-11) "Resisting the Resistor" After doing some research and talking with Eric and DonnyRay, I have come to the realization that there is no way around the use of resistors with LEDs. However, there are ways to reduce the use of resistors. (I am sure most of you know some of this basic electrical info below) Parallel method: As an example, the Electrical Panel will use 25 LEDs, 3mm flat top 3.5volt 14000MCD with up to 180 degree viewing angle. It would use 25 resistors, one for each LED. A 5volt power supply would supply the voltage. Pros: 1. Lower safe voltage. 2. If one goes bad it is isolated. 3. Only requires one resistor value for every LED. Cons: 1. Every LED gets a resistor meaning double the soldering! Series method: Using the same Electrical Panel as the example and using the same type of LEDs mentioned above. Wiring in Series, (Christmas lights) would only require 4 resistors for the Electrical Panel. We would have to run strings of seven and one string of four. Each string would use it's own resistor. A 28volt power supply would be used. Pros: 1. Only four resistors needed in this example. Cons: 1. The use of a 28volt power supply. Higher risk of shock and or damage. 2. If one LED goes out in the series, they all go out. 3. Several different resistor values, depending on how many LED's per string. So here is where I am at with the whole panel building process. I need to pick a path and commit to it. At this point I could go either way. I would like to get some of your thoughts and why you think I should pick one method over the other. Oh yeah, there is one other option: The 12volt wired version with the resistors built into the line. That is what I have been doing up until this point. Pros: 1. It works! 2. It's easy! Cons: 1. Wires everywhere! (Posted by Shane Barnes on 03-30-11) Hey Ron, I like the parallel method. It is a bit more soldering but I like the idea of lower voltage, LED's are isolated. You have the same resistors. I am looking at later on down the road if an LED goes out or resistor goes bad it would be easier in my opinion to service. You would know the resistor value if by chance it needed replacing vs. different resistor values. All of the LED's should be very near the same light output so no chance of different levels of light output. (Posted by Ron Rollo on 03-30-11) Thanks Shane, I share all your thoughts and concerns. I like the parallel method to the point that I ordered up 1,000 resistors to move forward. UPDATE: This week, I received the 3mm warm white LEDs and the resistors...finally! I have built up a 5 volt bench test that Eric T. recommended and now I am anxious to start soldering to do further testing. On paper, these LEDs should work better with a wider viewing angle (180 degrees) and a warmer white light versus the 12 volt LEDs you have seen in the earlier post in this thread. But I have ran out of time for at least this week so we will have to wait at least a few more days for that. I am working on 10 sets of REV panels in total. That may or may not sound like a lot of panels to you, but let me tell you the rest of the numbers. Each set of course has 2 panels in it which makes 20. Each panel has 6 CNC cut parts which makes a total of 120 pieces. This number does not include the screw ups, remakes or updates! I estimate I have cut around 150 pieces related to the REV panels from the CNC: The good news is I have all the parts cut out, sanded, painted, engraved, taped, tapped and fitted. All the switches and hardware is in hand. Now it is just a matter of putting the different packages together for the guys who have placed orders after testing of course. Reference to resistor, voltage, paint and light color, I have been working closely with Eric T. on this issue. We want to create some solid uniformity with key issues such as the color of the LED lighting, paint, etc.... It does no one any good if we have two or three different colors of LED lighting in our sims in at least similar type panels. We agree that the panels should be in the warm light spectrum rather than the cool white bluish light spectrum. Hopefully we will be able to put this issue to rest within the week. (Posted by Shane Barnes on 04-12-11) Looking forward to seeing the progress in this area. For the newer members here at the Hangar, Ron and Eric have put a lot of work into the research and development of the panels along with several members here who have provided support behind the scenes with information, drawings and access to a real panel from a Lear45 to try and match the actual light color from the panels. I think all of the hard work, research and development (better known as trial and error, scrapping parts, and money down the drain) will pay off in the end with a really nice product for the Lear builders. Thanks guys for all the hard work in this area! (Posted by Eric Tomlin on 04-13-11) Yes, Ron has really stepped away from the traditional panel building method and he's done some very unique things that I suspect will work very well. While I have stayed a bit closer to the "norm", we have both shared some things that have recently come to light for the both of us and it's making life easier for the two of us. I'd like to encourage everyone to take part in the poll that I just put up please. I think this will help Ron and I both to manage expectations and I'm sure the info there will be very helpful for you all too as we've discovered that there are quite a few misconceptions that have been formed over the years. (Posted by Mark L. on 04-13-11) I agree with getting the same or close to the same lighting specs to make the different makers of panels blend together. One question already would be for those that have Vince's RMU's or other panels of his, are you going to switch out the LED's if something different is found? For that matter, my TQ covers are running the same LED's as well. (Posted by Shane Barnes on 04-13-11) Hey Mark, I don't think there will be a big difference in the RMU/DU lighting versus whatever Ron and Eric come up with as long as its on the warm white side. I hooked them up (RMU/DU) for the first time a couple nights ago and I would say by the time you dim the RMU's down it will blend right in. The RMU's were much brighter than the DU lighting, of course more backlit buttons on the RMU's is most likely why it makes it appear this way. Vince, the RMU's / DU's look awesome lit up. I had waited a long time before lighting them up but the other night got the best of me. Can't wait till they are put to use! (Posted by Ron Rollo on 05-10-11) As you know, we have been all over the board attempting to find our way with LED color etc.... So here is where I am at: First off, I am holding off on building anything for anyone until I build it for myself first. My goal was to build it for myself and then offer what I come up with for others later. This way I can come up with the best solution for myself and others. I kinda got away from that. With that said, I have decided to go with white LEDs powered by a 12 volt power supply. Over the past two weeks, I have put a lot of thought into the "Whole Picture". DonnyRay brought this up to me and pointed me into this thought process. The point is, we can easily get a single panel or even a group of panels to light up off of any voltage with the proper resistors in place. The problem is getting panels to light up, dim and work in unison with other components in the flight deck. The bottom line is there is nothing in our flight deck that will require more than 12 volts of power. If there is something, as an example, all of the LEDs used to light up our panels that only need 3,2 volts, we would use resistors. Another example would be the lighting in the Davtron clocks that require 5 volts. A resistor here will bring down the power as well. 12 volts is the power cap! On the other hand, if we use a 5 volt power supply to power the panels, they will work fine by themselves. But then we run into issues trying to get Vince's RMUs and DUs which use 12 volt power onto the same dimming channel. Some say it can be done but even if it could, your still gonna need to buy a 12 volt power supply for the DU's, RMU's, clock, chart holders, fans, blowers, etc... As for the panels that use 5 volt power, it is just a matter of using a higher value resistor so that they will work on 12 volt power. The LEDs will not change. Most all LEDs operate between 1.7 and 3.5 volts depending on the color they put out. So any LED that we use will require a resistor anyway. Another side note: I am going to be using two 12 volt power supplies. This way, I can replicate the left and right power buses and add more realism to the hardware logic. (Posted by Shane Barnes on 05-10-11) I spent some time last night after you and I and Eric talked about this and I am going the 12v route. I have 12v overhead lights, chart lights and map lights. The Davtrons that I have run off 12v and 5v. The hours meter runs on 12v, and I plan on switching the under glare lighting to 12v. Additionally the blowers that I will be using for the vents uses 12v and as a side note the PWM switch/dimmer will also control the speed of the fan in the blowers. Eric and I discussed the panel aspect and this will not be an issue with 5v panels as there is a cheap solution so they will work with 12v as you mentioned, actually a couple of different routes can be taken with the panels. I decided to go this route because I wanted the dimming capability but more importantly I wanted everything controlled by the pilot side instrument knob and co-pilot side instrument knob to function with the respective knob on each side and I wanted to be able to do this with a low cost. At least in my case I have found the solution that will work and should be a very clean install. I do not have anything over 12v in my build so this should allow me to move forward with the build as I get a few parts in. For any of the new guys that are just starting your build, Ron, Eric and I talked about the need for thinking ahead in your build. I know that I have been guilty a few times in my build of not thinking ahead and going back to correct/fix a few items. None of us have a completed sim at this point and we have a few variations on the build. Some have opted for the shell kit route, others are not using a shell at this point, just the interior components. The point being we have an idea as to how everything will fit and function but I am sure some changes will come along that will need to be addressed. Working out your power supply is one of those areas that you need to consider in the early stages of your build to determine what will work best for you and this will allow you to consider what route you want to go with parts that you will add into your build such as clocks, AOA gauges, panels, fan motors,etc. I think the 12v is a good solution as it allows the use of real world parts converted to 12v as will allow the different lines of panels we have from builders such as Eric, Ron, Vince, and Mark to work together. (Posted by Ron Rollo on 05-25-11) A little progress and something neat to share with you guys. I made a backer backer panel for the four dummy rotaries on the Electrical Panel. I wanted them to stand off of the main backer so that the nut does not interfere with the lighting to the knobs: If you look closely, you can see that I have the front side of the backer panel milled out for the copper clad to embed into it. (Still waiting on the right resistors to show up!) Additionally, I cut out some parts and painted them using Gunship gray Model Master paint but they are still tacky even after several hours. The humidity was low and the temperature was around 75 degrees. As a matter of fact, I painted them inside the AC room because they were so small. I talked to Eric about this problem about the same thing happening a few days prior and I made sure I was painting in perfect conditions. My thinking at this point is that sometimes a bad can of paint is produced if that is possible. I painted some parts a few days ago with the same can and the same thing happened. The day before that, I did a test with Krylon primer gray and then put the gunship gray (from a different can) on top of that. After about 30 minutes, the paint and finish was dry and perfect! It seems that only recently I have been having issues with the paint being tacky. By the way, it's not like all I have to do is let it dry after a few days or even a week, that's the problem, it never does dry!!!! As you may or may not know, this happened to me when I painted the MIP last month. I emptied a whole can on it and it turned out to be tacky as well. (Although that day it was raining.) Bad can of paint or rain? So the bottom line, is it possible that from time to time, the paint in the can is bad which is causing the tacky issue? Tomorrow I am going to conduct a test and see if this is what in fact is happening. I am going to paint something with the can that has produced two tacky finishes and then something else with a new can, side by side in the same environment. (Posted by Mark L. on 06-14-11) Ron, I think I posted about that same thing about a year ago. Most of the time I have no problems, but I had some that never dried, always stayed a little tacky. Like too much of some chemical that reacts with the plastic so it stays in that condition or something. (Posted by Ron Rollo on 06-14-11) I conducted a paint test today and I could not believe the results! I painted two pieces of test plastic, one with the can that produced two tacky finishes and the other using a different can that was half used. I painted them inside the garage, temperature was 78 degrees and the humidity 72 percent. After an hour of "dry time" (I use that term loosely) the first test piece was still so tacky that it stuck to my finger. The second test piece was perfectly dry like it should be. This tells me that something important was left out of the production process at the manufacturing plant with this can and possibly a string of them in a batch! I plan to write them and see if they have any explanation for this. These Model Master cans are relatively expensive for the quantity and not to mention the lost time and frustration of stripping and repainting. In any case, we learned something and I will no longer go nuts with this issue if it happens again. (Posted by Geneb on 06-30-11) This thread has been a fun read! I notice that you've discovered the "warm white" LEDs. Did you know that you can get them in a 180 degree version? This means that you can vastly decrease your part count and still get the correct amount of lighting that you're after. You can also get 125 degree, SMD LEDs that would make your circuit boards easier to make. You could cut a single .0625" wide path through the clad side and "span" the gap with your LEDs. If you get a good white primer for plastics, you can use a normal Latex paint for your panels. You can get an inexpensive HVLP spray gun (2.0mm needle!) and by mixing a bit of Floetrol with it, can spray those panels. The result is very good! (I've done it with flat black, but the process should hold for lighter colors) (Posted by Ron Rollo on 07-17-11) As you know, Eric and I have gone back and forth on lighting and color of the panels. Today, I had a chance to do a small test to see what his paint method looks like first hand. The panel on the left is using white LEDs with the aluminum tape on the back side of the clear light plate. The panel on the right is using white LEDs with Ivory paint on the back side of the clear light plate: I know what the real panel should look like and it is closer to the one on the right although still not spot on. At least it's not green! I am still torn between the two. I think for now I am going to go with the aluminum backed clear light panel. If after I get all the panels completed, to convert over to the other color will just be a matter of pulling the clear light panel out, pulling the tape off and painting the panel ivory. This is something that you guys can also do if you want to warm up the panels some. This is a comparison of the two light plates: UPDATE: Over two years ago, I took great care in the design of the MIP backer and TQ pedestal where they come together to make sure that the Center Lower Panel and the System Test Panel had enough room. Today, I finally had the chance to see how that worked out. At first, I thought I screwed up but after a little wiggling, they both seated and I don't think they could be any closer! A perfect fit! Today I also worked on the System Test rotary switch. I used the same principals as with the REV Panels, only this thing is on steroids: There are twelve positions on this rotary. There is a push button switch behind the rotary and I have it wired up so that when the rotary shaft is pushed, it closes the circuit for whatever the rotary has selected. The ground wire is wired to the push button: It's nickname is "The Highchair" I have all twelve selections wired but as of right now, according to Eric T., only seven of the selections can possibly be interfaced. But if ever the day comes that the other selections can be interfaced, I'll be ready. The knob is going to be fun because it has the push feature at the top and it is also back lit. (Posted by Ron Rollo on 07-17-11) As you know, Eric and I have gone back and forth on lighting and color of the panels. Today, I had a chance to do a small test to see what his paint method looks like first hand. The panel on the left is using white LEDs with the aluminum tape on the back side of the clear light plate. The panel on the right is using white LEDs with Ivory paint on the back side of the clear light plate: I know what the real panel should look like and it is closer to the one on the right although still not spot on. At least it's not green! I am still torn between the two. I think for now I am going to go with the aluminum backed clear light panel. If after I get all the panels completed, to convert over to the other color will just be a matter of pulling the clear light panel out, pulling the tape off and painting the panel ivory. This is something that you guys can also do if you want to warm up the panels some. This is a comparison of the two light plates: UPDATE: Over two years ago, I took great care in the design of the MIP backer and TQ pedestal where they come together to make sure that the Center Lower Panel and the System Test Panel had enough room. Today, I finally had the chance to see how that worked out. At first, I thought I screwed up but after a little wiggling, they both seated and I don't think they could be any closer! A perfect fit! Today I also worked on the System Test rotary switch. I used the same principals as with the REV Panels, only this thing is on steroids: There are twelve positions on this rotary. There is a push button switch behind the rotary and I have it wired up so that when the rotary shaft is pushed, it closes the circuit for whatever the rotary has selected. The ground wire is wired to the push button: It's nickname is "The Highchair" I have all twelve selections wired but as of right now, according to Eric T., only seven of the selections can possibly be interfaced. But if ever the day comes that the other selections can be interfaced, I'll be ready. The knob is going to be fun because it has the push feature at the top and it is also back lit. UPDATE: Today I worked on finishing the landing gear LED three pack. What I wanted to share with you guys is the way I secured the double LEDs inside the AML switch. I used clear Liquid nail silicone on the back cavity of the switches. Of all the double LED AMLs that we have to contend with, the landing gear three pack are some of the easiest to deal with. They just sit there and light up, no push function. This means we can go right through the center of the switch where the latching mechanics are: This hold the LEDs exactly where I want them: Finally I am finished wiring up this center lower panel! (Posted by Ron Rollo on 10-21-11) Today I made it a point to solve my color lighting issue once and for all and I think I have. I spent hours (and $3.25) on colored paper, transparent colored paper, paint, aluminum backing, paint in the holes, nothing in the holes and you name it, I tried it. Here is a photo of all the pieces that I had to use in combination: Long story short, would you believe Gold and pink are the two magic colors? With my naked eye, the color is near perfect to what I have been told the panels look like. They are also nearly spot on with Vince's panels. NOTE: The panel I have conducted the test on is the right REV panel. The left REV panel is the previous try using paint treatment in the holes of the LEDs: Here is a close up of the right reversion panel: Again, the photo is not good as usual. But with my naked eye, it looks great! Another thing I was able to solve or resolve was spreading the light throughout the panel. No paint either on the light plate or in the holes. Just paper filters. UPDATE: Here is a little update on my panels for you. I just picked up the Pressurization and Environmental panels from the laser shop. Everything looks great! UPDATE: Today I worked on finishing the landing gear LED three pack. What I wanted to share with you guys is the way I secured the double LEDs inside the AML switch. I used clear Liquid nail silicone on the back cavity of the switches. Of all the double LED AMLs that we have to contend with, the landing gear three pack are some of the easiest to deal with. They just sit there and light up, no push function. This means we can go right through the center of the switch where the latching mechanics are: This hold the LEDs exactly where I want them: Finally I am finished wiring up this center lower panel! (Posted by Ron Rollo on 10-21-11) Today I made it a point to solve my color lighting issue once and for all and I think I have. I spent hours (and $3.25) on colored paper, transparent colored paper, paint, aluminum backing, paint in the holes, nothing in the holes and you name it, I tried it. Here is a photo of all the pieces that I had to use in combination: Long story short, would you believe Gold and pink are the two magic colors? With my naked eye, the color is near perfect to what I have been told the panels look like. They are also nearly spot on with Vince's panels. NOTE: The panel I have conducted the test on is the right REV panel. The left REV panel is the previous try using paint treatment in the holes of the LEDs: Here is a close up of the right reversion panel: Again, the photo is not good as usual. But with my naked eye, it looks great! Another thing I was able to solve or resolve was spreading the light throughout the panel. No paint either on the light plate or in the holes. Just paper filters. UPDATE: Here is a little update on my panels for you. I just picked up the Pressurization and Environmental panels from the laser shop. Everything looks great! I have also been working on some other smaller panels that I have been thinking about for some time. One being the ELT panel: And here it is lit up! For more information on the ELT panel click HERE As you probably read in an earlier post in this thread, I have found a way to match up my cool white LEDs with just about any color lighting and intensity I need to. In my case, I am syncing up my lighting to match Vince's RMU's and DU's. This is a break through discovery for me and everyone else because now, (If your anal about lighting like I am) we can match our panels up from different builders. As you can see in the photo above of the ELT panel, there are two shades of light. The "ring around the toggle" is the cool white light that has not yet been addressed. You can clearly see the difference that the pink and gold paper makes. On a side note, Eric and I were talking about the "ring around the toggle" and he suggested just leaving it as is because there are some panels that actually show this same lighting. In either case, we can leave it as is or make a colored ring for the toggle holes as well. This is one of those panels that I am ready to release in kit form. It will not include the toggle or the wiring. It will include the LEDs and resistors soldered to the clad, ready for 12 volt power. Here is a photo of all that is included. $65 with free standard shipping: Thanks to Shane for sending me over a file on the ELT stickers. I changed the font sizes a little here and there but it was great to work from being that it gave me a starting point. I'm at the point now in the build that I have all the stuff that I need to build the sim. Now the hard part is figuring out what I want to work on next! The one thing I am sure of is that I want to continue working on hardware items and stay clear of the computers, software and interfacing, at least for a little while longer. (Posted by Shane Barnes on 10-27-11) Hey Ron, been a while getting to this point huh? I worked on another small sticker for the Lear last night, I will send the file over to you. I hope that maybe you can identify the font and maybe have access to it. Just a little detail for the interior, not all Lear45's have the sticker but I think I will add it to mine. Your sim is looking great! (Posted by Mark L. on 10-27-11) Everything looks great, but a little confused on the paper thing. So are you using both the transparent pink and the gold at the same time? (Posted by Ron Rollo on 10-28-11) Yes I am Mark. It is a light blending nightmare and I have finally woke up from it and seen "the proper color light". Both pink and gold paper are needed to to achieve the proper color for me. Keep in mind that depending on the type of LED and other factors, this could be different for you or others. As an example, I am using 3mm flat top cool white LEDs with aluminum tape on the back side of the clear light plate. So to start with, I have a light that leans into the blue spectrum. (So it is a mix of blue, pink and gold really.) UPDATE: I just finished up my APU panel. Well, actually, it is 95% complete. I still need to develop the switch guard and the GEN AMP digital display. (At this moment for the APU GEN AMP screen, I am using a blank dummy. I thought about having the laser engraver cut out a value so that it at least looks like it is displaying something. But those are small details that can wait until after I get this bird off the ground so to speak: I took this photo of how I had to do a little wood trimming to the pedestal rails to make room for the nuts that hold the front panel to the rear panel. I figure I would give you all a heads up on this. More than likely, you will have to do the same for the Engine start panel: Here it is in it's new home. It is unbelievable how much work goes into such a small panel: Back lighting looks really nice. I am using my new colored paper treatment here as well: I really need to develop the switch guard for the APU before I can release it for sale, hopefully within a few weeks! (Posted by Dave Ault on 10-30-11) Just a suggestion as I have a working APU display. I just drive a small digital volt meter display that I got off eBay. It connects to a D to A output on my interface card which I set from the FSUIPC offset. I have hacked the module to give a display of 100 for 5V input and control the D to A voltage from software. I'll add a picture later with details of the mod to the module. (Posted by Ron Rollo on 10-30-11) Thanks Dave! I have not had enough time to put any thought into it. I knew someone has. I am looking forward to what you post!! And let me thank Vince for making us the SYS Test knob! I just got finished installing mine: I ended up doing something a little different than the way Vince planed for. First, I had to open the hole for the shaft to 1/4 inch diameter. Then I simply took a small piece of rubber hose and stuck it in the PUSH TEST knob to take up the space. Now it is a nice tight fit. The only draw back is that when you push the PUSH TEST knob, the whole knob gets pushed down. But with that said, the amount of travel is hardly noticeable. I like it because it is simple and nothing can go wrong! Thank you again Vince for the efforts here. Another area complete! I have also been working on some other smaller panels that I have been thinking about for some time. One being the ELT panel: And here it is lit up! For more information on the ELT panel click HERE As you probably read in an earlier post in this thread, I have found a way to match up my cool white LEDs with just about any color lighting and intensity I need to. In my case, I am syncing up my lighting to match Vince's RMU's and DU's. This is a break through discovery for me and everyone else because now, (If your anal about lighting like I am) we can match our panels up from different builders. As you can see in the photo above of the ELT panel, there are two shades of light. The "ring around the toggle" is the cool white light that has not yet been addressed. You can clearly see the difference that the pink and gold paper makes. On a side note, Eric and I were talking about the "ring around the toggle" and he suggested just leaving it as is because there are some panels that actually show this same lighting. In either case, we can leave it as is or make a colored ring for the toggle holes as well. This is one of those panels that I am ready to release in kit form. It will not include the toggle or the wiring. It will include the LEDs and resistors soldered to the clad, ready for 12 volt power. Here is a photo of all that is included. $65 with free standard shipping: Thanks to Shane for sending me over a file on the ELT stickers. I changed the font sizes a little here and there but it was great to work from being that it gave me a starting point. I'm at the point now in the build that I have all the stuff that I need to build the sim. Now the hard part is figuring out what I want to work on next! The one thing I am sure of is that I want to continue working on hardware items and stay clear of the computers, software and interfacing, at least for a little while longer. (Posted by Shane Barnes on 10-27-11) Hey Ron, been a while getting to this point huh? I worked on another small sticker for the Lear last night, I will send the file over to you. I hope that maybe you can identify the font and maybe have access to it. Just a little detail for the interior, not all Lear45's have the sticker but I think I will add it to mine. Your sim is looking great! (Posted by Mark L. on 10-27-11) Everything looks great, but a little confused on the paper thing. So are you using both the transparent pink and the gold at the same time? (Posted by Ron Rollo on 10-28-11) Yes I am Mark. It is a light blending nightmare and I have finally woke up from it and seen "the proper color light". Both pink and gold paper are needed to to achieve the proper color for me. Keep in mind that depending on the type of LED and other factors, this could be different for you or others. As an example, I am using 3mm flat top cool white LEDs with aluminum tape on the back side of the clear light plate. So to start with, I have a light that leans into the blue spectrum. (So it is a mix of blue, pink and gold really.) UPDATE: I just finished up my APU panel. Well, actually, it is 95% complete. I still need to develop the switch guard and the GEN AMP digital display. (At this moment for the APU GEN AMP screen, I am using a blank dummy. I thought about having the laser engraver cut out a value so that it at least looks like it is displaying something. But those are small details that can wait until after I get this bird off the ground so to speak: I took this photo of how I had to do a little wood trimming to the pedestal rails to make room for the nuts that hold the front panel to the rear panel. I figure I would give you all a heads up on this. More than likely, you will have to do the same for the Engine start panel: Here it is in it's new home. It is unbelievable how much work goes into such a small panel: Back lighting looks really nice. I am using my new colored paper treatment here as well: I really need to develop the switch guard for the APU before I can release it for sale, hopefully within a few weeks! (Posted by Dave Ault on 10-30-11) Just a suggestion as I have a working APU display. I just drive a small digital volt meter display that I got off eBay. It connects to a D to A output on my interface card which I set from the FSUIPC offset. I have hacked the module to give a display of 100 for 5V input and control the D to A voltage from software. I'll add a picture later with details of the mod to the module. (Posted by Ron Rollo on 10-30-11) Thanks Dave! I have not had enough time to put any thought into it. I knew someone has. I am looking forward to what you post!! And let me thank Vince for making us the SYS Test knob! I just got finished installing mine: I ended up doing something a little different than the way Vince planed for. First, I had to open the hole for the shaft to 1/4 inch diameter. Then I simply took a small piece of rubber hose and stuck it in the PUSH TEST knob to take up the space. Now it is a nice tight fit. The only draw back is that when you push the PUSH TEST knob, the whole knob gets pushed down. But with that said, the amount of travel is hardly noticeable. I like it because it is simple and nothing can go wrong! Thank you again Vince for the efforts here. Another area complete! UPDATE: Alan pushed me to create something that I have been putting off for some time. I call it the phone panel: I wanted to make something that looked like it belonged in the Lear45 while at the same time be practical. In the future, when we are all flying together on "flight night" in cyber space, if I need to pick up the cockpit phone and call the guy flying with me, it's going to be my cell phone. Therefor, I am using a 12volt car charger with my phone panel. Again, another reason why we want to use a 12volt system: It is held in place with DZUS fastener replicas and I rounded the two aft corners so that they don't cut legs getting in and out. If you would like one, post here or email me. Phone Panel $45, phone charger, $15 (if your with Metro PCS), being able to call your friends from the cockpit of your home built flight simulator while flying in cyberspace, Priceless! UPDATE: Hey guys, I thought I would share with you a way to increase the lighting in the knobs that light up the indicator lines. Basically, I used my Dremel tool to remove most of the material under the knob. I used the circle as a guide and set off approximately 1/16th inch. This photo shows the before and after: Here you can see the tinted paper under the knob: Although the photo sucks, here you can see that the area under the knob is at least twice as bright as the other parts of the panel: And I don't know why I am posting this photo because it does not do the indicator line in the knob justice. Before, the indicator knob just barely lit up. Now it is noticeable and almost as bright as what is in the real airplane: Also keep in mind that these REV panel knobs are set off the panel because of the "push" feature in these panels. All the other knobs in the sim are flush and will be even brighter! CAUTION: I find when it comes to panels like these, you want to be careful with what you do with them. As an example, I have a pair of RMU's from Vince. I have done some minor tweaking here and there to them but the last thing we want to do is break something and have to go through the process of getting a replacement. So as an example, a drill bit is out of the question! Here is a photo of the two tools that I used: Use the smaller one so that you can work to open the hole to the point that you can then get the larger tool in the hole. Then use the larger tool to finish off the hole evenly. I thought about making the change in the drawings and files but I like the idea of finishing the panel like this manually. Any panel that I make from here on out will have the hole opened up. The reason I say I would rather do it manually is because I have a better chance of making the hole a perfect circle and making the white part line up with it than the laser shop does lining it up with the hole after it is cut. In other words, it will just look neater and cleaner, even though the knob will be covering it. UPDATE: Alan pushed me to create something that I have been putting off for some time. I call it the phone panel: I wanted to make something that looked like it belonged in the Lear45 while at the same time be practical. In the future, when we are all flying together on "flight night" in cyber space, if I need to pick up the cockpit phone and call the guy flying with me, it's going to be my cell phone. Therefor, I am using a 12volt car charger with my phone panel. Again, another reason why we want to use a 12volt system: It is held in place with DZUS fastener replicas and I rounded the two aft corners so that they don't cut legs getting in and out. If you would like one, post here or email me. Phone Panel $45, phone charger, $15 (if your with Metro PCS), being able to call your friends from the cockpit of your home built flight simulator while flying in cyberspace, Priceless! UPDATE: Hey guys, I thought I would share with you a way to increase the lighting in the knobs that light up the indicator lines. Basically, I used my Dremel tool to remove most of the material under the knob. I used the circle as a guide and set off approximately 1/16th inch. This photo shows the before and after: Here you can see the tinted paper under the knob: Although the photo sucks, here you can see that the area under the knob is at least twice as bright as the other parts of the panel: And I don't know why I am posting this photo because it does not do the indicator line in the knob justice. Before, the indicator knob just barely lit up. Now it is noticeable and almost as bright as what is in the real airplane: Also keep in mind that these REV panel knobs are set off the panel because of the "push" feature in these panels. All the other knobs in the sim are flush and will be even brighter! CAUTION: I find when it comes to panels like these, you want to be careful with what you do with them. As an example, I have a pair of RMU's from Vince. I have done some minor tweaking here and there to them but the last thing we want to do is break something and have to go through the process of getting a replacement. So as an example, a drill bit is out of the question! Here is a photo of the two tools that I used: Use the smaller one so that you can work to open the hole to the point that you can then get the larger tool in the hole. Then use the larger tool to finish off the hole evenly. I thought about making the change in the drawings and files but I like the idea of finishing the panel like this manually. Any panel that I make from here on out will have the hole opened up. The reason I say I would rather do it manually is because I have a better chance of making the hole a perfect circle and making the white part line up with it than the laser shop does lining it up with the hole after it is cut. In other words, it will just look neater and cleaner, even though the knob will be covering it. Hi Ron, After completing the attachment of my controls (except the Throttle), I am starting to work on the panels. I am starting with the Gear / Hyd panel. You will see circles on the drawing as I am using different MOM switches as you know. I do have a few questions on your drawings if I may. I have circled in green several circles in the drawing. I want to confirm my assumption that these are screw holes that hold the layers together. The center holes (2 concentric circles) are large enough and deep enough for the screw heads? The next drawings are my cut diagrams for the LED containment. I hope you can read the numbers. The cuts are circled for questions. Again on the top drawing, the left circled hole (#1) is again for screws holding layers. On cut 2 (assume for LED bulbs), the hole goes all the way thru? The rectangle is for the bulb to lay flat? Are you using 3.3 mm bulbs? The bottom drawing is obviously the LED Clad diagram. Are these two panels the same - Front and Back? Questions on the termination and the connections (Circle #3). If the panels are not front to back, how are these rectangles cut? Also, it seams that the yellow lines are the outline for one side of the circuit (anode or cathode) ending in the hole thru the board. Assuming this is the cathode, where are the anode circuits unless the whole board is the anode? Just for grins, below is my cut on the text. After I level my CNC spoiler top, I am going to try CNC engraving. The tool paths on the VCarve Pro 3D view look great. Hi Ron, After completing the attachment of my controls (except the Throttle), I am starting to work on the panels. I am starting with the Gear / Hyd panel. You will see circles on the drawing as I am using different MOM switches as you know. I do have a few questions on your drawings if I may. I have circled in green several circles in the drawing. I want to confirm my assumption that these are screw holes that hold the layers together. The center holes (2 concentric circles) are large enough and deep enough for the screw heads? The next drawings are my cut diagrams for the LED containment. I hope you can read the numbers. The cuts are circled for questions. Again on the top drawing, the left circled hole (#1) is again for screws holding layers. On cut 2 (assume for LED bulbs), the hole goes all the way thru? The rectangle is for the bulb to lay flat? Are you using 3.3 mm bulbs? The bottom drawing is obviously the LED Clad diagram. Are these two panels the same - Front and Back? Questions on the termination and the connections (Circle #3). If the panels are not front to back, how are these rectangles cut? Also, it seams that the yellow lines are the outline for one side of the circuit (anode or cathode) ending in the hole thru the board. Assuming this is the cathode, where are the anode circuits unless the whole board is the anode? Just for grins, below is my cut on the text. After I level my CNC spoiler top, I am going to try CNC engraving. The tool paths on the VCarve Pro 3D view look great. Hi Dave, I am not sure if you have a CNC or not, but if you want to make your own panels using my drawings exactly as I have them, a CNC is absolutely required. There is a lot of milling, pocketing, trace lines, etc.... If you have a CNC, you can create your own CAM files and G-code based on my drawings or I can send you the G-code files. For anyone, if you want to use my G-Code files and assuming you have a CNC with some basic knowledge of how to use it, simply load the G-Code up into Mach3, strap down the correct plastic, make sure you have the right bits and your ready to go. If you are wondering what plastic and bits to use, all that information and more is in the first few lines of every G-Code file I have created to each part you will be cutting. Below is a sample of the first few lines of G-Code for the Gear Hyd Front Panel: (Gear Hyd Front Panel v2.0 Inch) For those who are not familiar with CNCs and G-code, I have attached the whole G-Code file for the Gear Hyd Front Panel (below) so you can see just how much code there is to cut just this one panel. I am not sure how many lines there are but it's well over a couple thousand. And it takes well over an hour to cut this one panel out! I have not counted lately, but I have and will be releasing over 500 G-Code files that will cover every panel and every part that I make with the help of the CNC. As of this date, I am still refining several drawings but getting closer every day! To answer a couple of your questions Dave, in the first photo where you are referring to the holes marked #5, those are for the eight 2-56 brass inserts. And in most cases, yes, the rest of the clad is the ground (cathode), but not in the photo below! The other questions might be better answered with this photo: This is not the best photo but what it shows is what I use to light up the panels in each of those little rectangular areas. In the case of the Gear Hyd Panel, I have 36 lights embedded into the panel. To the left of the photo above you will see two SMD (surface mounted devices), the black SMD is a size 1206 430 ohm resistor and the yellow SMD is a warm white LED. If you are not familiar with SMDs, especially this small, they can be challenging. Take a look at just how small they are: To recap, all of my panels and drawings use these size 1206 SMDs. (Bulbs run too hot, take up too much space and draw too many amps when all panels are lit up.) The resistor are absolutely necessary in order to drop the voltage down from either 12 volts or 5 volts to an acceptable level (3 volts give or take) where the LED will not blow. In other words, these 430 ohm resistors will protect the LEDs no matter if you are using 12 volt power to back light your panels or 5 volt. The only difference obviously is the 5 volt power will cause the bulbs to not be as bright which turns out to be perfect for a dark cockpit which is why we are moving to 5 volt power. I know this is a lot of information and it probably looks like I am all over the place touching on a little here or there, but hopefully this will help give you an idea of what to expect if you are trying to use my drawings exactly as I have them drawn out. One thing that you or anyone can do is use my drawings to create your own preferred method of back lighting. The drawings are 100% to scale to the best of our knowledge. So if you have an alternative method you would like to use, feel free to use the drawings as you see fit. Hi Dave, I am not sure if you have a CNC or not, but if you want to make your own panels using my drawings exactly as I have them, a CNC is absolutely required. There is a lot of milling, pocketing, trace lines, etc.... If you have a CNC, you can create your own CAM files and G-code based on my drawings or I can send you the G-code files. For anyone, if you want to use my G-Code files and assuming you have a CNC with some basic knowledge of how to use it, simply load the G-Code up into Mach3, strap down the correct plastic, make sure you have the right bits and your ready to go. If you are wondering what plastic and bits to use, all that information and more is in the first few lines of every G-Code file I have created to each part you will be cutting. Below is a sample of the first few lines of G-Code for the Gear Hyd Front Panel: (Gear Hyd Front Panel v2.0 Inch) For those who are not familiar with CNCs and G-code, I have attached the whole G-Code file for the Gear Hyd Front Panel (below) so you can see just how much code there is to cut just this one panel. I am not sure how many lines there are but it's well over a couple thousand. And it takes well over an hour to cut this one panel out! I have not counted lately, but I have and will be releasing over 500 G-Code files that will cover every panel and every part that I make with the help of the CNC. As of this date, I am still refining several drawings but getting closer every day! To answer a couple of your questions Dave, in the first photo where you are referring to the holes marked #5, those are for the eight 2-56 brass inserts. And in most cases, yes, the rest of the clad is the ground (cathode), but not in the photo below! The other questions might be better answered with this photo: This is not the best photo but what it shows is what I use to light up the panels in each of those little rectangular areas. In the case of the Gear Hyd Panel, I have 36 lights embedded into the panel. To the left of the photo above you will see two SMD (surface mounted devices), the black SMD is a size 1206 430 ohm resistor and the yellow SMD is a warm white LED. If you are not familiar with SMDs, especially this small, they can be challenging. Take a look at just how small they are: To recap, all of my panels and drawings use these size 1206 SMDs. (Bulbs run too hot, take up too much space and draw too many amps when all panels are lit up.) The resistor are absolutely necessary in order to drop the voltage down from either 12 volts or 5 volts to an acceptable level (3 volts give or take) where the LED will not blow. In other words, these 430 ohm resistors will protect the LEDs no matter if you are using 12 volt power to back light your panels or 5 volt. The only difference obviously is the 5 volt power will cause the bulbs to not be as bright which turns out to be perfect for a dark cockpit which is why we are moving to 5 volt power. I know this is a lot of information and it probably looks like I am all over the place touching on a little here or there, but hopefully this will help give you an idea of what to expect if you are trying to use my drawings exactly as I have them drawn out. One thing that you or anyone can do is use my drawings to create your own preferred method of back lighting. The drawings are 100% to scale to the best of our knowledge. So if you have an alternative method you would like to use, feel free to use the drawings as you see fit. Hi Ron, I am well aware of CNC, G-code and milling plastic. If you remember, I made a couple of panels and bezels for my diy MIP and non-AML switches. Since I purchased Alan's MIP and still using non-AML switches, I'm back to making my own panels. The first and last graphics above are my cut on vectors and already created the tool paths. They seem to work. The first question was a bit rhetorical as I figured out how to connect layers. Just the art didn't match the Gear / Hyd scrap panel you sent me in 2015. Am curious about the clad panels tho. Are the rectangles indents for LED bulbs and the holes to let light to the next up layer? There are some cuttings in the panels across the board that aren't intuitive. An example, I can't find how the paint mask is used (found the blog but don't know where and why the black paint is aimed). I suppose I should put some of these notes in the CNC forum. I'm not sure about using your G-code. I use VCarve Pro to draw and create tool paths. It must have 200 tool path choices to feed CNCs. Mine, a Shark from Rockler, used a specific G-code. Can't use a generic G-code. Are you aware that when you export to .DXF that the files do not include joined vectors. Some other art packages, not using .DXF directly, may want full vectors. Just some input. Don't kill the messenger. 😉😉😉☺☺☺☺ Hi Ron, I am well aware of CNC, G-code and milling plastic. If you remember, I made a couple of panels and bezels for my diy MIP and non-AML switches. Since I purchased Alan's MIP and still using non-AML switches, I'm back to making my own panels. The first and last graphics above are my cut on vectors and already created the tool paths. They seem to work. The first question was a bit rhetorical as I figured out how to connect layers. Just the art didn't match the Gear / Hyd scrap panel you sent me in 2015. Am curious about the clad panels tho. Are the rectangles indents for LED bulbs and the holes to let light to the next up layer? There are some cuttings in the panels across the board that aren't intuitive. An example, I can't find how the paint mask is used (found the blog but don't know where and why the black paint is aimed). I suppose I should put some of these notes in the CNC forum. I'm not sure about using your G-code. I use VCarve Pro to draw and create tool paths. It must have 200 tool path choices to feed CNCs. Mine, a Shark from Rockler, used a specific G-code. Can't use a generic G-code. Are you aware that when you export to .DXF that the files do not include joined vectors. Some other art packages, not using .DXF directly, may want full vectors. Just some input. Don't kill the messenger. 😉😉😉☺☺☺☺Backlit Panel Development and Discussion
![]()
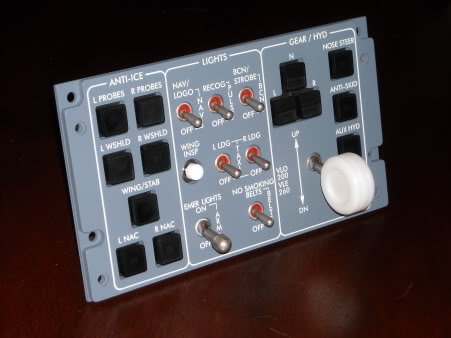

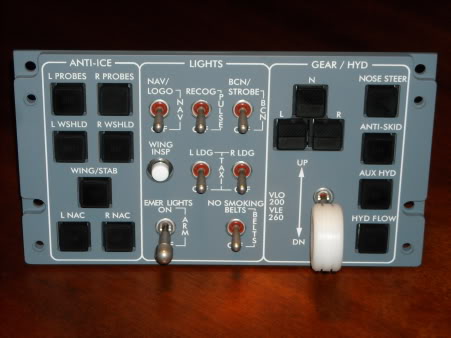

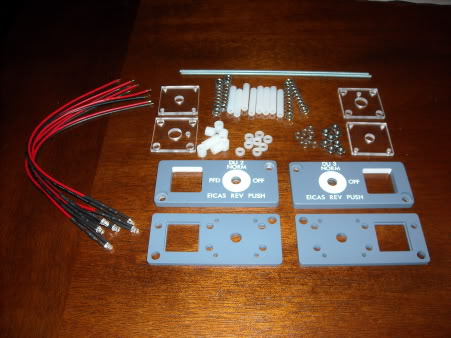

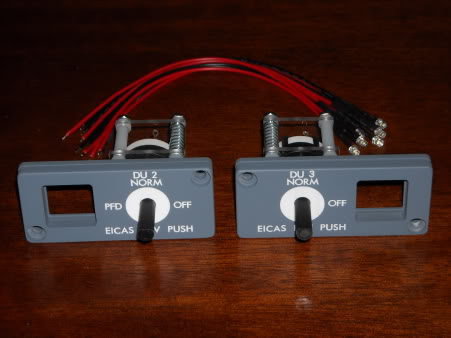

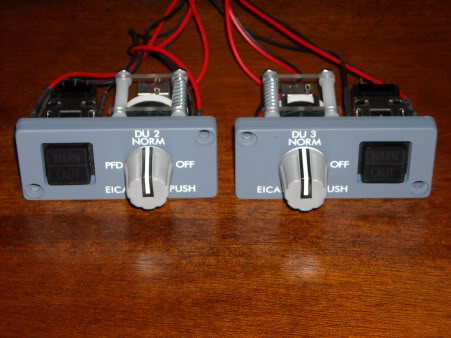

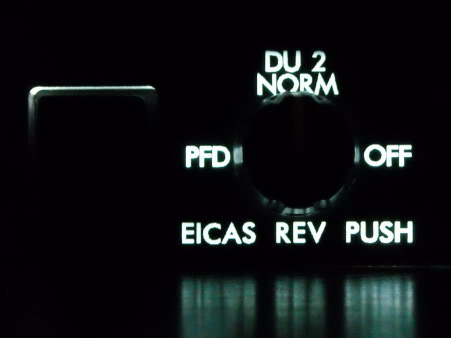

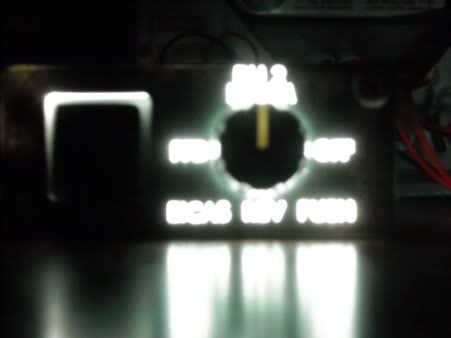

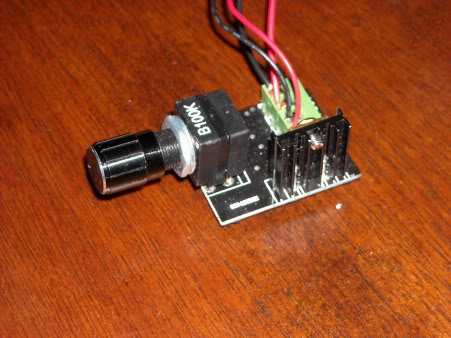

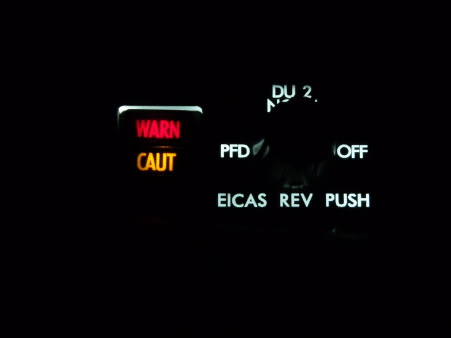


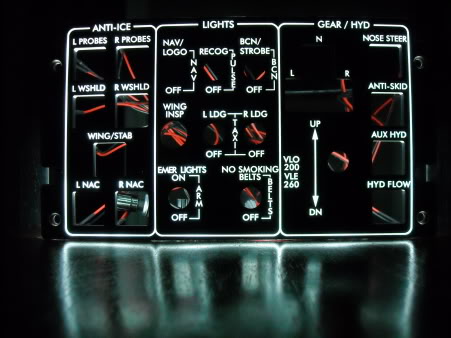

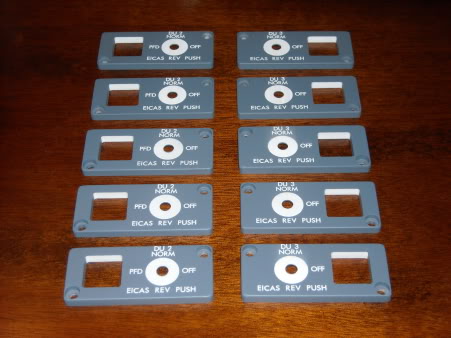

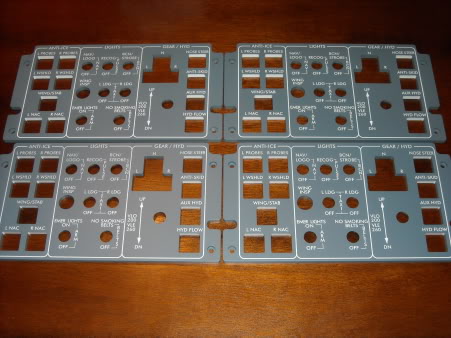

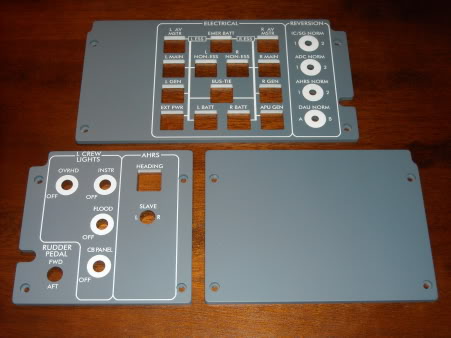

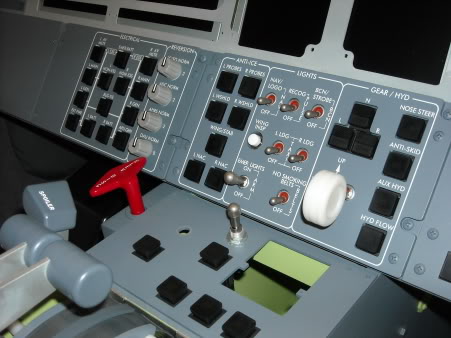

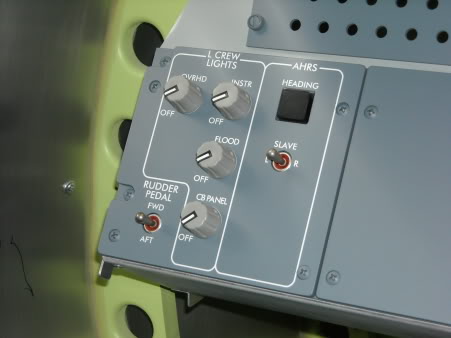

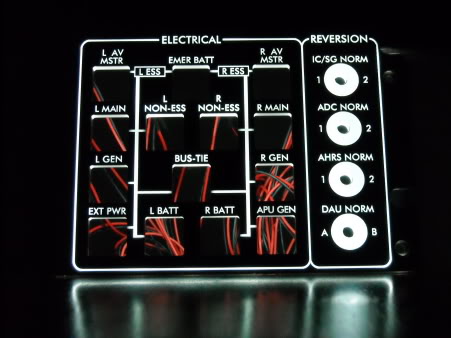

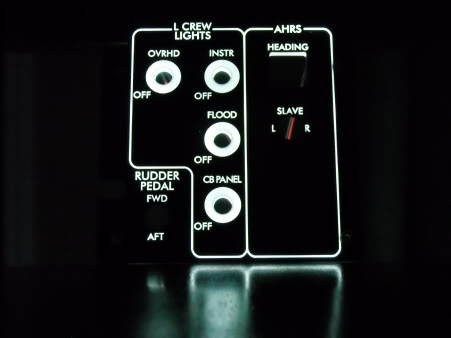

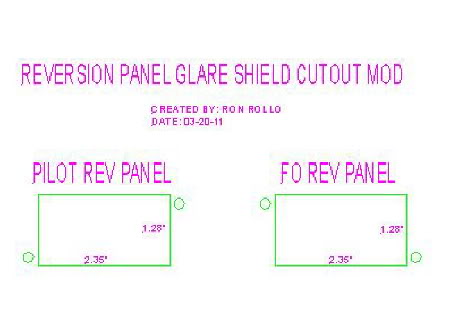


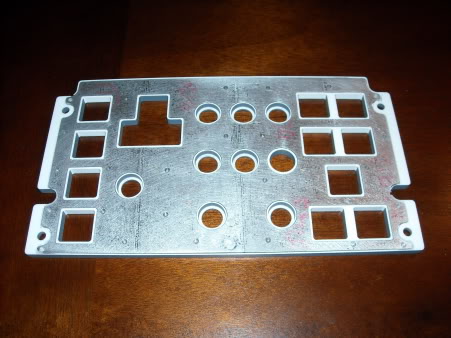

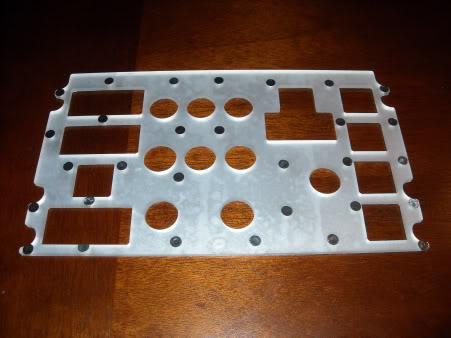

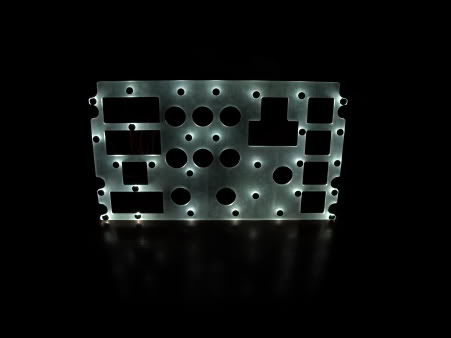

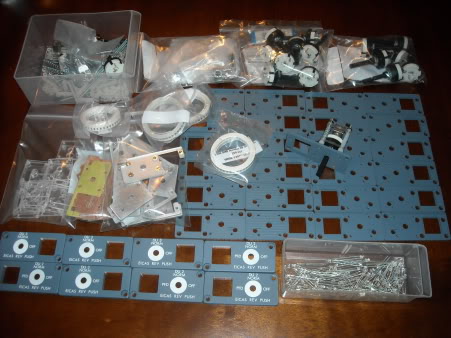

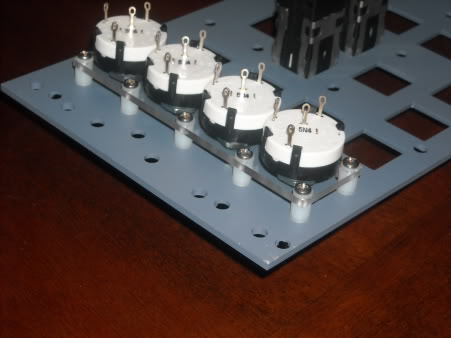

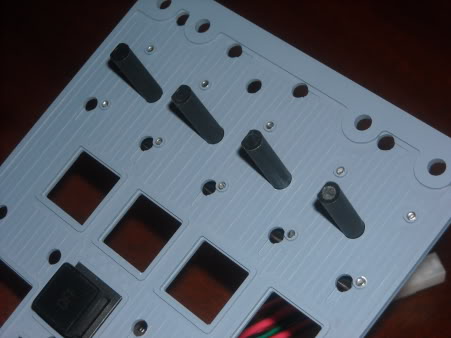


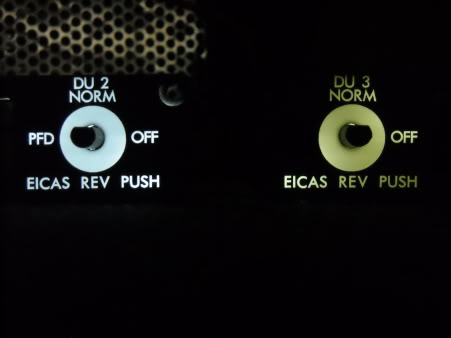

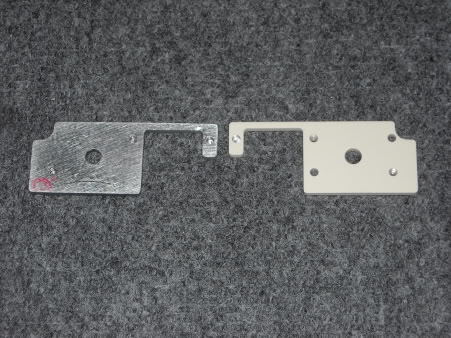

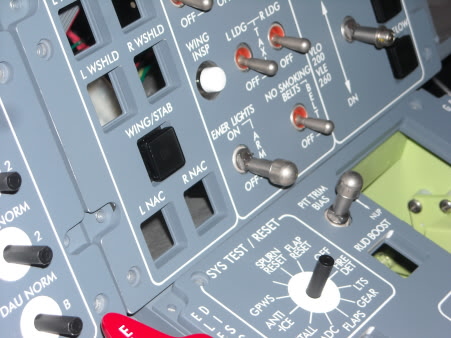

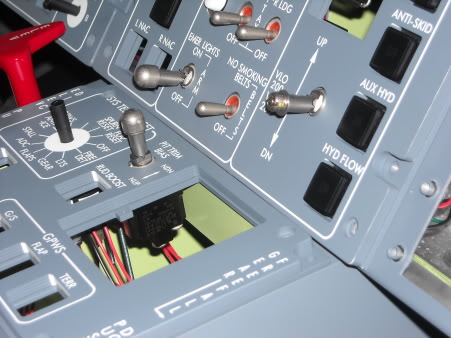

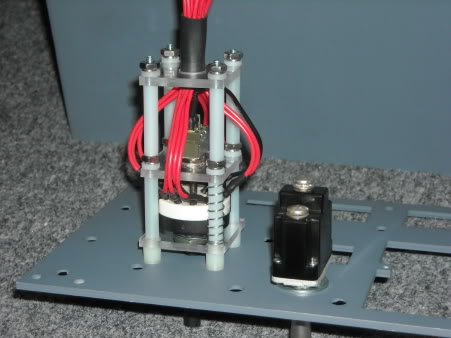

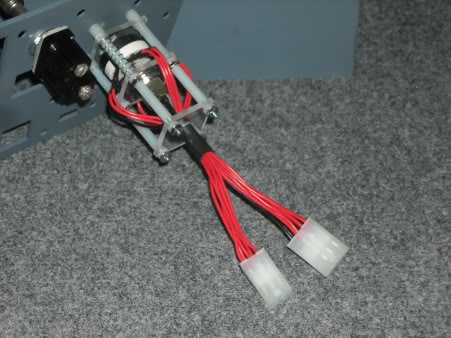


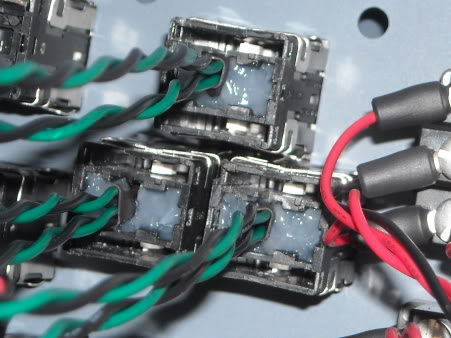

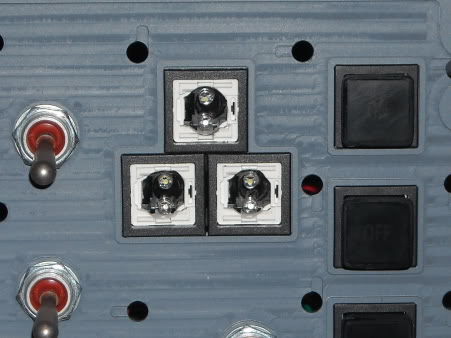

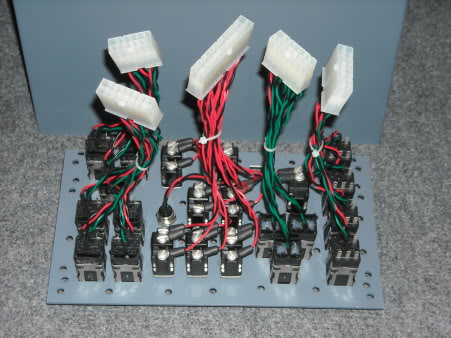

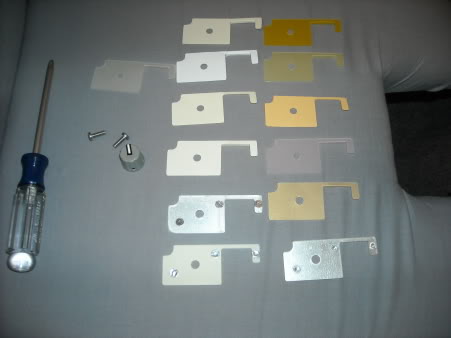

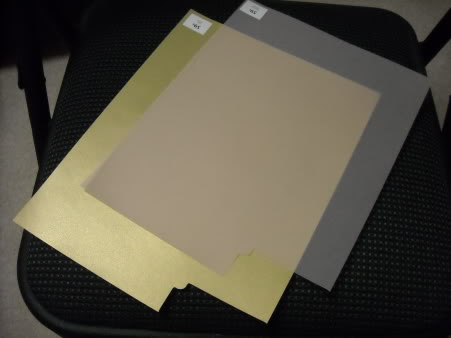

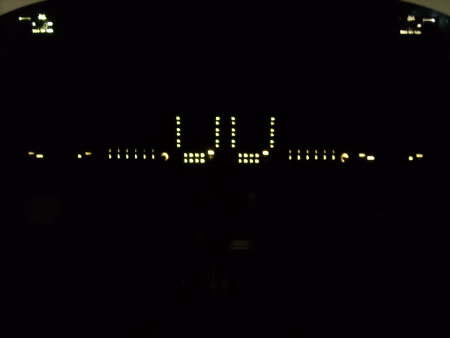

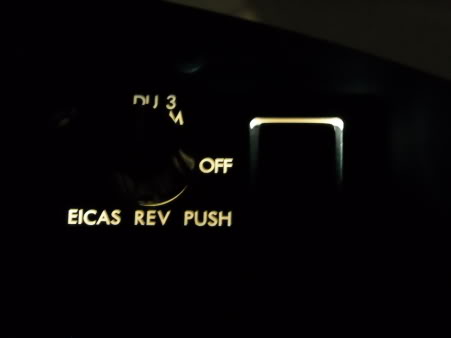

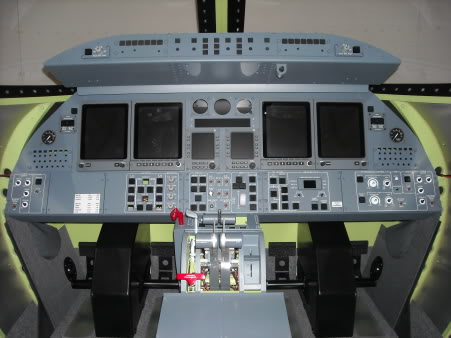

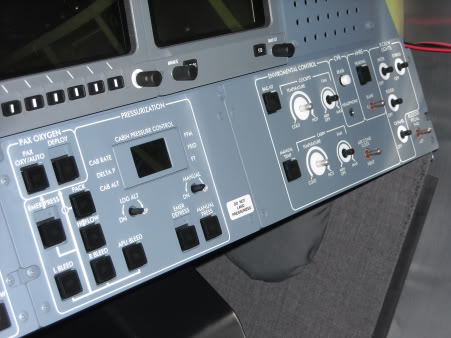

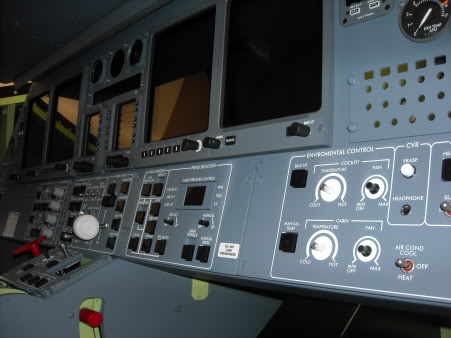


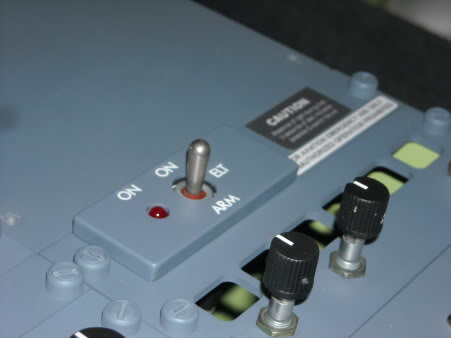

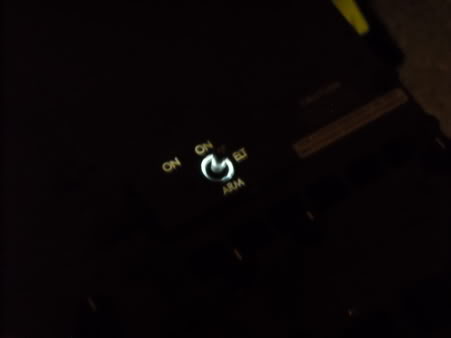

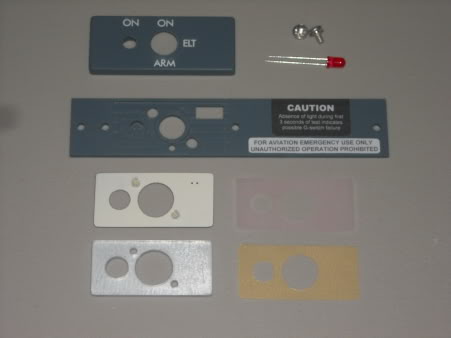

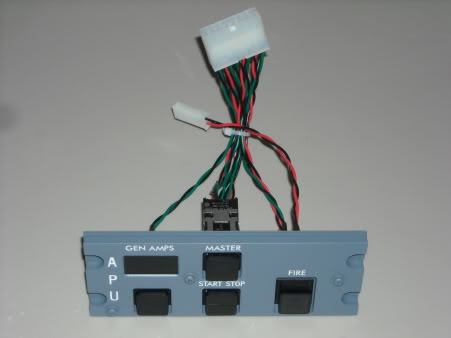

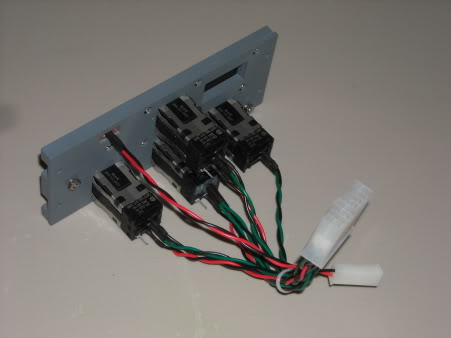

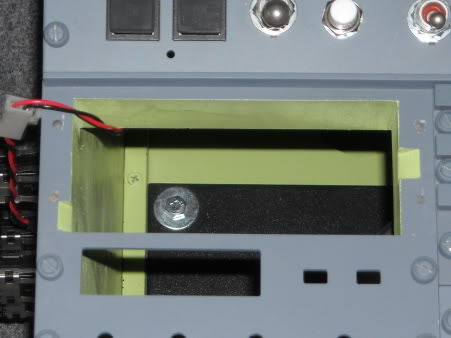

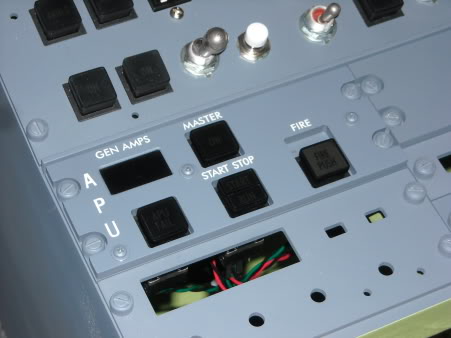

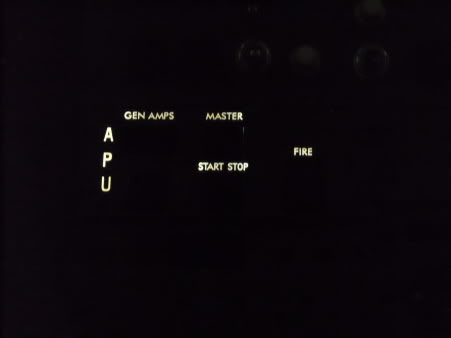

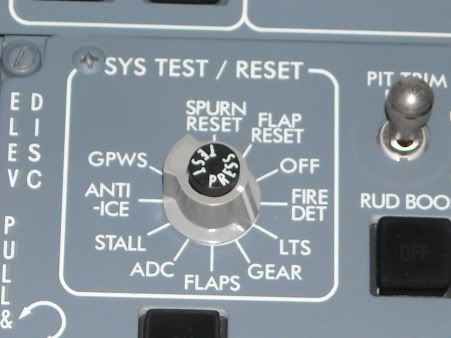

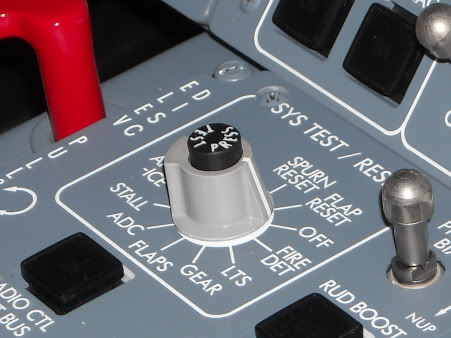


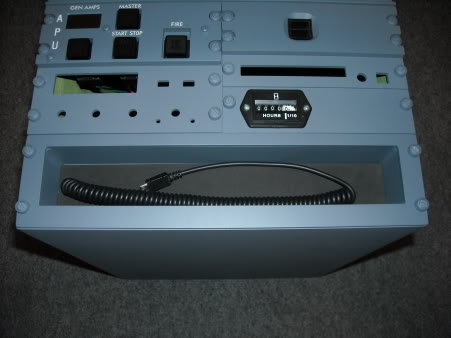

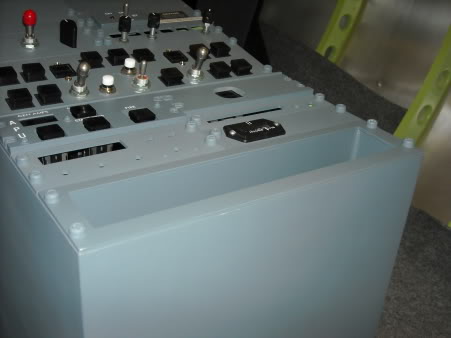

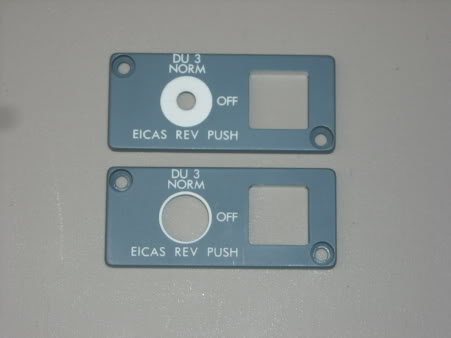

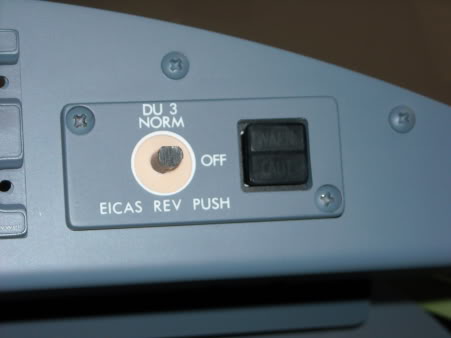

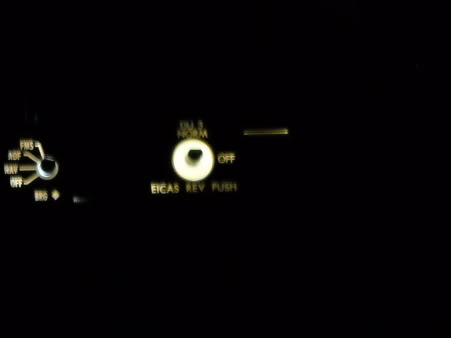

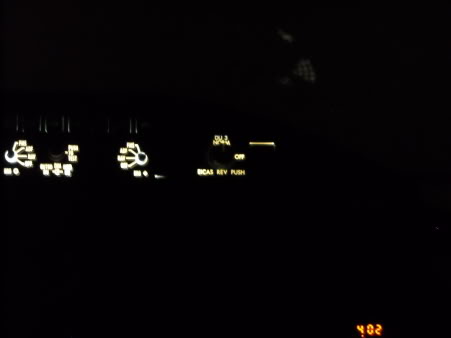

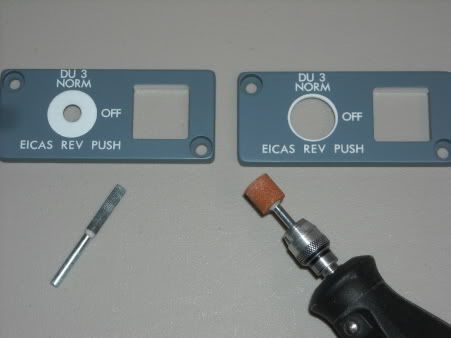


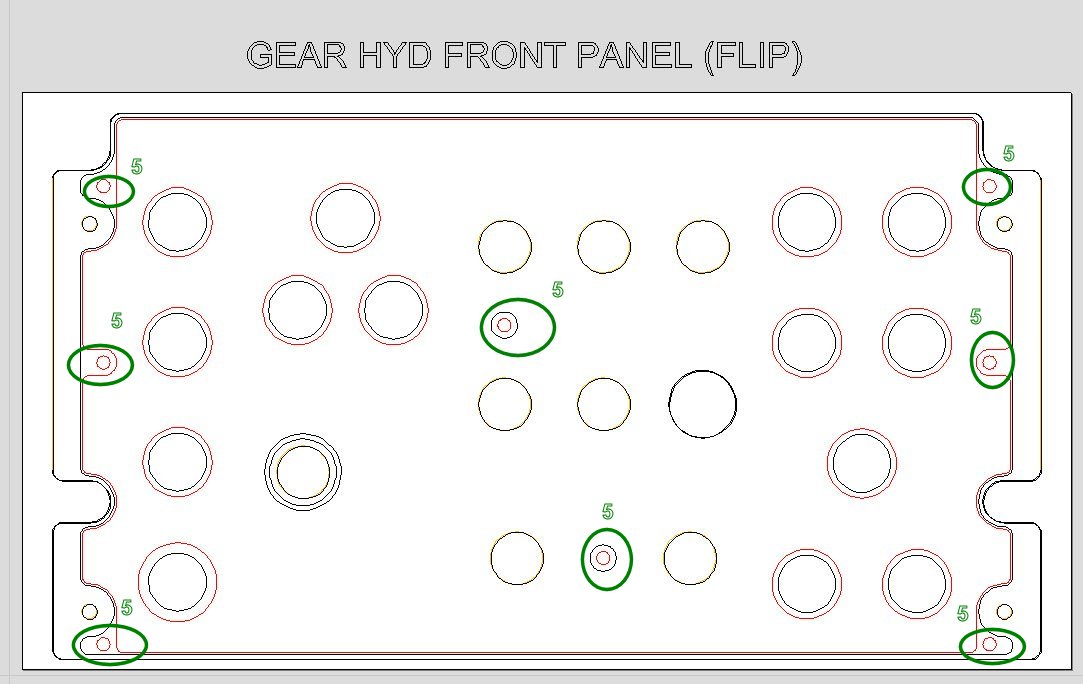

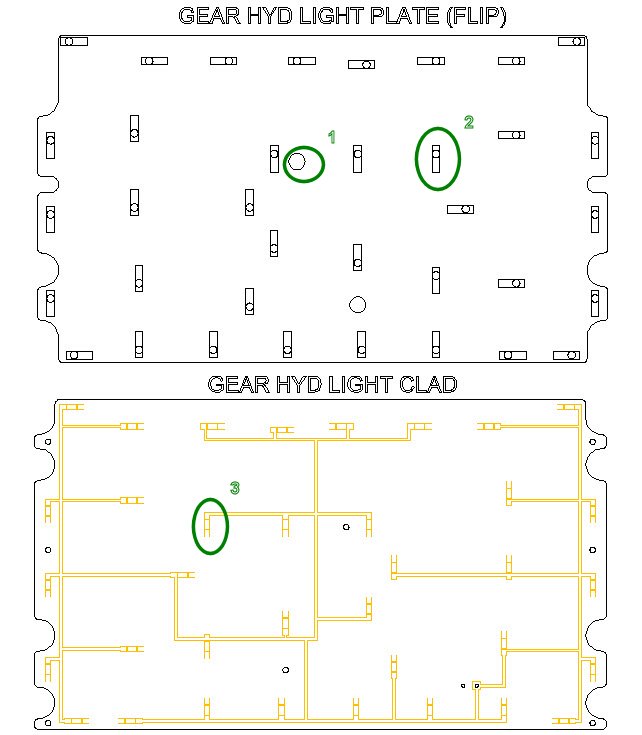

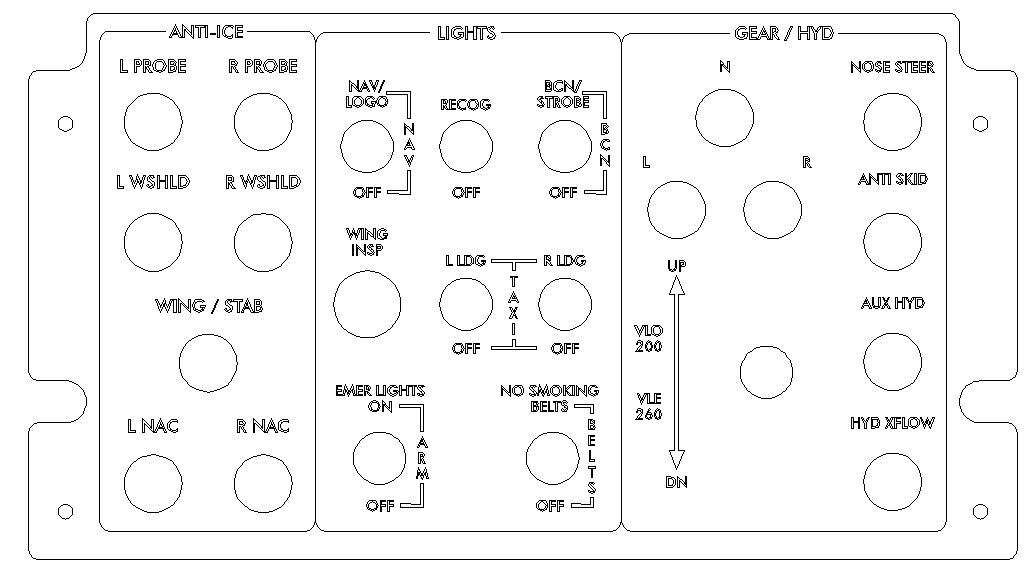


(By: Ron Rollo Updated 10-02-20)
(Use 1/16" Double Flute Bit for first cuts)
(Use 1/8" Double Flute Bit For Area Clear 1 Cuts)
(Use 3/32" Double Flute Bit for all other cuts)
(Use 1/4" Thick #3015 White Cast Plastic)
(Install Eight 2-56 Brass Inserts)
(Paint with Model Master FS 36118 Gunship Gray)
(Laser engrave artwork into painted panel)
G90
G20
G49
G0Z0.2000
G0 X0.3499 Y0.4986 Z0.2000
G1 Z-0.0440 F23
G3 X0.3087 Y0.4573 I-0.0000 J-0.0412
G3 X0.3499 Y0.4161 I0.0412 J-0.0000
G3 X0.3912 Y0.4573 I0.0000 J0.0412
G3 X0.3499 Y0.4986 I-0.0412 J0.0000 etc.........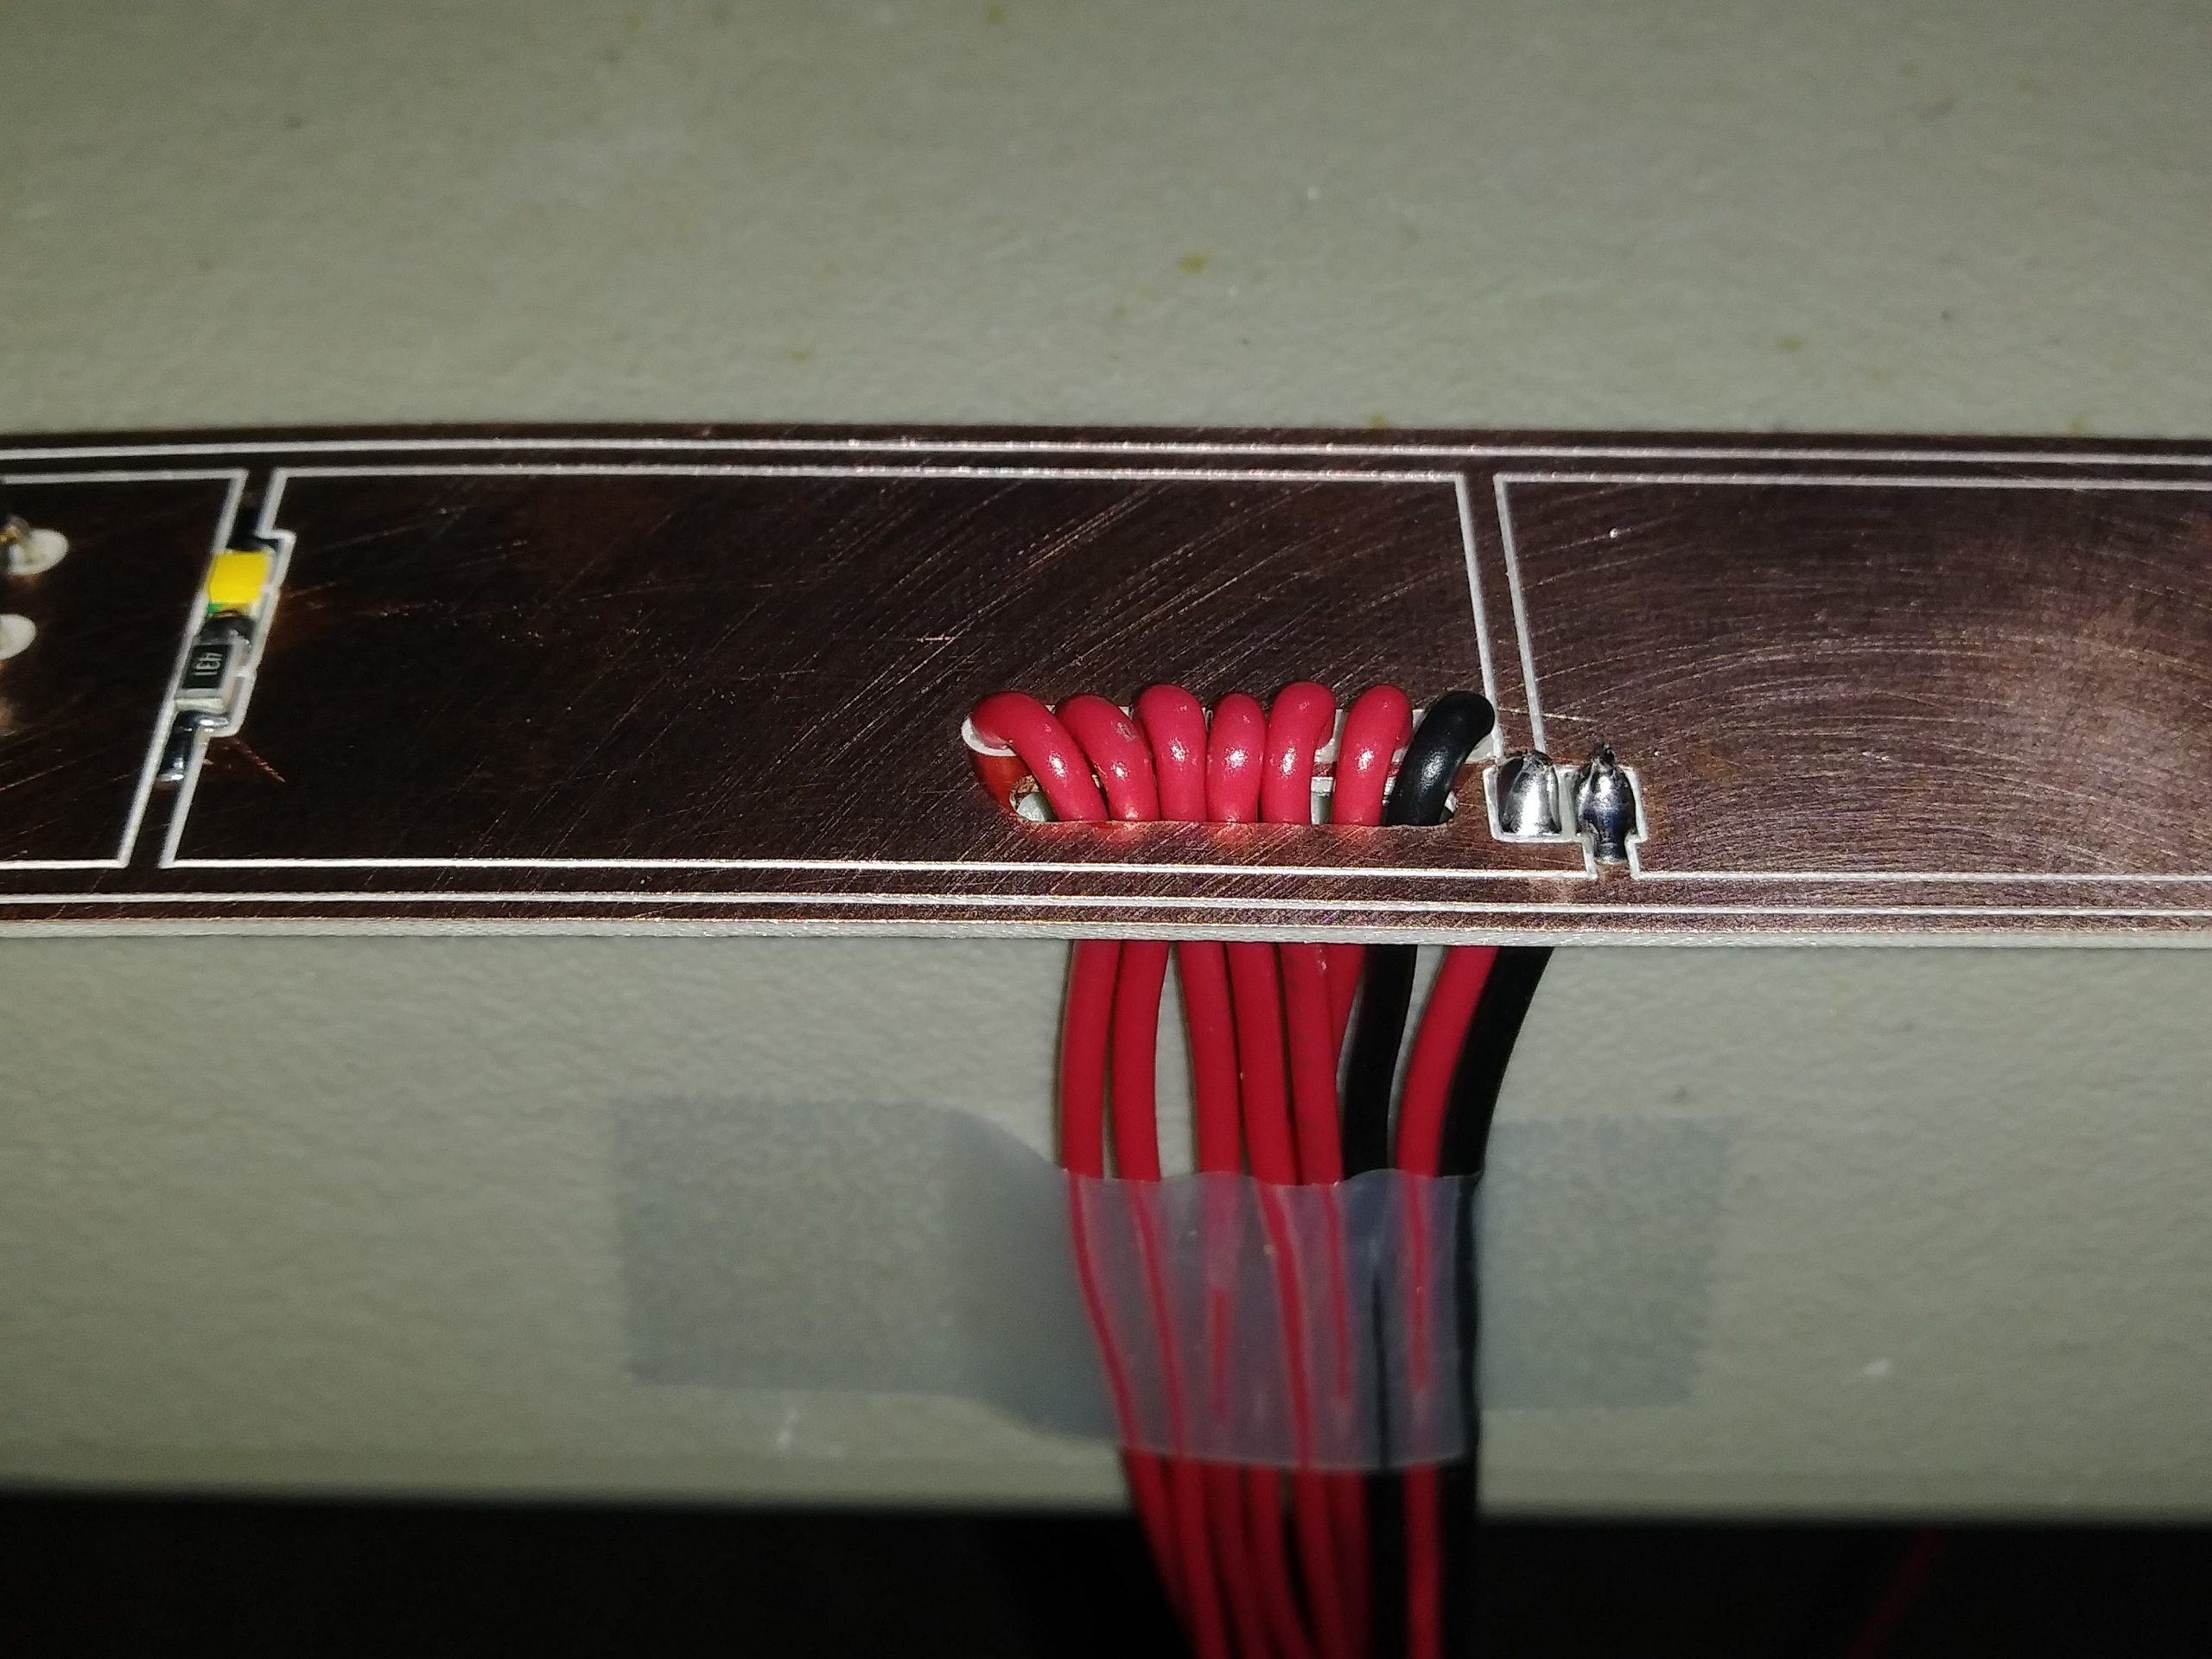
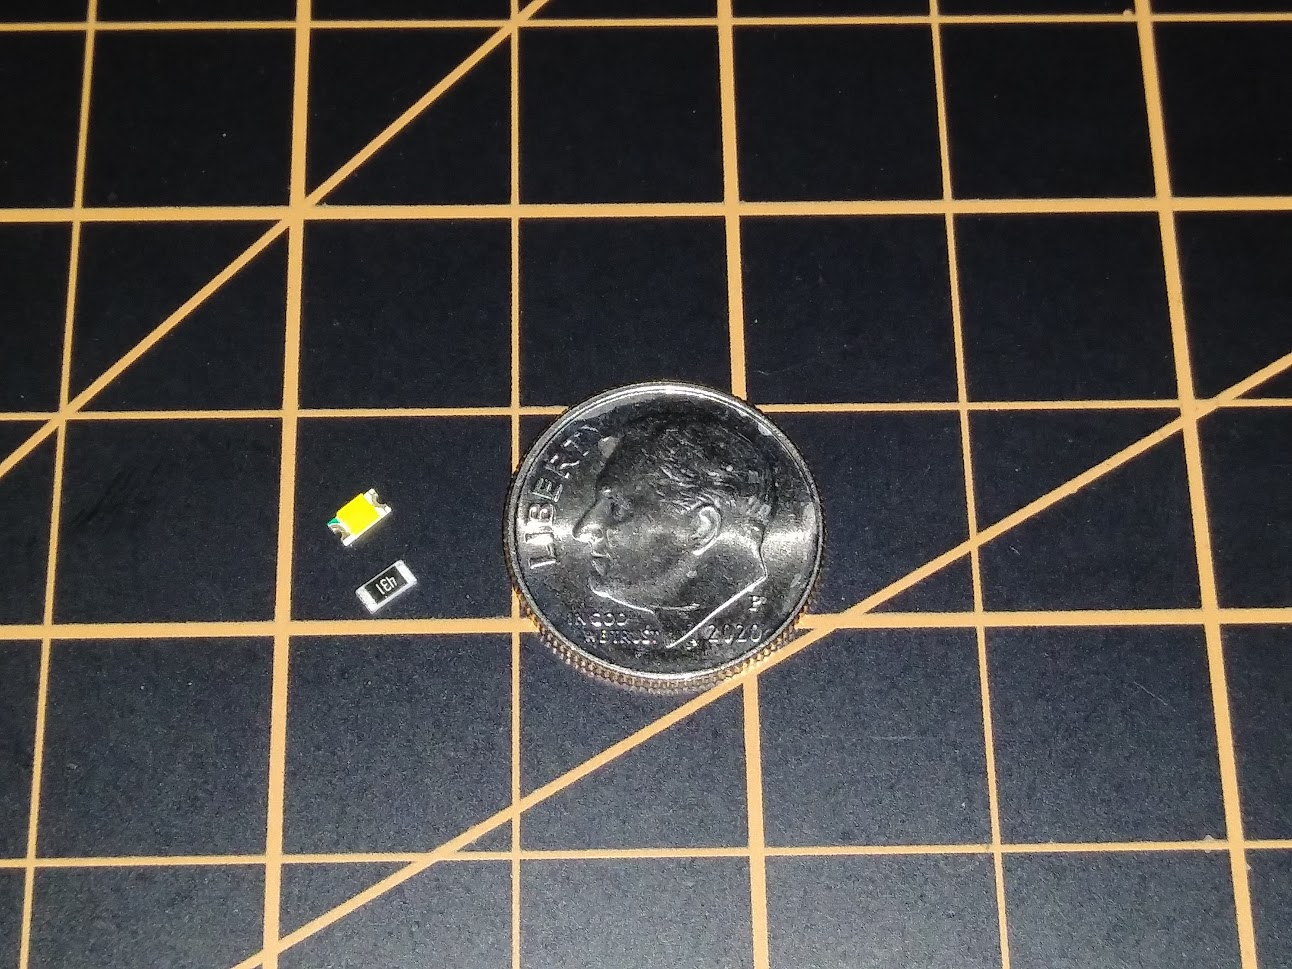


Forum NavigationBacklit Panel Development and Discussion
#1 · December 13, 2017, 7:43 am#2 · January 12, 2018, 7:54 am#3 · January 12, 2018, 8:09 am#4 · January 12, 2018, 8:19 am#5 · January 12, 2018, 8:28 am#6 · January 12, 2018, 8:32 am#7 · January 12, 2018, 8:54 am#8 · March 19, 2021, 1:33 pm#9 · March 19, 2021, 9:33 pm#10 · March 19, 2021, 10:15 pm
2017-10-10


