


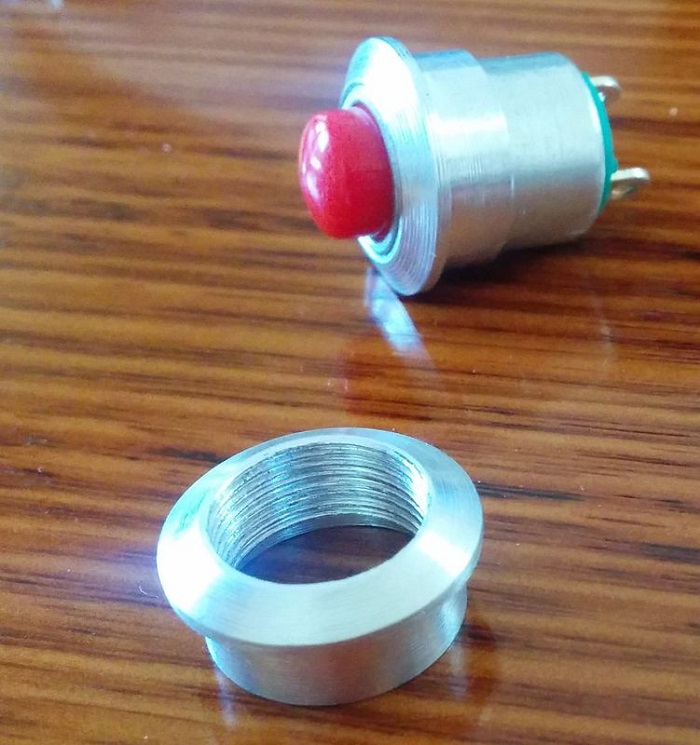
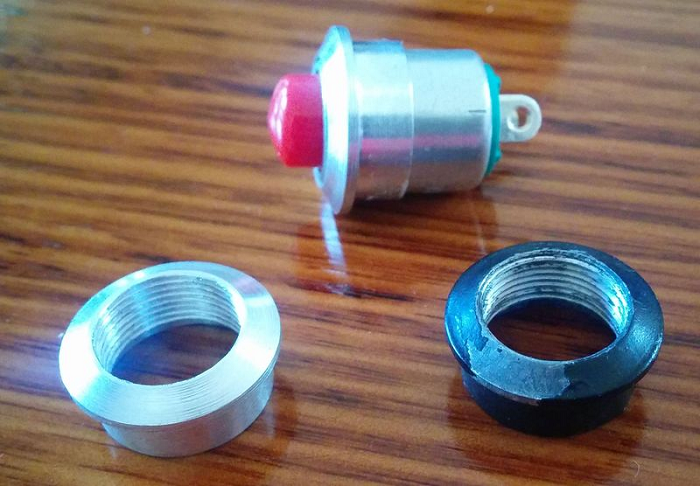
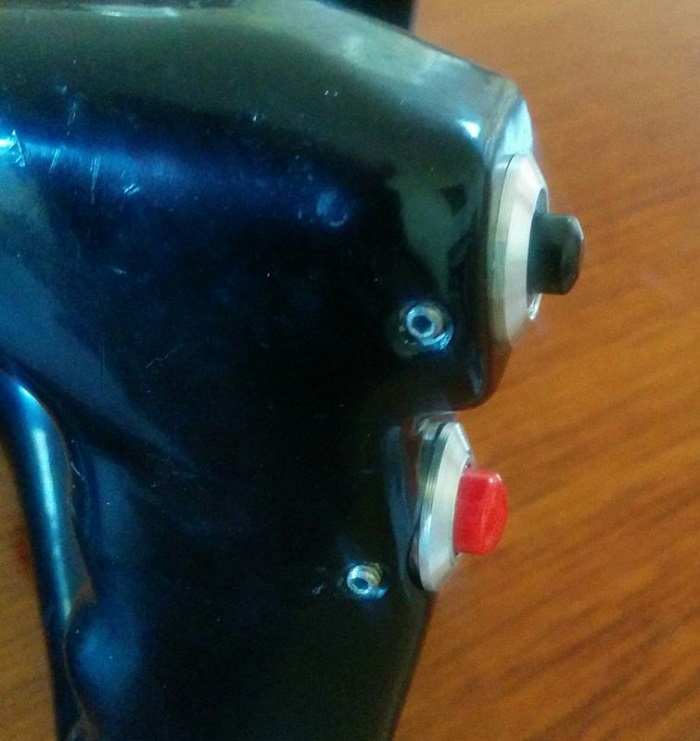
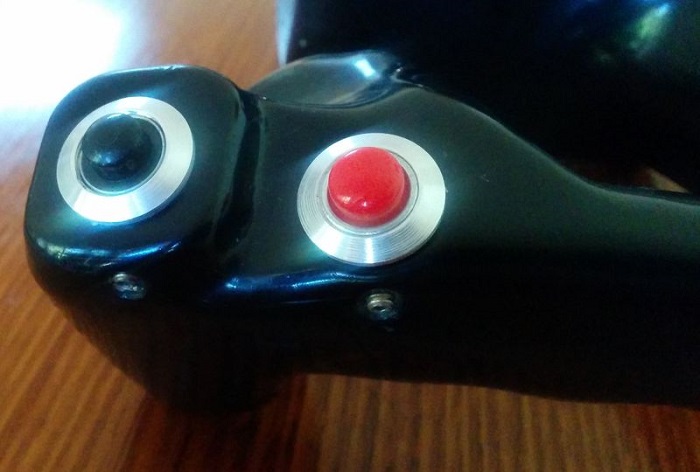
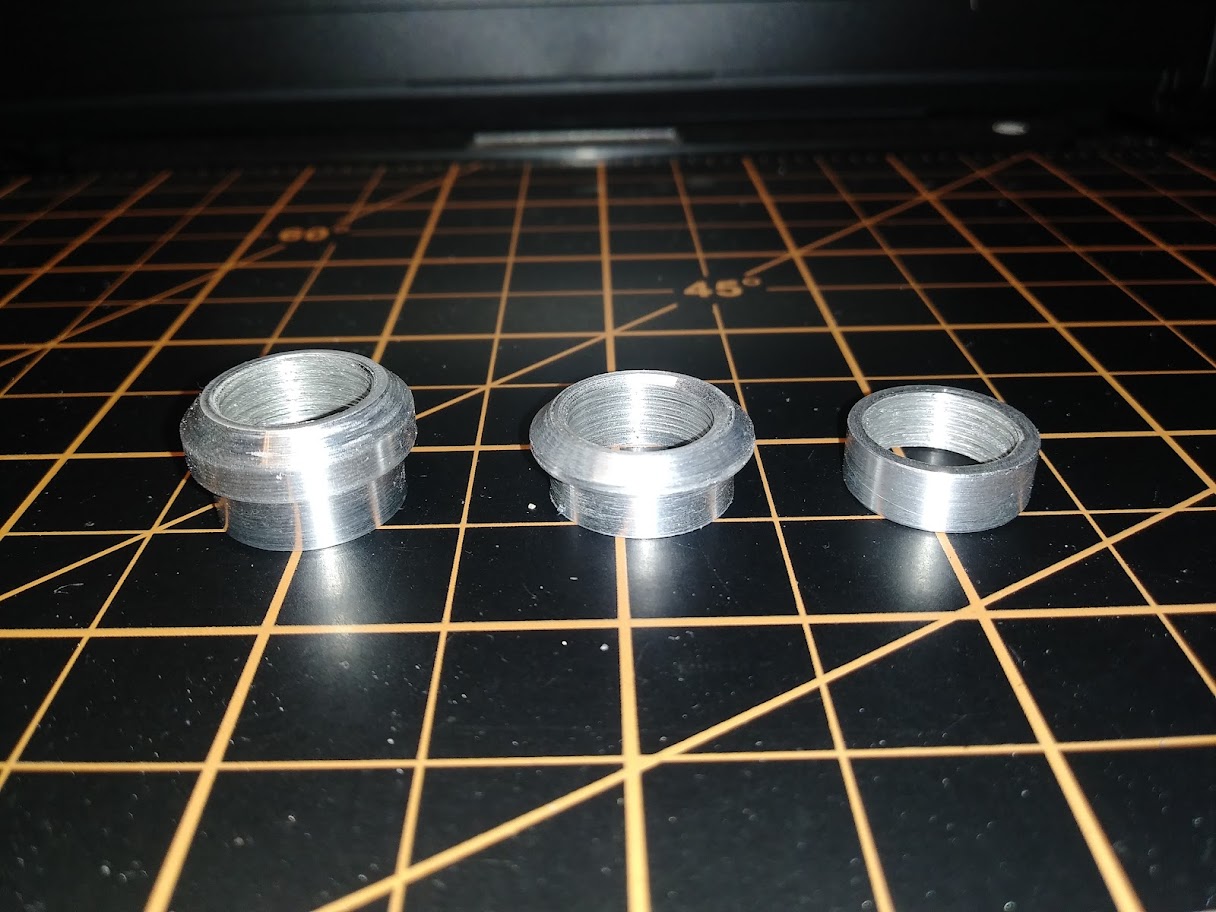
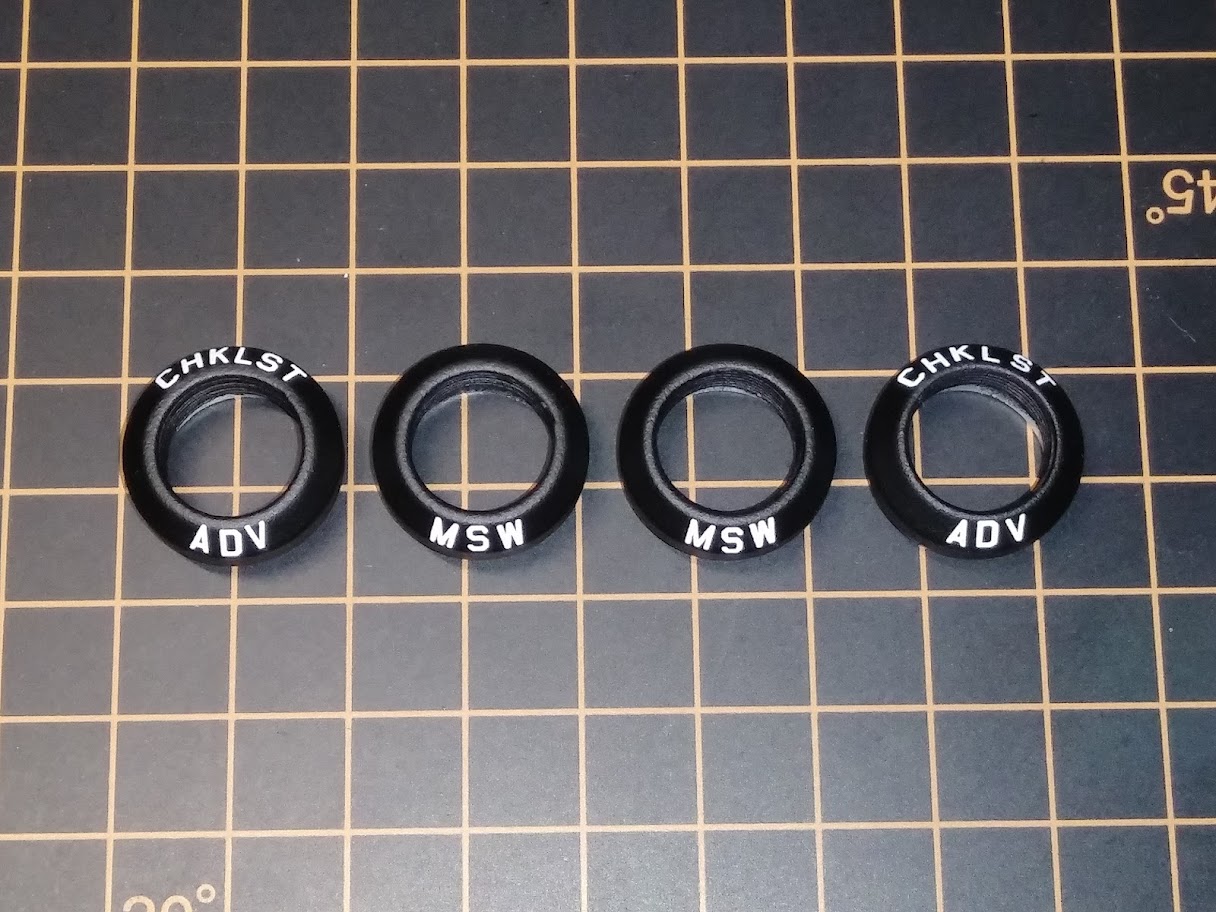
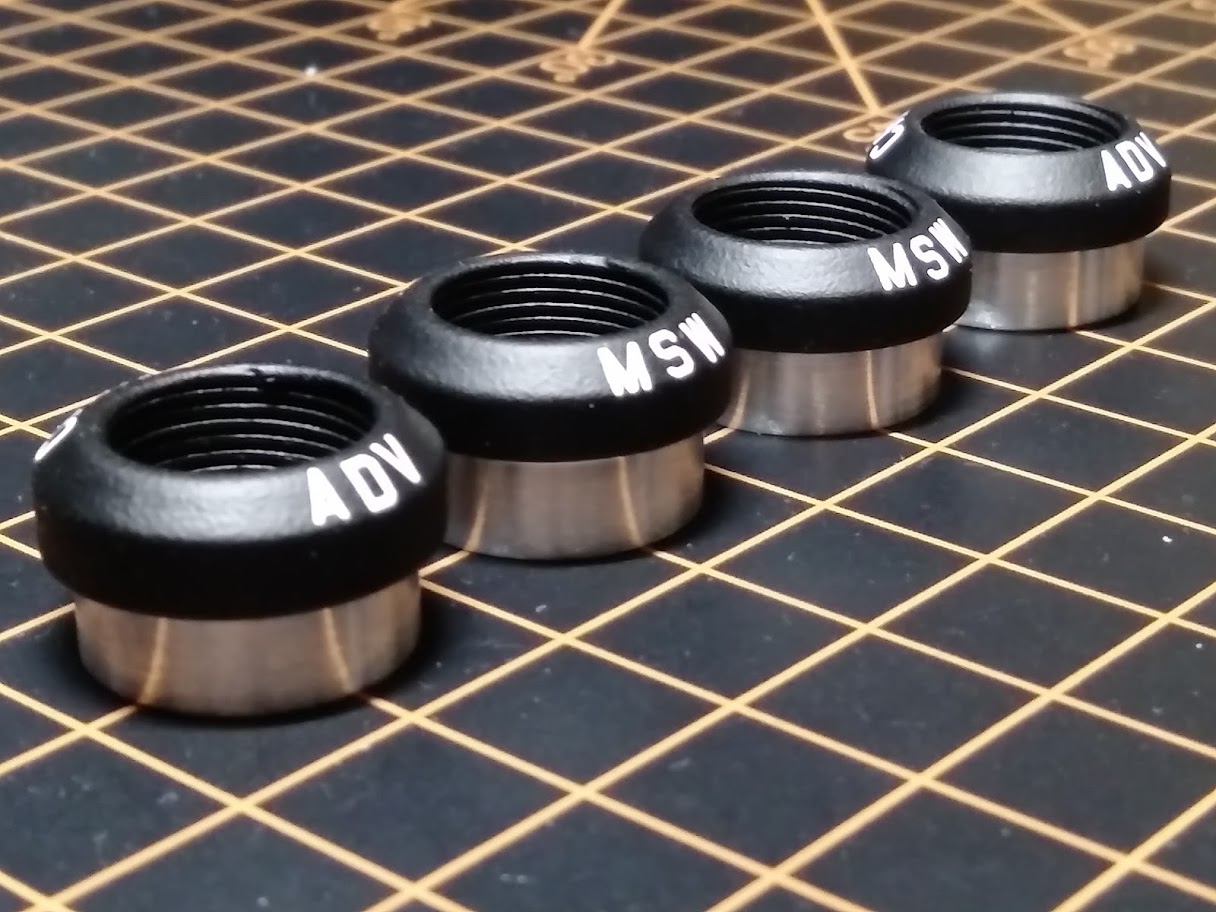
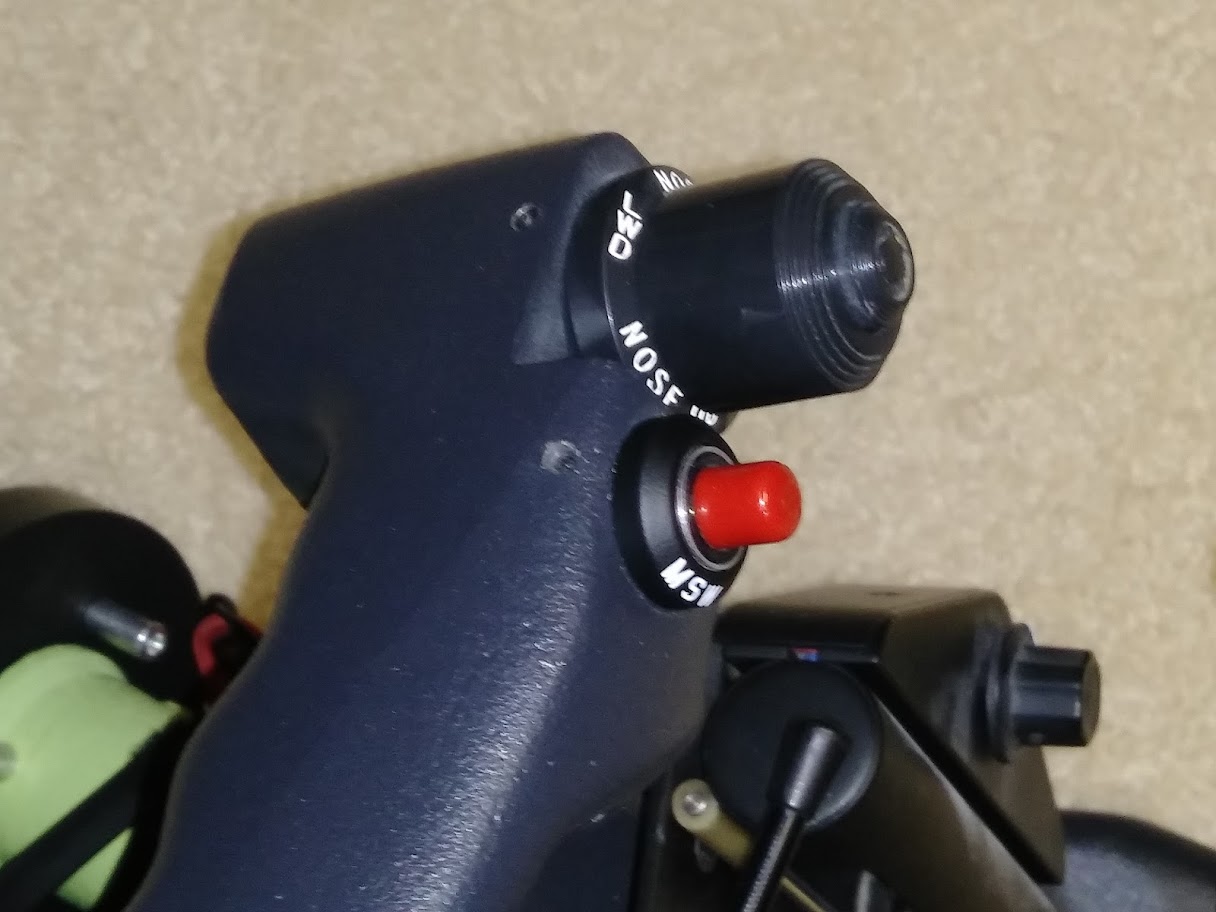
(Original thread started on 05-08-15 by Will Sasse) Before I go ahead and create some blank replicas, did anyone find a source for the push-button collars on the yokes? The buttons screw into these and these slip into the yoke to be held with grub-screws. They are mentioned in Ron's great thread on refurbishing yokes found HERE I have had some collars made, I can get more for anyone who wants some. They fit my original Lear buttons and the David Clarke red PTT button. - Made from aluminum. - Provided un-painted. - Rear un-bevelled variety will be produced soon. - $20 per item + freight. Photo of new collar with one attached to David Clarke red button: Photo of new with original (black): (Posted by Ron Rollo on 07-18-15) Wow! Great looking collar Will. I will be getting a few from you. I just need to confirm that two is what I need. I'll check later today. Another thing we can do, if you want, is get the final numbers and send them all to me after you receive payment and I'll distribute them for the guys here in the USA. (We did this with the knobs from Vince back in the day.) That way everyone saves on the international shipping. From Jacksonville to anywhere in the USA will be about $1.50. And you only have to fill one customs form out rather than several. (Posted by Will Sasse on 07-19-15) I would love to say I made them myself, but its a job I've had done for me by a work mate. Good idea on shipping. A couple more photos to show the collars in use on the yolk. The buttons are just those I had on hand, may not be the correct button for the location: I am also having the straight collar for the rear push button made, if any one needs. This doesn't have the beveled flange and is slightly shorter. (Posted by Ron Rollo on 07-19-15) Outstanding work! Thank you for taking this on. Another issue put to rest. I took a closer look at the ones I had on my yokes. The final answer is I need only one. So please put me down on your list for a single button collar. And thank your friend for us. Once you get your final numbers together, especially for the guys here in the USA, send me an email in reference to payment I owe you. (Posted by Will Sasse on 02-27-17) Unfortunately my friend no longer has the time....but.....I am going to get myself a lathe in the near future, if you are not in a hurry? Either that, or do you know someone with a lathe. Its not a difficult job. (Original thread started on 05-08-15 by Will Sasse) Before I go ahead and create some blank replicas, did anyone find a source for the push-button collars on the yokes? The buttons screw into these and these slip into the yoke to be held with grub-screws. They are mentioned in Ron's great thread on refurbishing yokes found HERE I have had some collars made, I can get more for anyone who wants some. They fit my original Lear buttons and the David Clarke red PTT button. - Made from aluminum. - Provided un-painted. - Rear un-bevelled variety will be produced soon. - $20 per item + freight. Photo of new collar with one attached to David Clarke red button: Photo of new with original (black): (Posted by Ron Rollo on 07-18-15) Wow! Great looking collar Will. I will be getting a few from you. I just need to confirm that two is what I need. I'll check later today. Another thing we can do, if you want, is get the final numbers and send them all to me after you receive payment and I'll distribute them for the guys here in the USA. (We did this with the knobs from Vince back in the day.) That way everyone saves on the international shipping. From Jacksonville to anywhere in the USA will be about $1.50. And you only have to fill one customs form out rather than several. (Posted by Will Sasse on 07-19-15) I would love to say I made them myself, but its a job I've had done for me by a work mate. Good idea on shipping. A couple more photos to show the collars in use on the yolk. The buttons are just those I had on hand, may not be the correct button for the location: I am also having the straight collar for the rear push button made, if any one needs. This doesn't have the beveled flange and is slightly shorter. (Posted by Ron Rollo on 07-19-15) Outstanding work! Thank you for taking this on. Another issue put to rest. I took a closer look at the ones I had on my yokes. The final answer is I need only one. So please put me down on your list for a single button collar. And thank your friend for us. Once you get your final numbers together, especially for the guys here in the USA, send me an email in reference to payment I owe you. (Posted by Will Sasse on 02-27-17) Unfortunately my friend no longer has the time....but.....I am going to get myself a lathe in the near future, if you are not in a hurry? Either that, or do you know someone with a lathe. Its not a difficult job. First I have to give a big THANK YOU to Will Sasse for not only securing a machinist for the first batch of yoke collars but for also taking on the second batch with his very own lathe machine! Thank you Will and I know at least a half dozen other builders who feel the same way! A couple months ago I received several of Will's aluminum switch collars for myself and a bunch more for distribution to other builders. The collars were designed and made by Will with his lathe machine and they turned out incredibly well! Last year we discovered that there are three basic types of collars found on the Lear45 yokes: The new discovery was that the MSW and CHCKLST ADV switch collars are taller than what we thought was standard. For myself and a few others, we wanted to update our sims to replicate this new discovery. In my case, I had to replace four collars on the front side of the yokes with Will's tall collars. A few tips for you guys working with any of these collars and Dry transfers. First, sand the aluminum collars well. Paint flat black and then after they dry, hit them with a flat clear. This will lock the flat black paint in place. What I found is that trying to get the Dry transfers perfectly straight is a bit of trial and error requiring removal of a misplaced letter. If the collars are not sealed with the flat clear, you will find yourself not only removing the misplaced letter but also some of the flat black paint, which you do not want. The flat clear allows you to remove a letter and place another as many times as it takes until you are happy with the results. Once you are completely happy with all letter placements, hit them again with the flat clear to lock everything in place. I did this with my first version of the Lear45 sim and never had any of the lettering rub off or get damaged! Take a look at the end result! Notice the TCS (Touch Control Steering) collar is shorter than the MSW and the CHKLST ADV collars? This is now a correct installation for the Lear45! Additionally, we discovered that there is one more switch on the backside of the yokes. This switch is a IDENT switch. You can either use the short collars or the bare collars for these switches and the Push to Talk for that matter. And if you are wondering, there is no lettering on either of the switches mounted to the rear of the yokes. Again, thanks to Will for taking on the switch collars and helping all of us with this part of the build! First I have to give a big THANK YOU to Will Sasse for not only securing a machinist for the first batch of yoke collars but for also taking on the second batch with his very own lathe machine! Thank you Will and I know at least a half dozen other builders who feel the same way! A couple months ago I received several of Will's aluminum switch collars for myself and a bunch more for distribution to other builders. The collars were designed and made by Will with his lathe machine and they turned out incredibly well! Last year we discovered that there are three basic types of collars found on the Lear45 yokes: The new discovery was that the MSW and CHCKLST ADV switch collars are taller than what we thought was standard. For myself and a few others, we wanted to update our sims to replicate this new discovery. In my case, I had to replace four collars on the front side of the yokes with Will's tall collars. A few tips for you guys working with any of these collars and Dry transfers. First, sand the aluminum collars well. Paint flat black and then after they dry, hit them with a flat clear. This will lock the flat black paint in place. What I found is that trying to get the Dry transfers perfectly straight is a bit of trial and error requiring removal of a misplaced letter. If the collars are not sealed with the flat clear, you will find yourself not only removing the misplaced letter but also some of the flat black paint, which you do not want. The flat clear allows you to remove a letter and place another as many times as it takes until you are happy with the results. Once you are completely happy with all letter placements, hit them again with the flat clear to lock everything in place. I did this with my first version of the Lear45 sim and never had any of the lettering rub off or get damaged! Take a look at the end result! Notice the TCS (Touch Control Steering) collar is shorter than the MSW and the CHKLST ADV collars? This is now a correct installation for the Lear45! Additionally, we discovered that there is one more switch on the backside of the yokes. This switch is a IDENT switch. You can either use the short collars or the bare collars for these switches and the Push to Talk for that matter. And if you are wondering, there is no lettering on either of the switches mounted to the rear of the yokes. Again, thanks to Will for taking on the switch collars and helping all of us with this part of the build!Yoke Pushbutton Collars Discussion
![]()
![]()

2017-10-10